Starting a Subscription
Selecting a Plan
To use Payara Cloud, you will need to sign up for a subscription. A Payara Cloud subscription plan represents the billable unit for your usage of the Payara Cloud service.
You can choose from a variety of available Payara Cloud plans tailored to your needs. Each plan offers a specific amount of prepaid CPU time per month, a maximum instance size, and additional features like custom domain support.
Trial Plan
If you are new, you can start with the Payara Cloud Trial.
The trial plan limits usage to a maximum of 4 vCPU cores.
After Free Trial
After your free trial ends, you must select a subscription plan to continue using the service
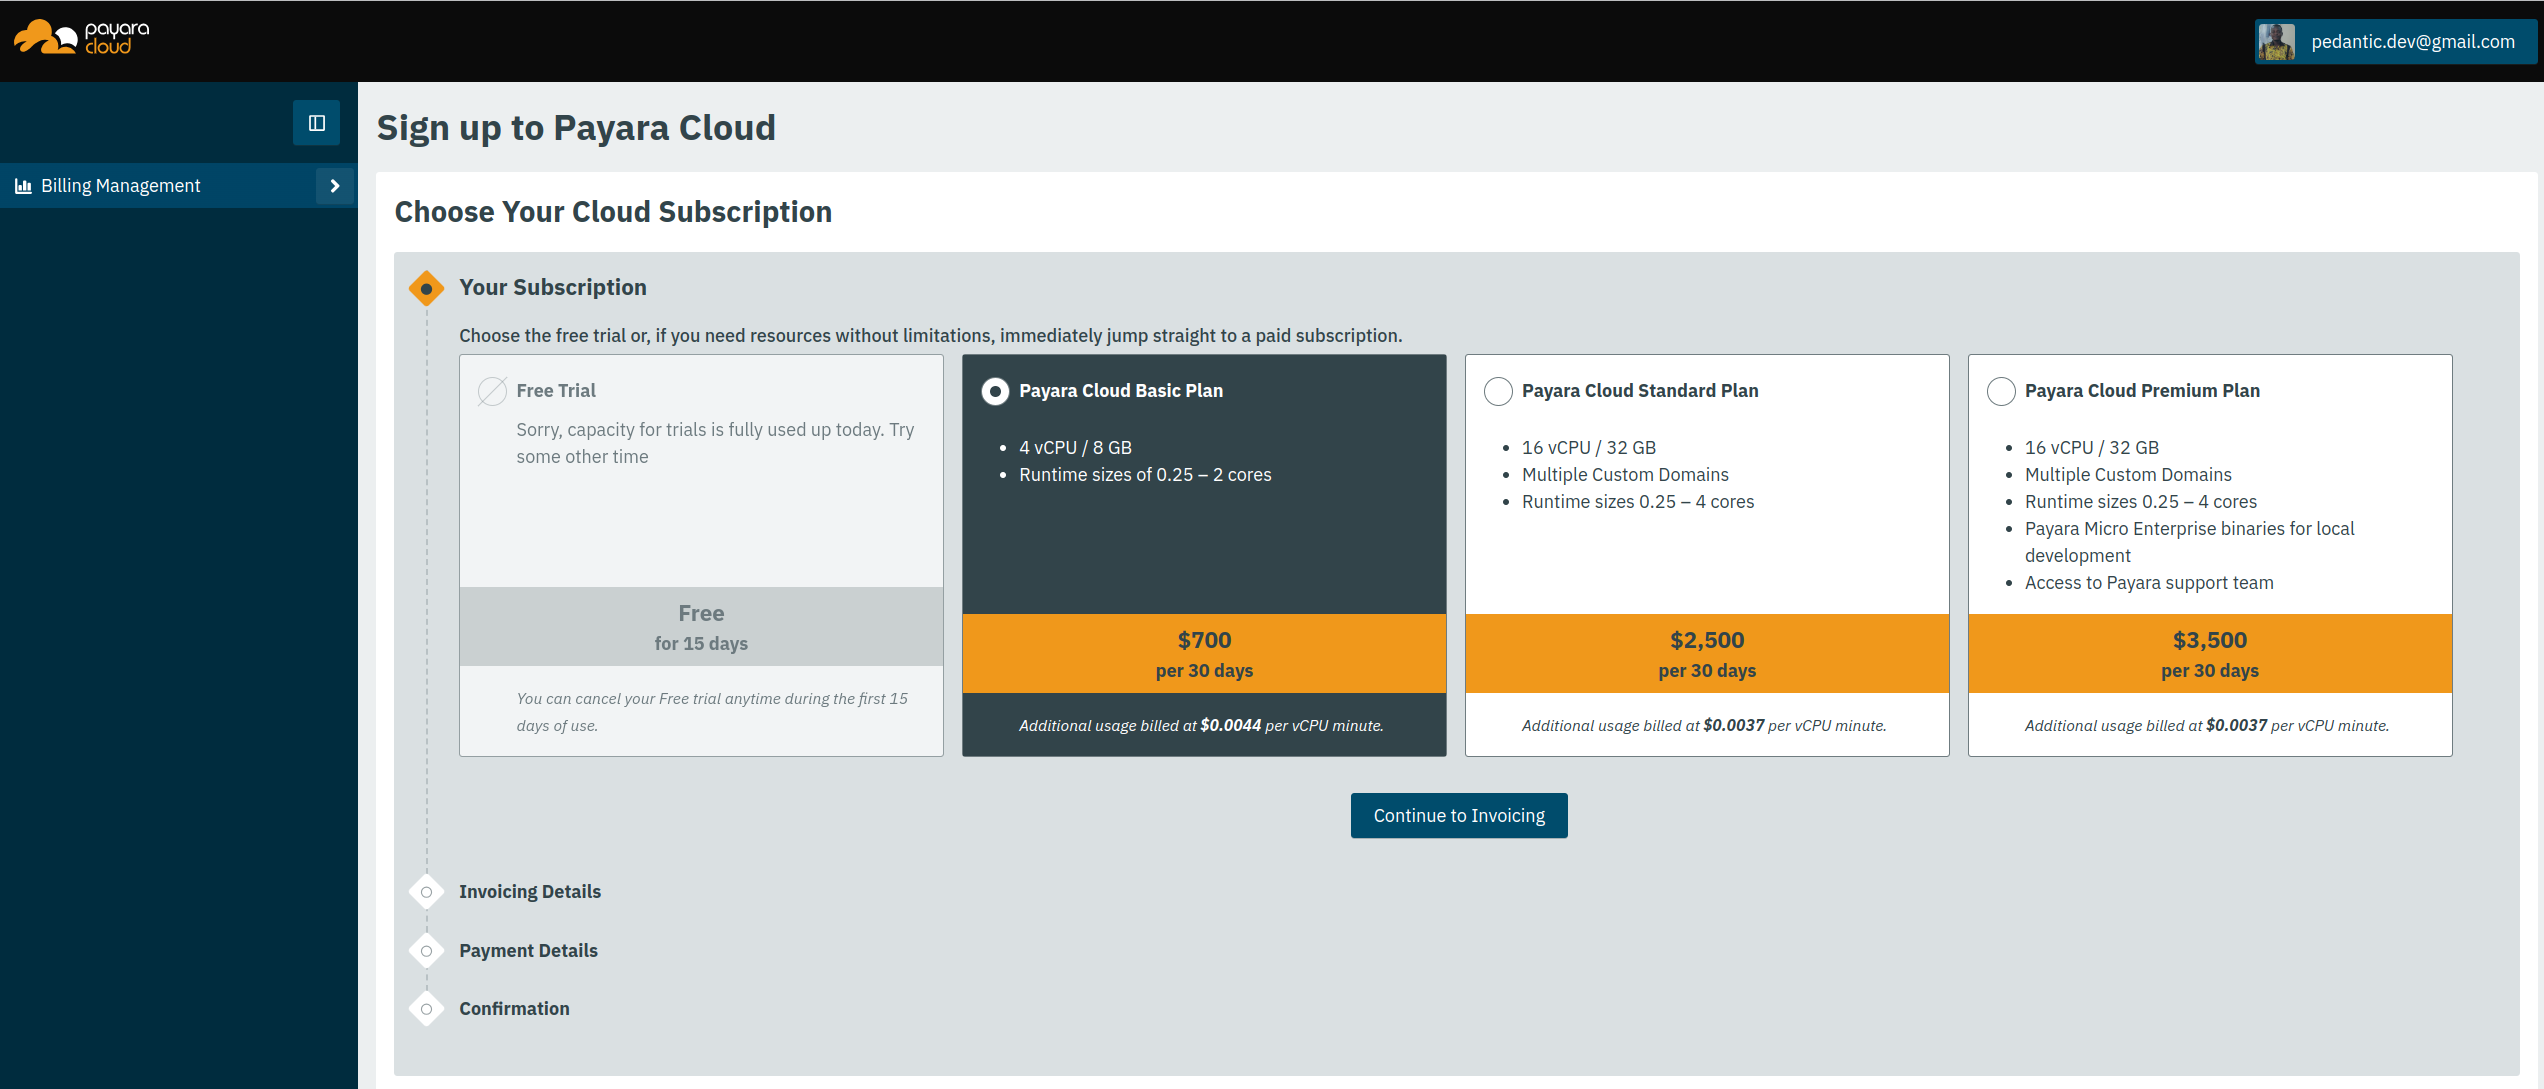
After making your selection and clicking Continue to Invoicing, a summary of your chosen plan appears above the invoicing details form. To change your plan, click Change Subscription.
Invoicing Details
Next, fill in your invoicing details:

- Contact Name and Email
-
Enter the contact details for receiving notifications and invoices. It defaults to your account’s email; modify if needed for different invoicing.
- Company Name, Address, City, Zip Code, Country
-
Provide your company’s invoicing information for the invoice.
- Tax ID Type, Tax ID
-
Optionally, if VAT-registered, enter your VAT ID. Our payment processor will validate it according to the given ID Type. Tax type updates based on the selected country.
Click Continue to payment after filling in the details.
Payment method
Finally, authorize a payment method for automated invoice settlement. Clicking Confirm payment details might redirect you to your bank for payment authorization.
Your card is charged at the trial’s end and then at each billing period’s start.

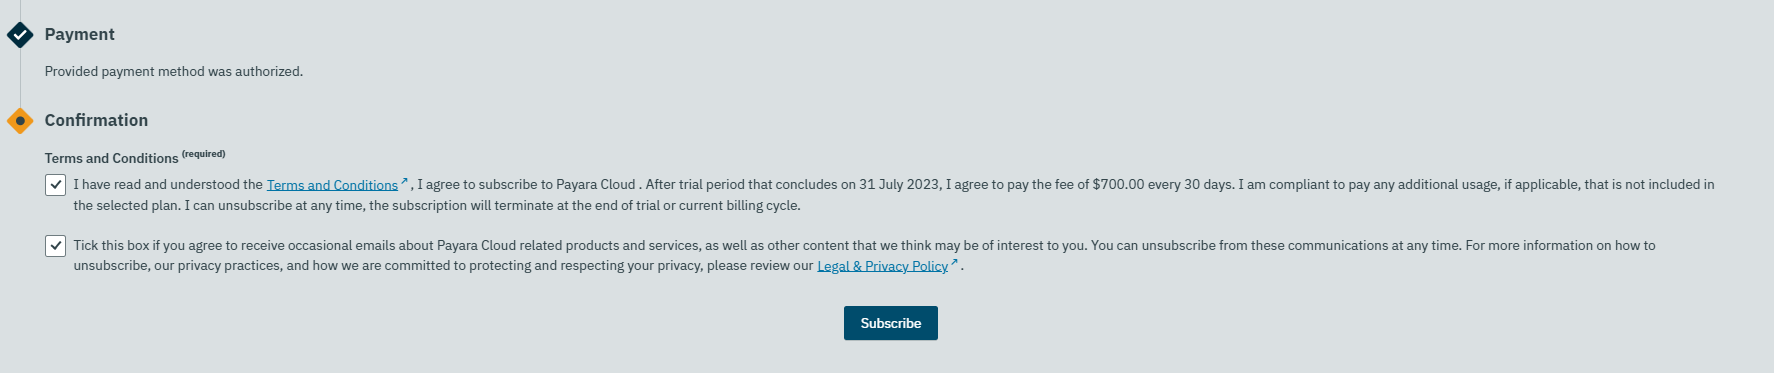
Confirmation
Agree to Payara Cloud’s Terms and Conditions. You can also choose to opt in for product updates via email to complete the process.
Provisioning
You’ll then be directed to the Payara Cloud Application Management console. Account provisioning may take a few minutes. Welcome to Payara Cloud!
Manage Subscriptions
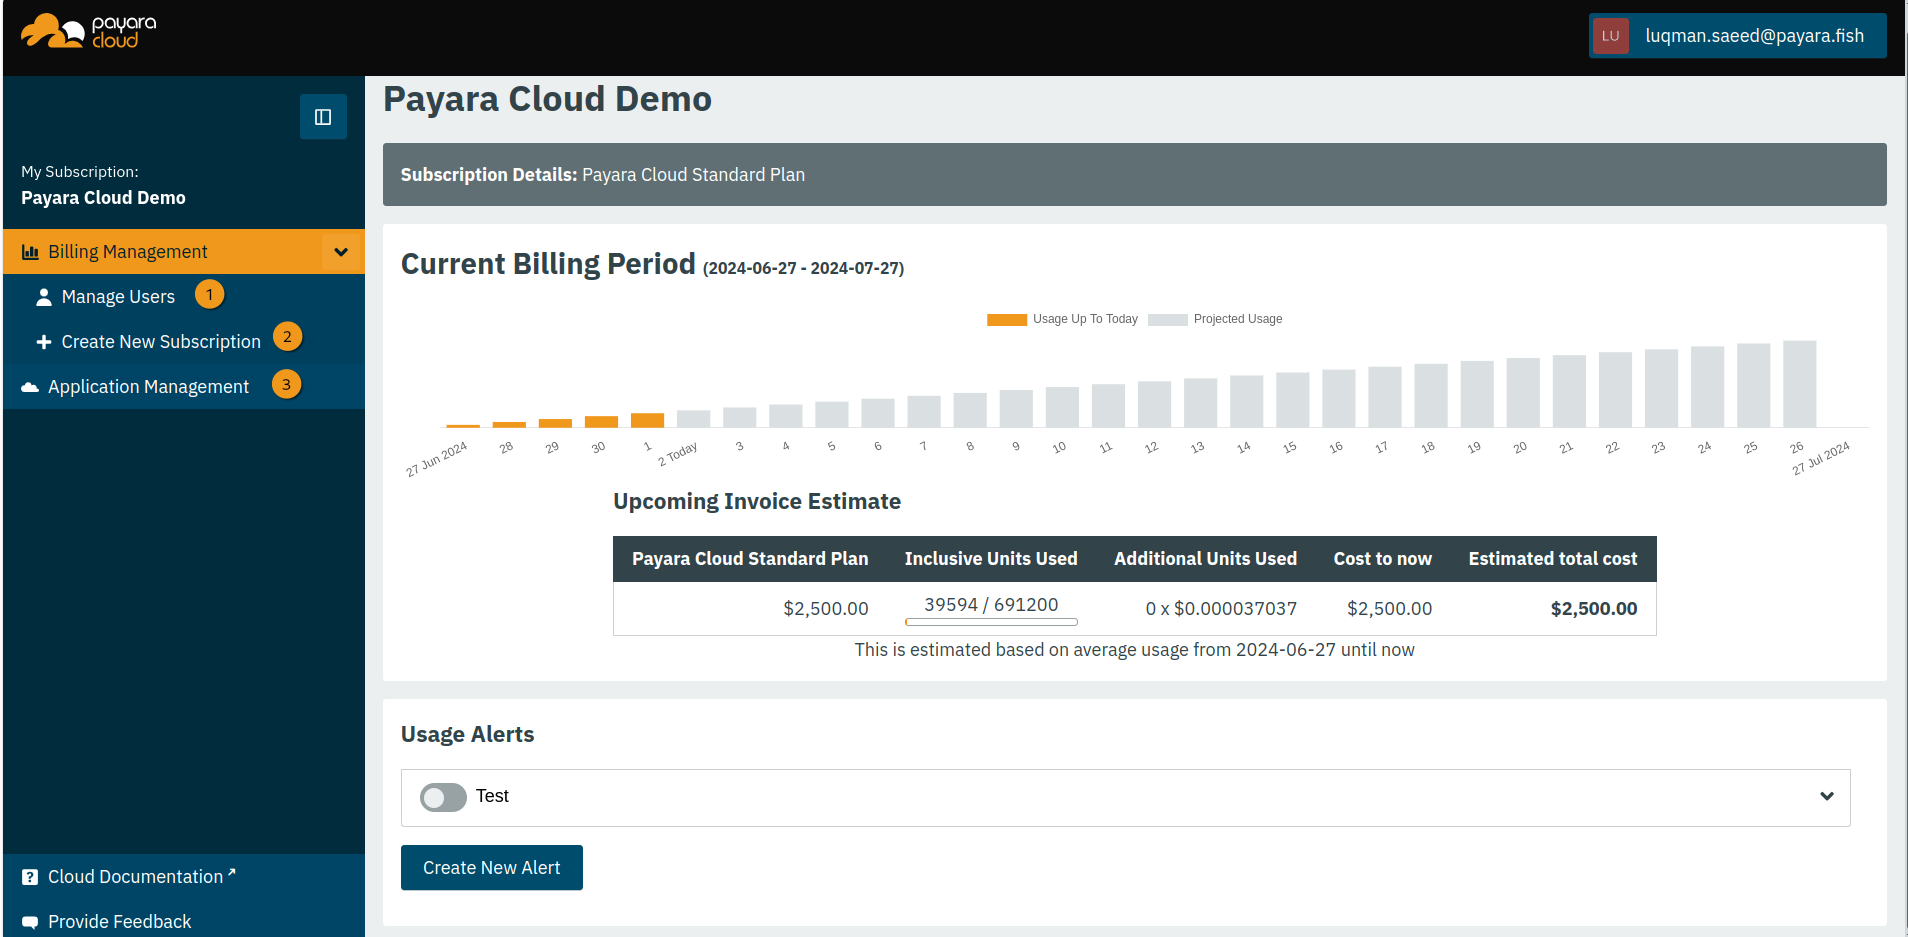
To see and manage your existing subscriptions, click on the Billing Management menu in the left vertical menu bar. Through the Billing Management menu, you can manage users in your subscription, view a list of your active subscriptions and create new subscriptions.
-
❶ Click to Manage Users.
-
❷ Click to create a new subscription
-
❸ Click to go back to application management
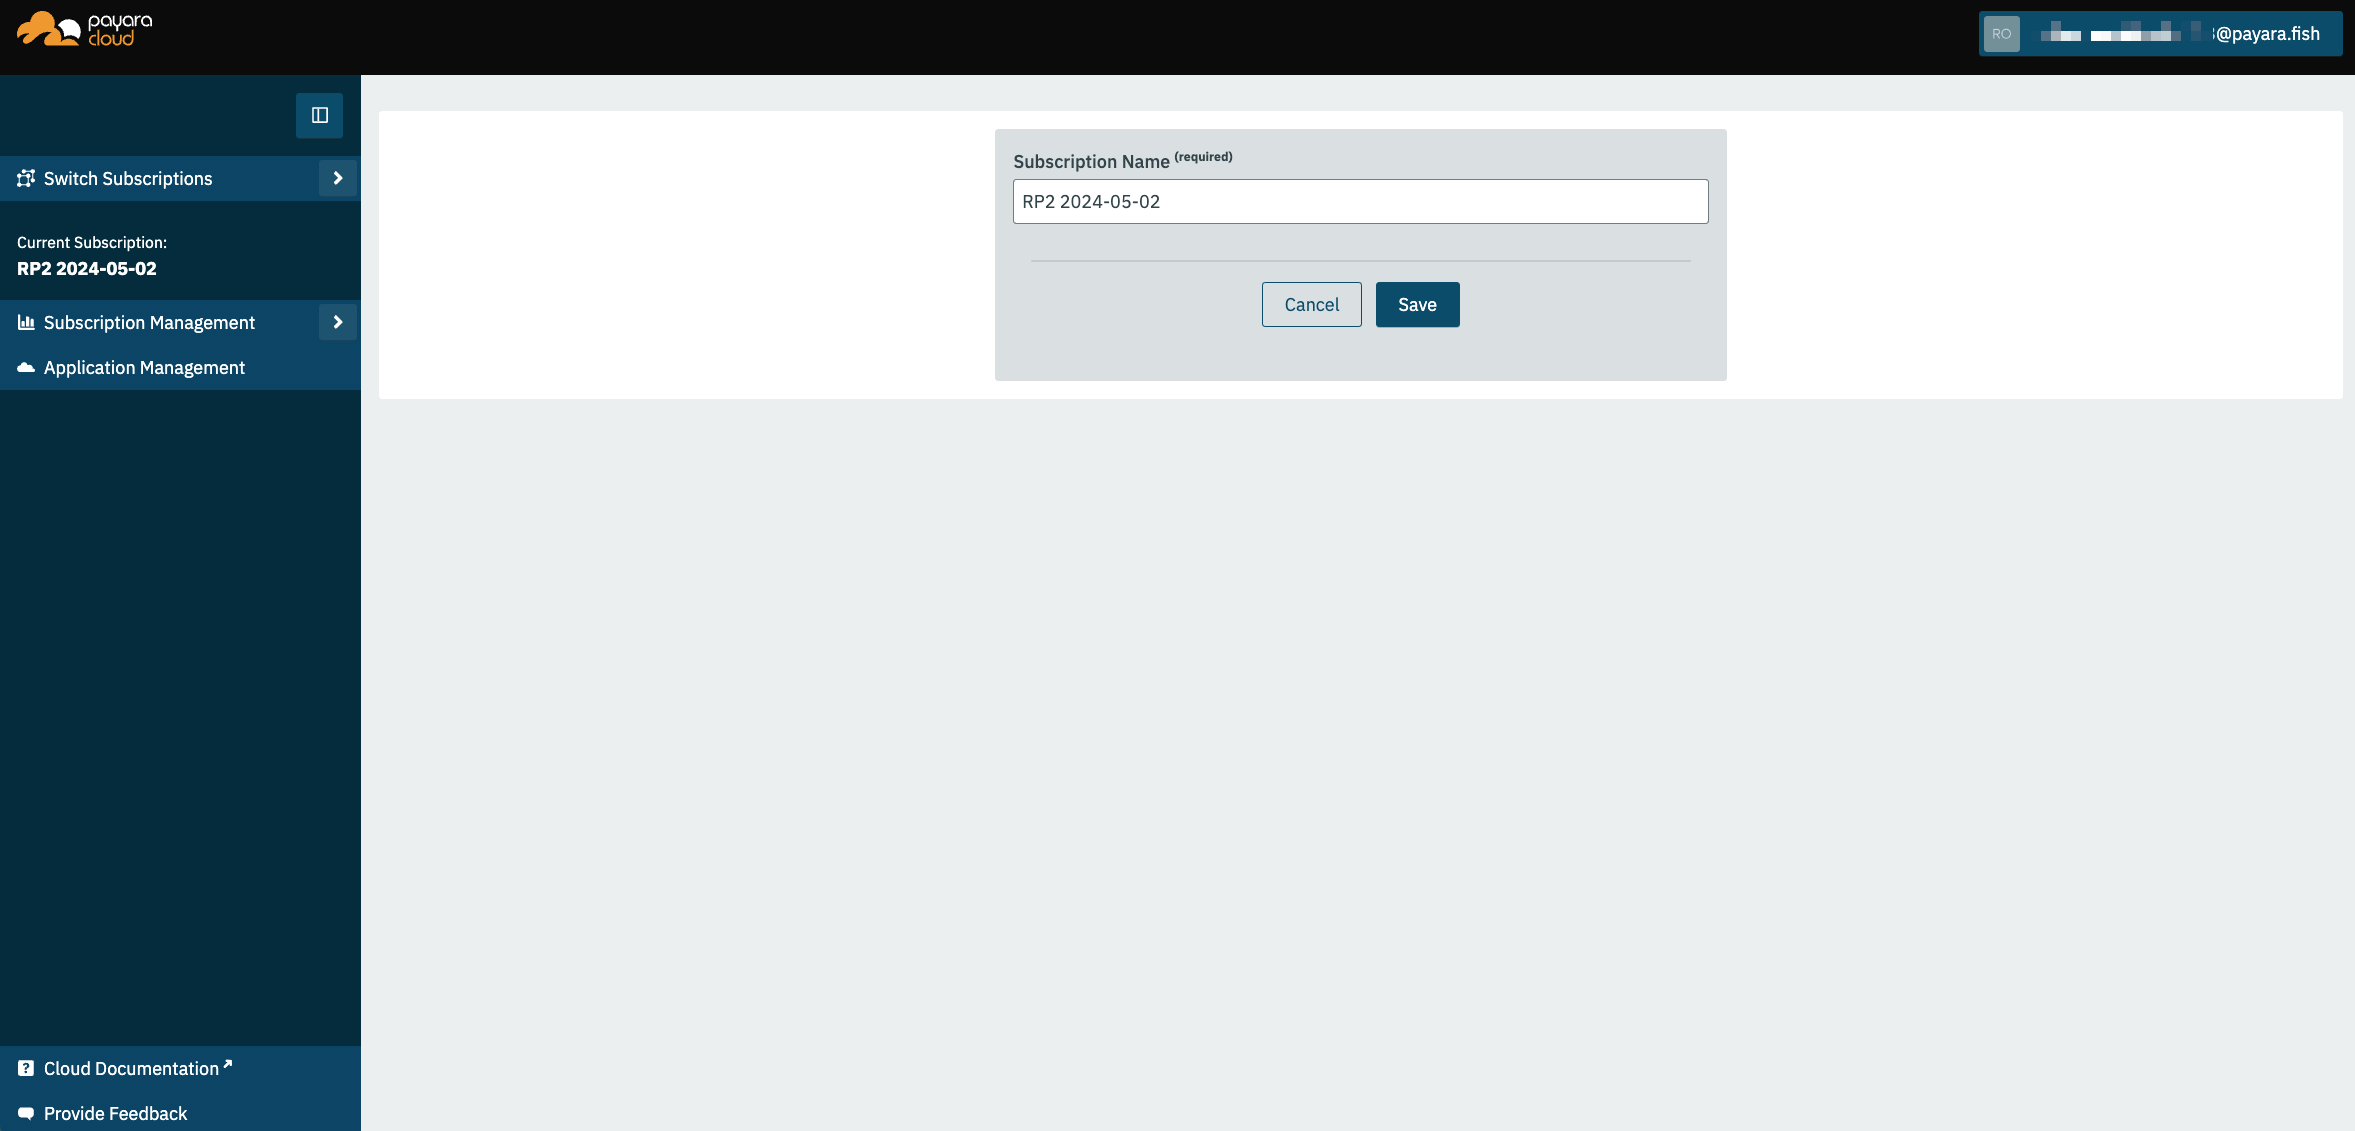
Edit Subscription Name
-
Click on "Subscription Actions" button on top right
-
Click "Edit Subscription"
-
Edit the name as required and click Save
-

View Current Usage
Current and Projected usages are displayed on home page of selected subscription
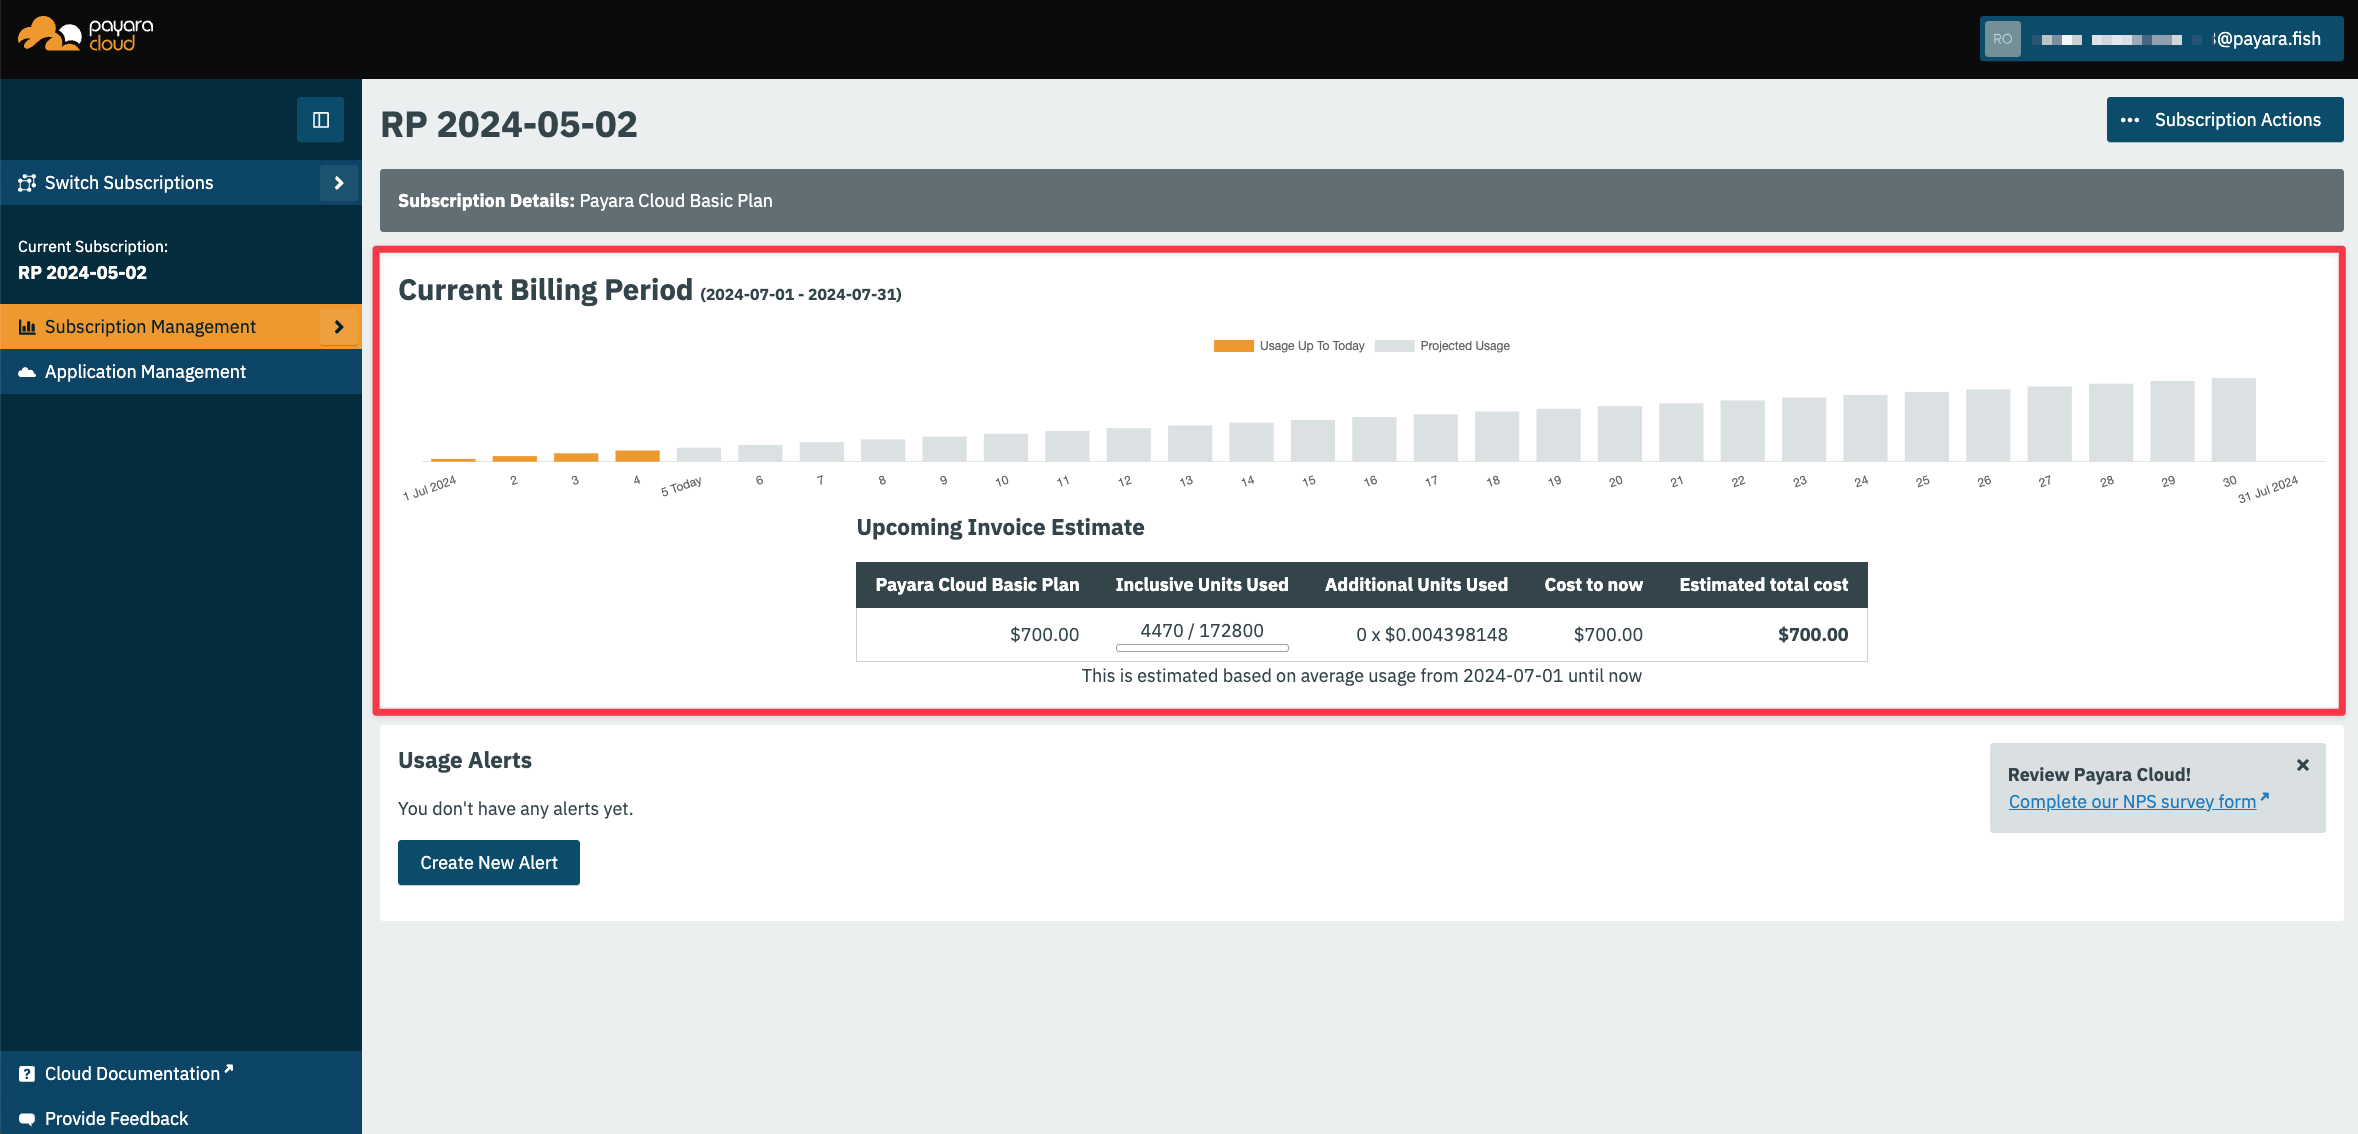
All information related to Billing can be found at Stripe Portal
Set Usage Alerts
To have better visibility and control over your usage of Payara Cloud, you can set usage alerts for your subscriptions.
To create a usage alert, click on the Create New Alert button on a given subscription.
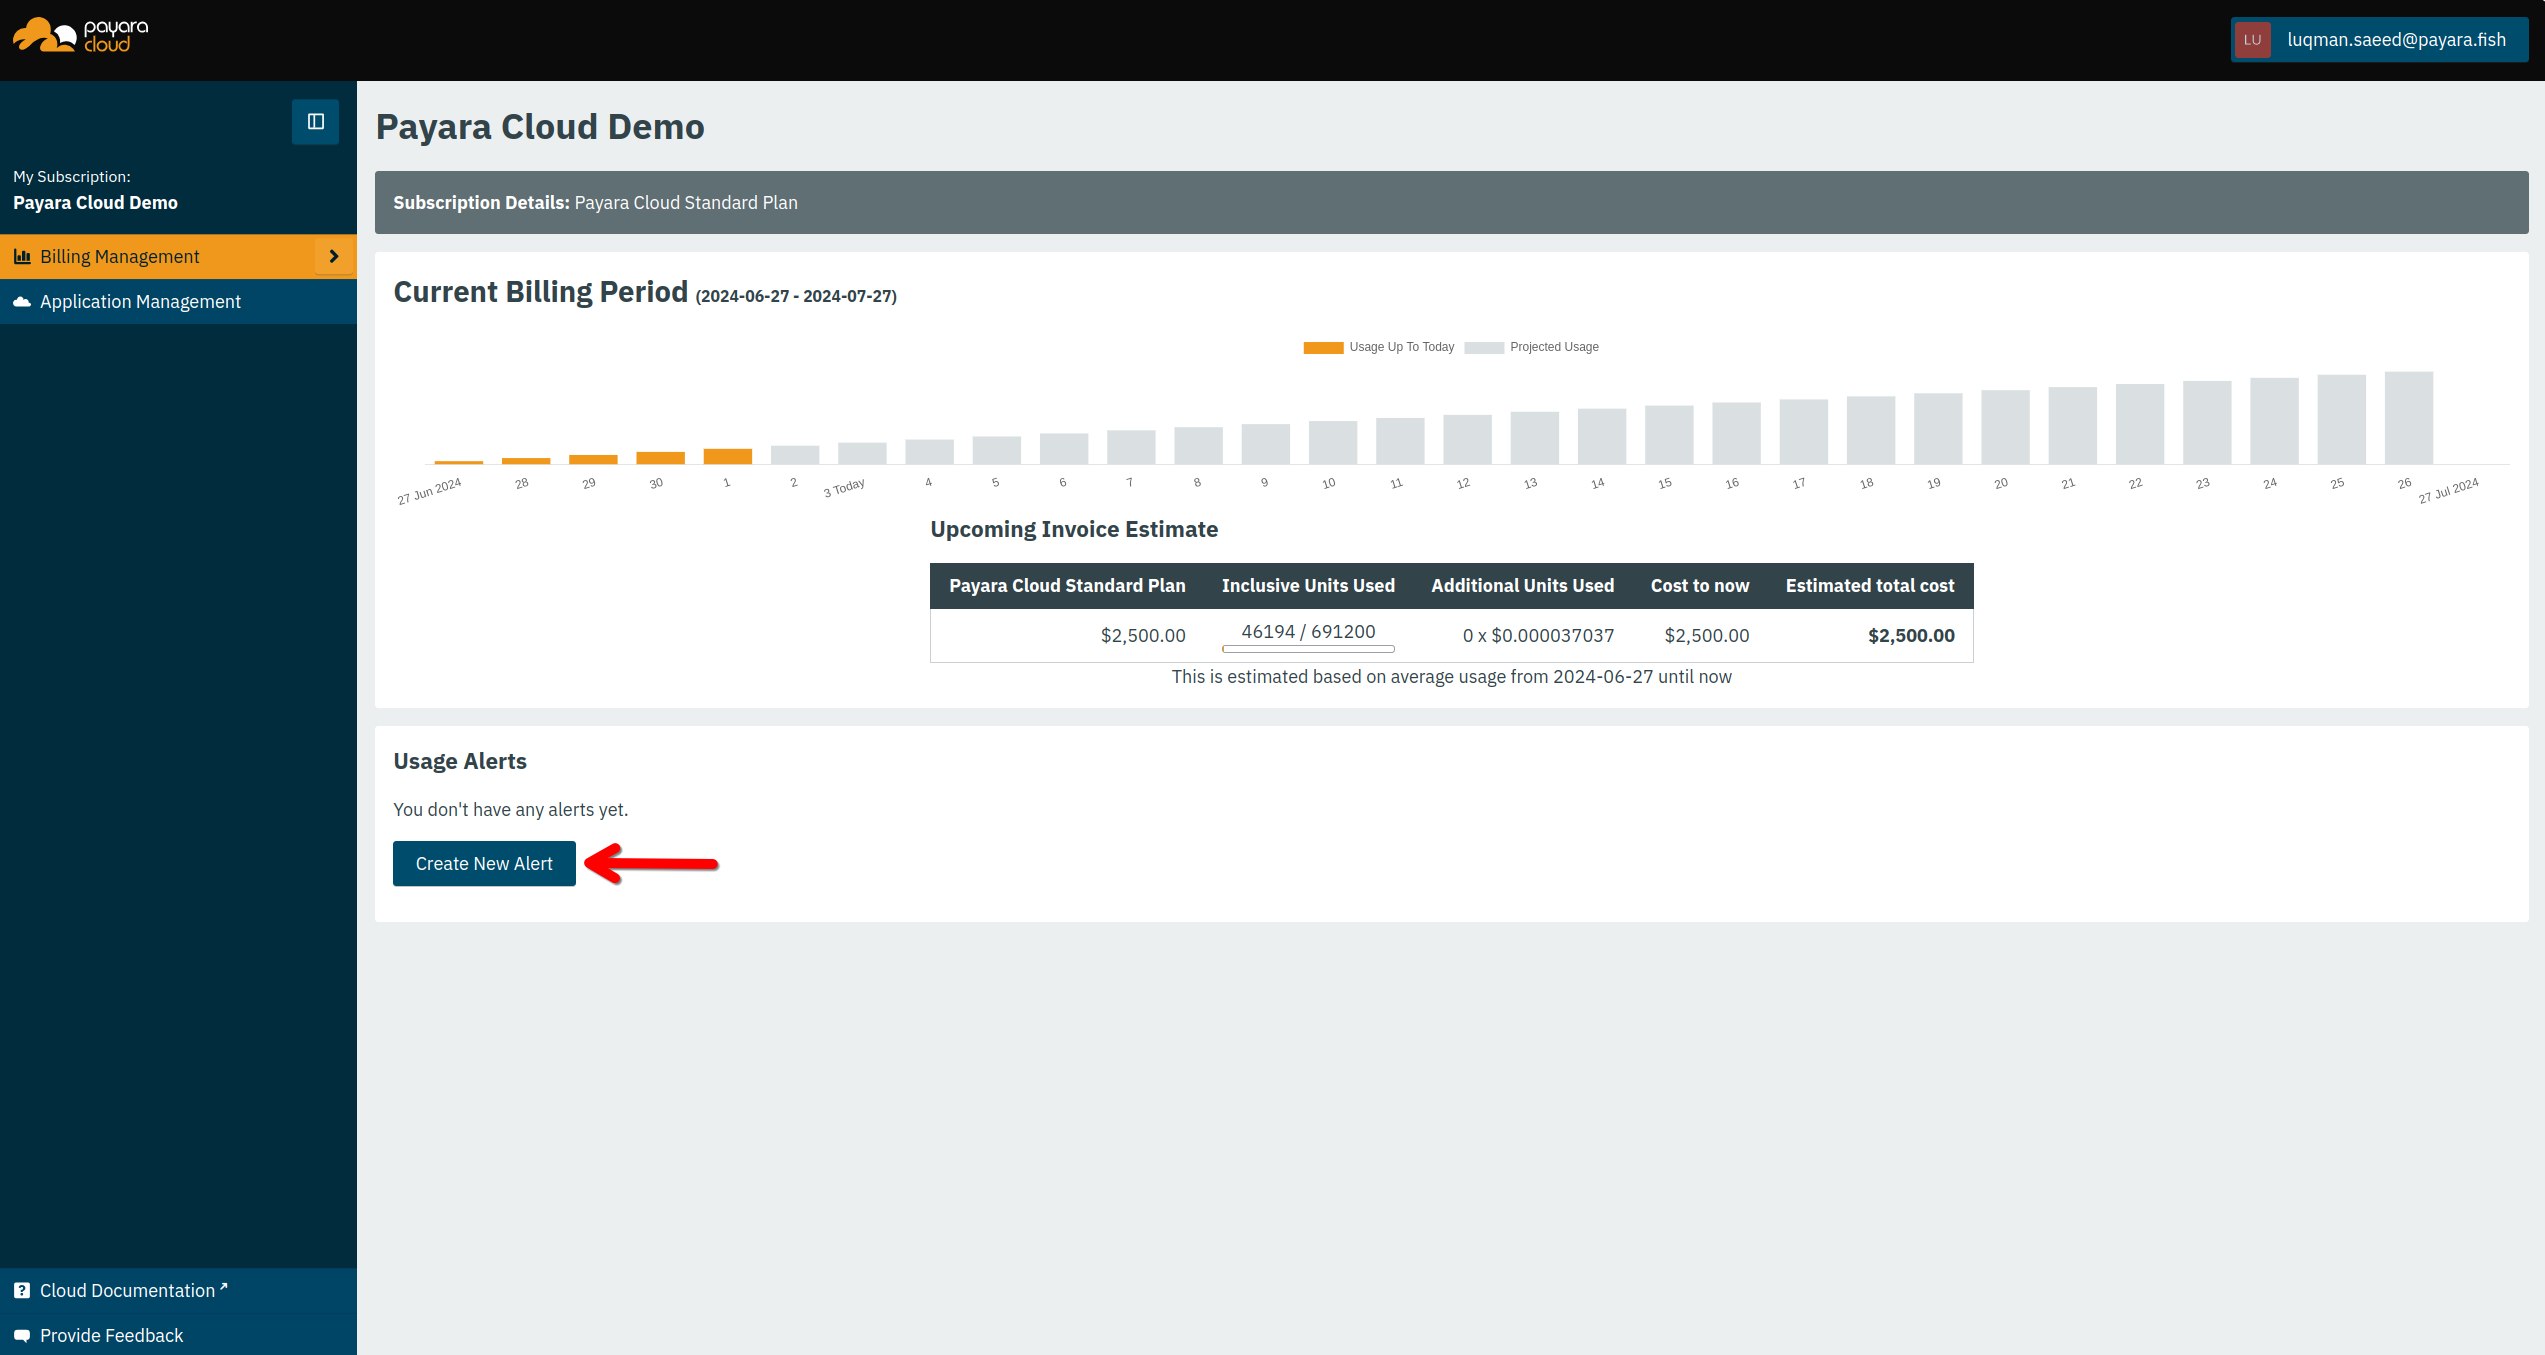
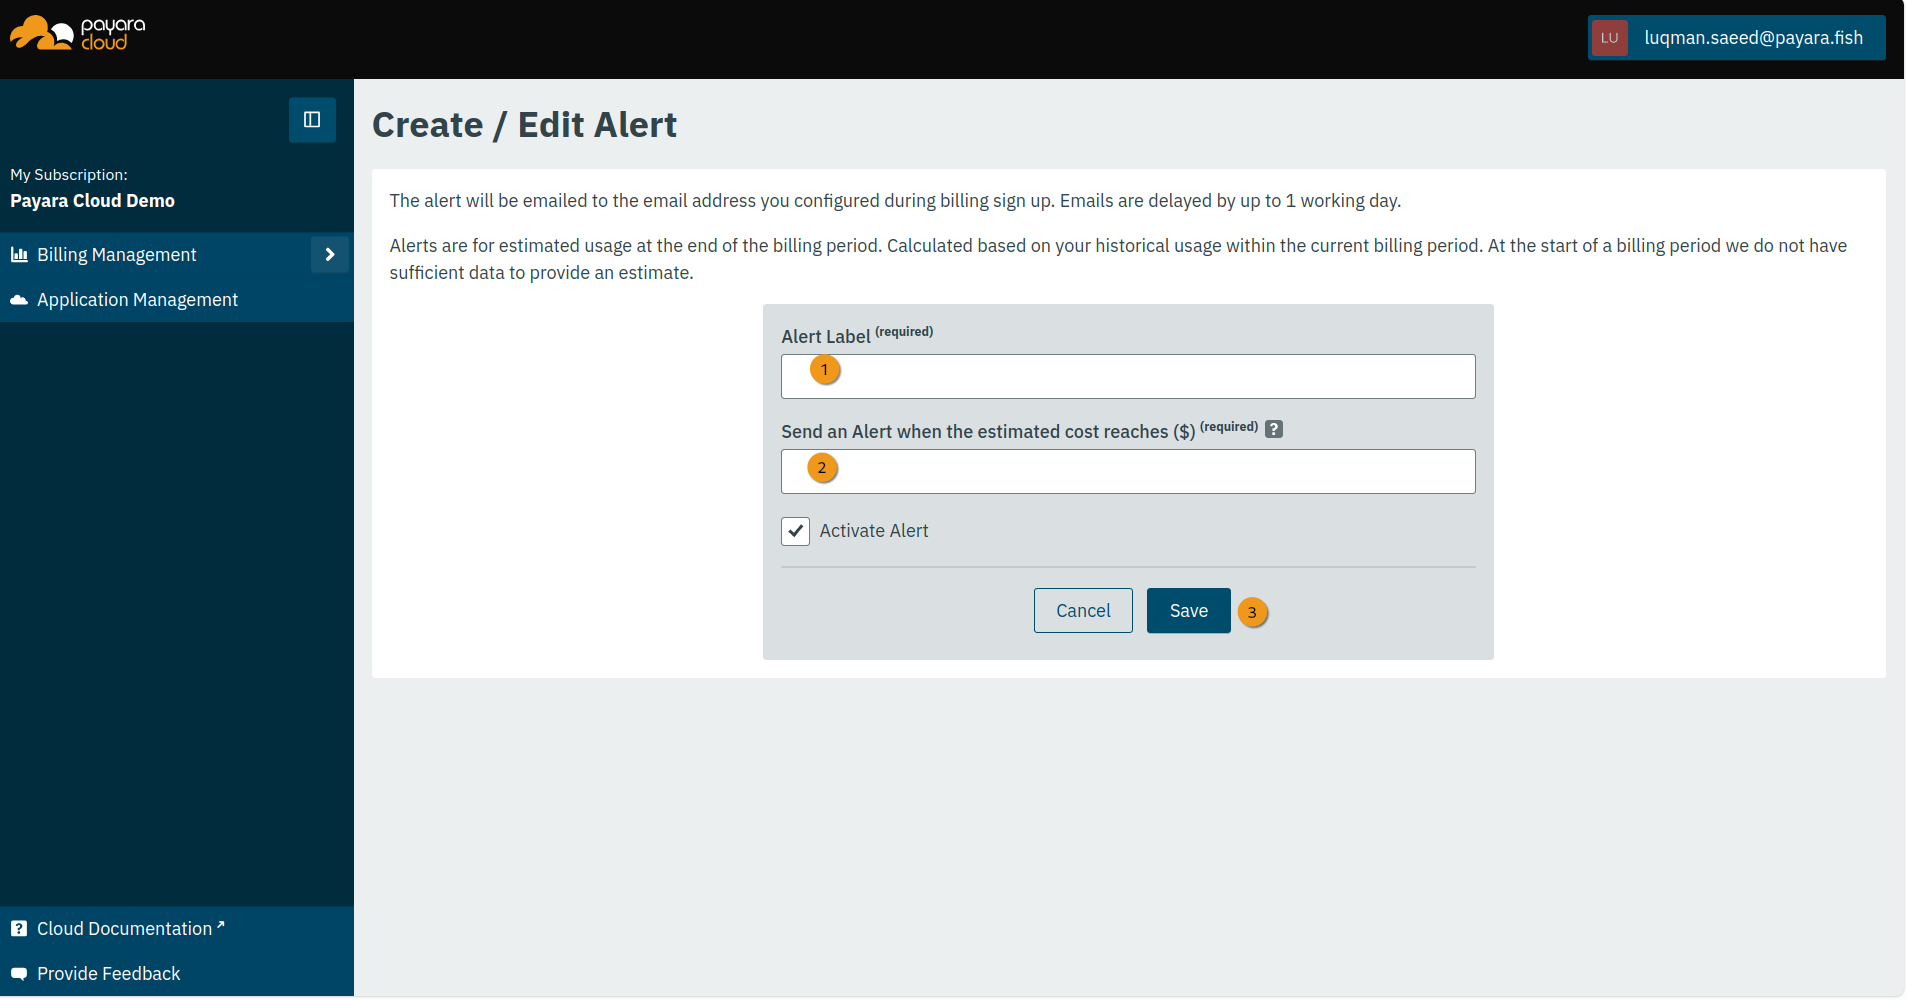
This will open the new alert form.
-
❶ Enter a label for the alert, for example Prod Usage
-
❷ A threshold above which the alert should be trigger
-
❸ click to save the alert
With the alert in place, any usage above the set threshold will trigger an email to be sent to the email address of the Billing Manager of the subscription.