Payara Cloud offers customers on the Standard or Premium subscription tiers the ability to associate custom domains to namespaces. This feature enhances the accessibility of your applications deployed to such namespaces for end users, by providing a personalized and easily recognizable URL.
When applications are uploaded to a specific namespace in Payara Cloud, a default URL is created. This URL is formed by concatenating your namespace and application names, resulting in a link like: https://guide-docu-6696a94c.payara.app/demo (Note: This is a fabricated URL for illustration purposes).
However, these auto-generated URLs may not always align with your brand or be user-friendly, which is why the custom domain feature is valuable. It allows you to transform the default URL into a more brand-centric and user-friendly format such as https://yourAmazingBrand.com/app1, https://yourAmazingBrand.com/app2, and so on, simplifying the way end users access your deployed applications.
Add A Custom Domain
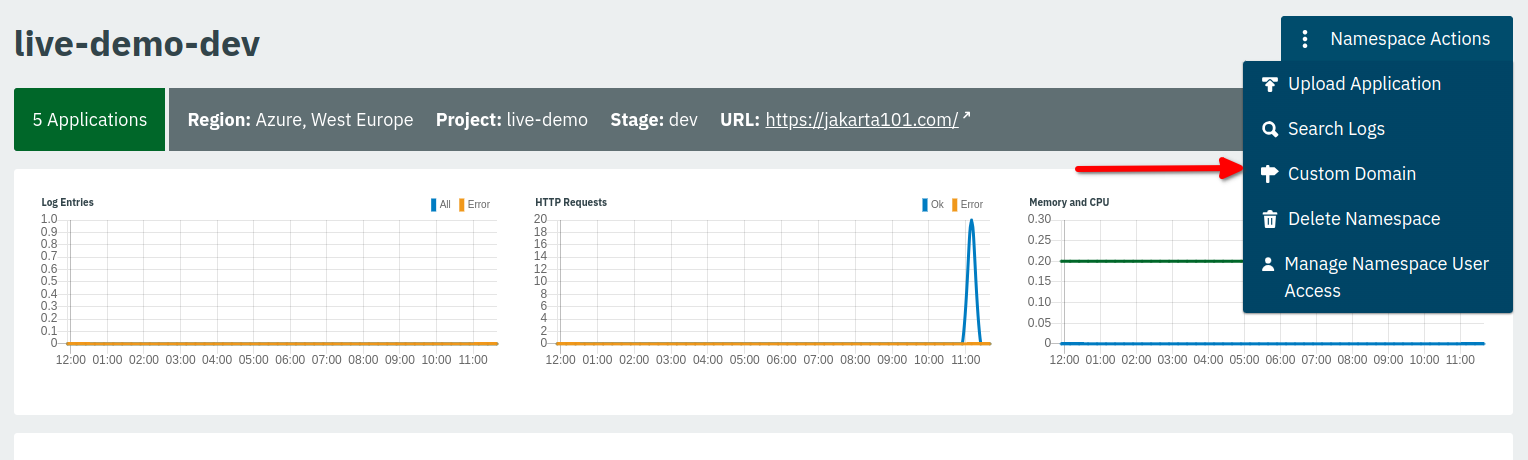
Select the namespace containing your application from the Namespace Navigator. In the Namespace Actions drop down menu, click Custom Domain
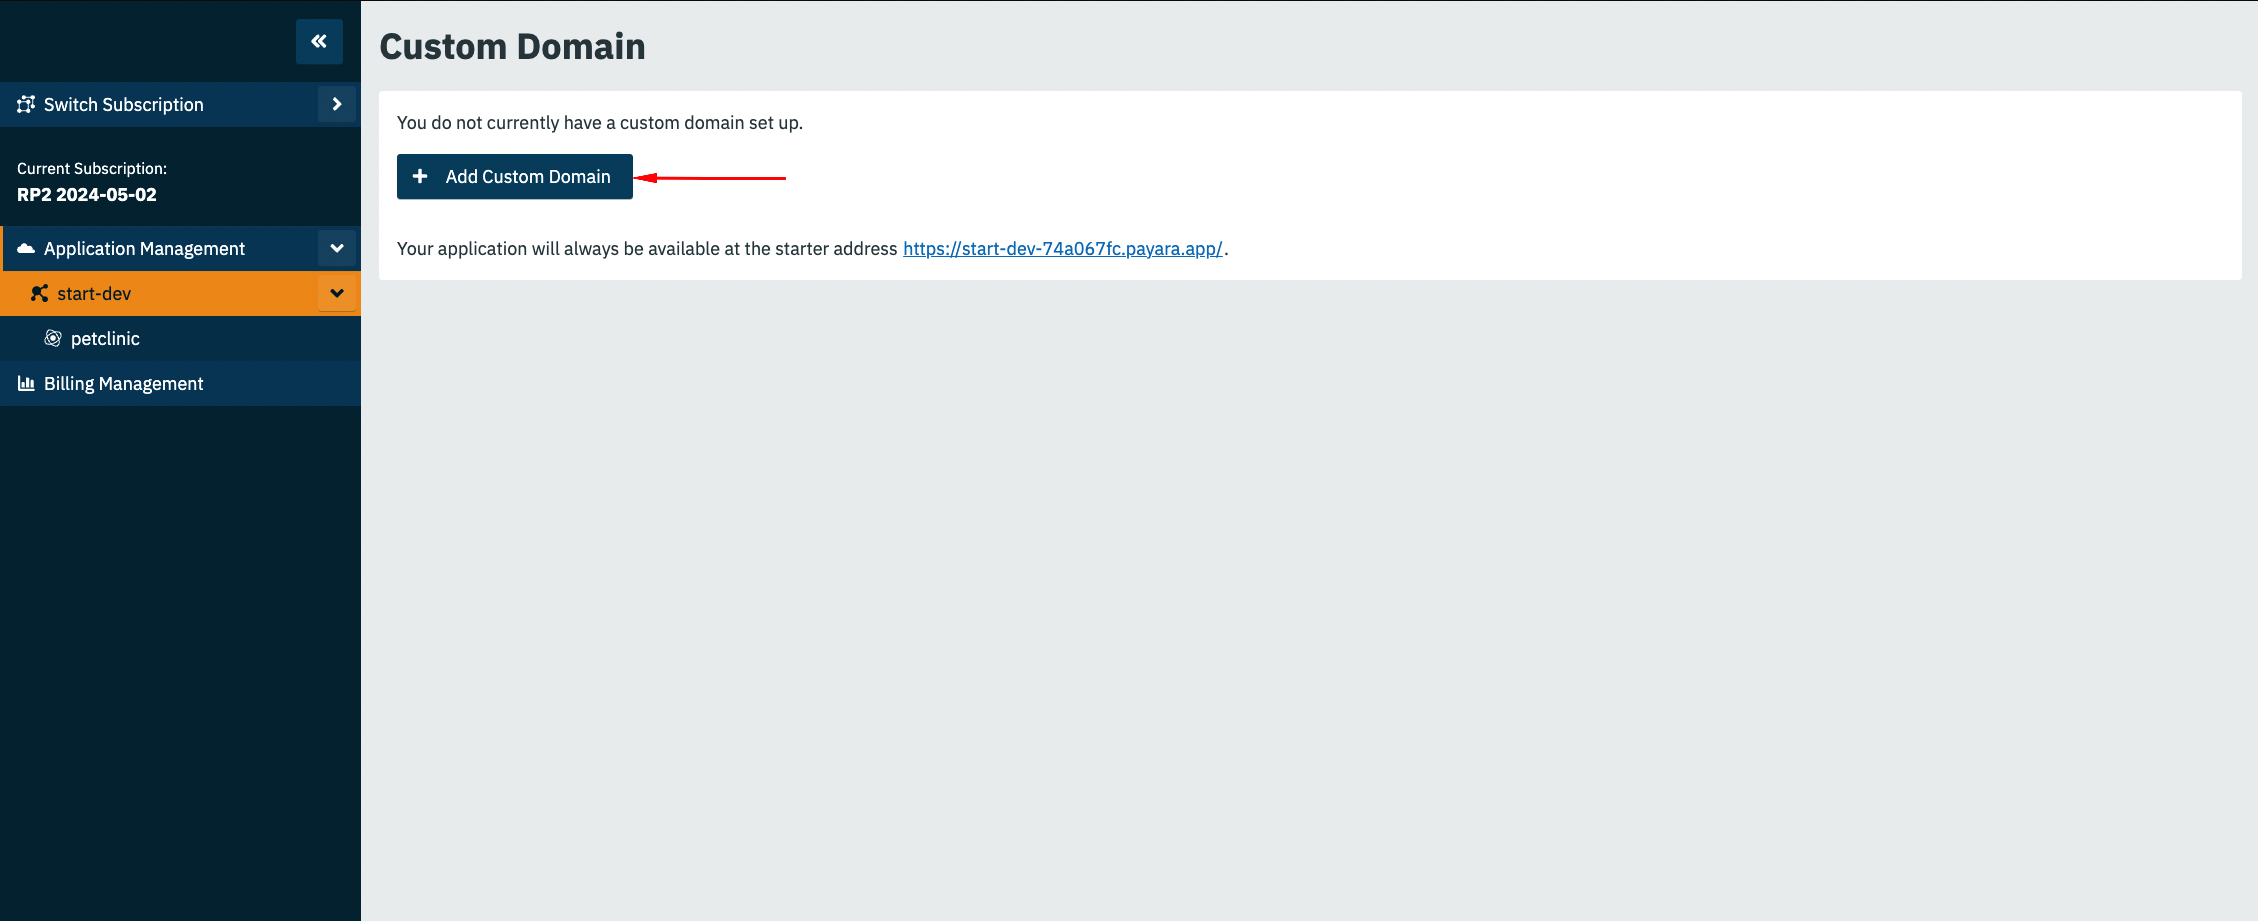
On the next screen, click Add Custom Domain.
Enter the domain name you’d prefer to use for accessing your application in the Custom Domain Name field.
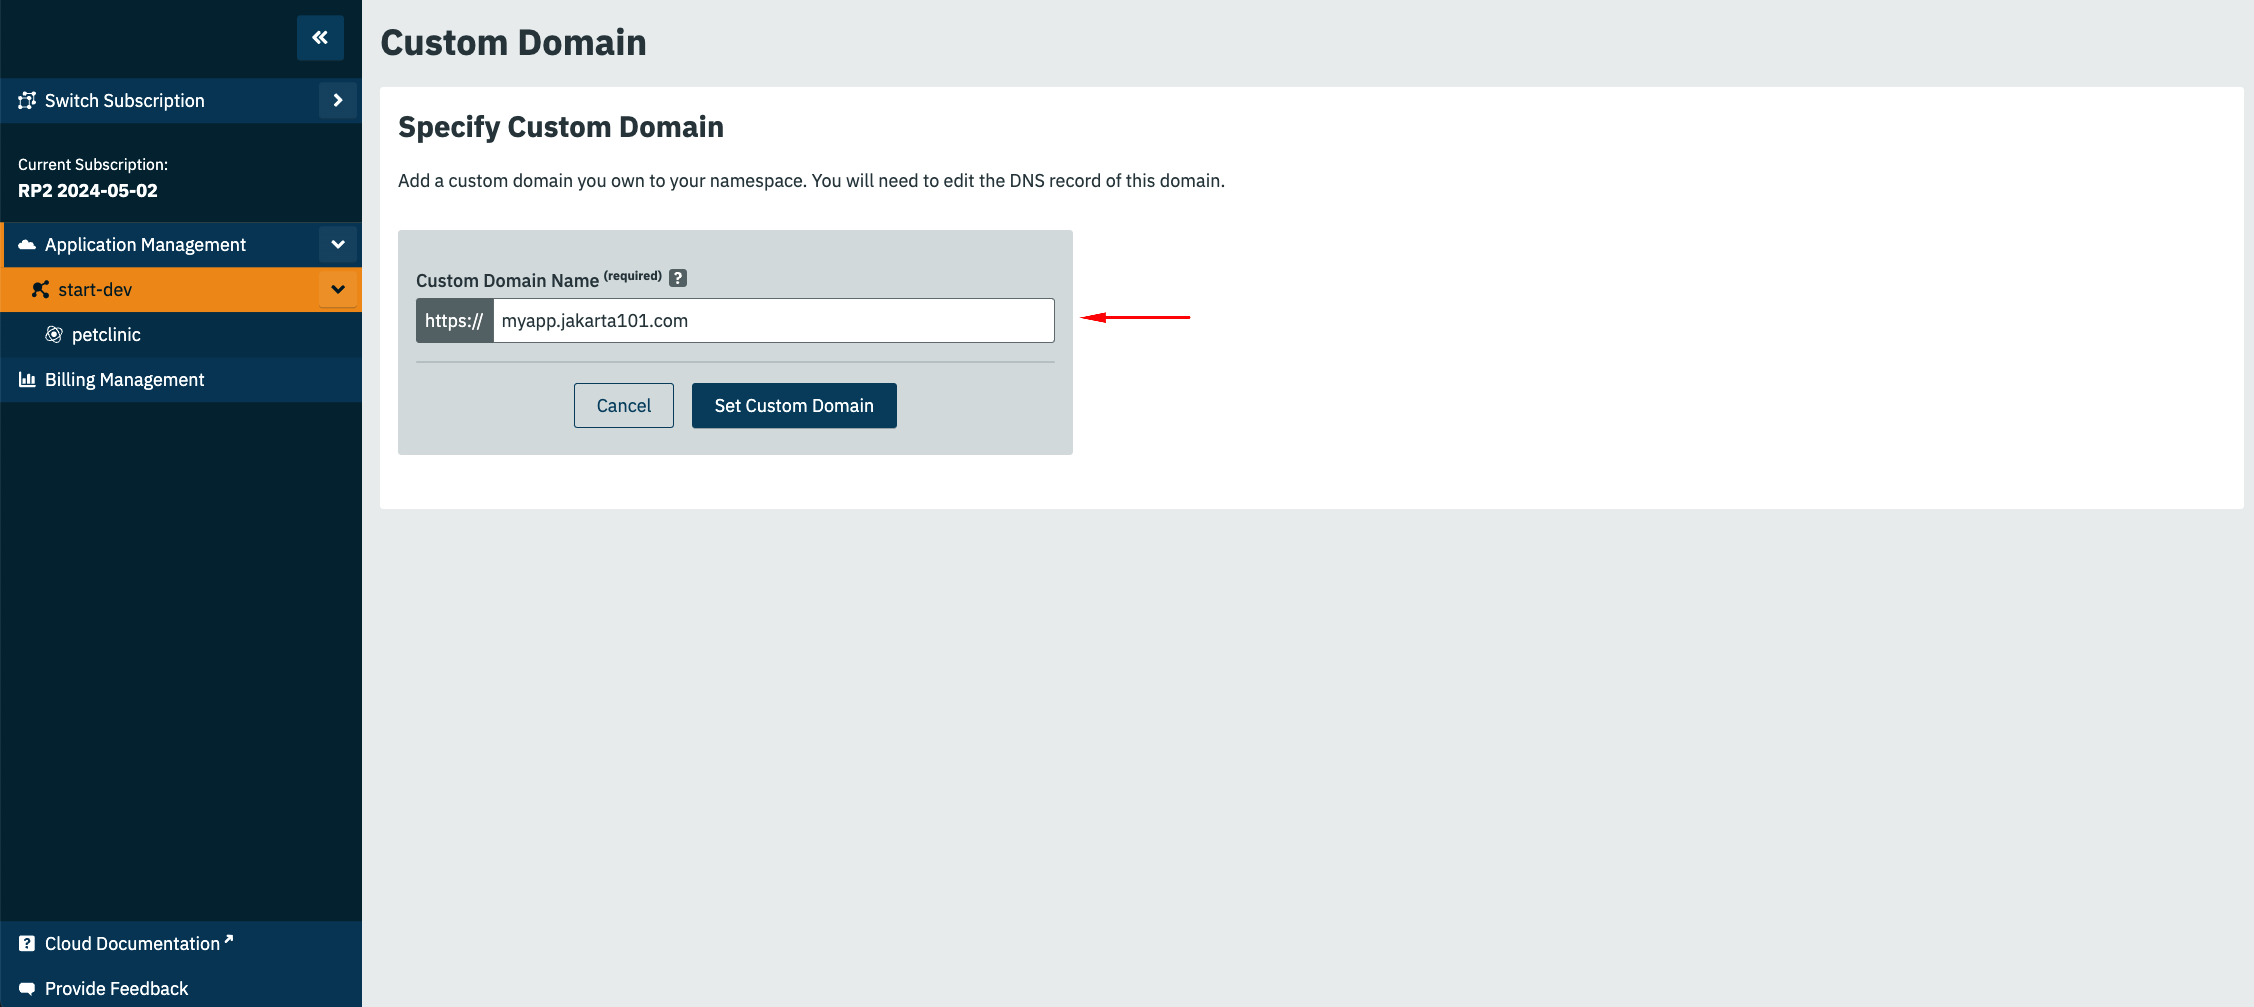
Click Set Custom Domain
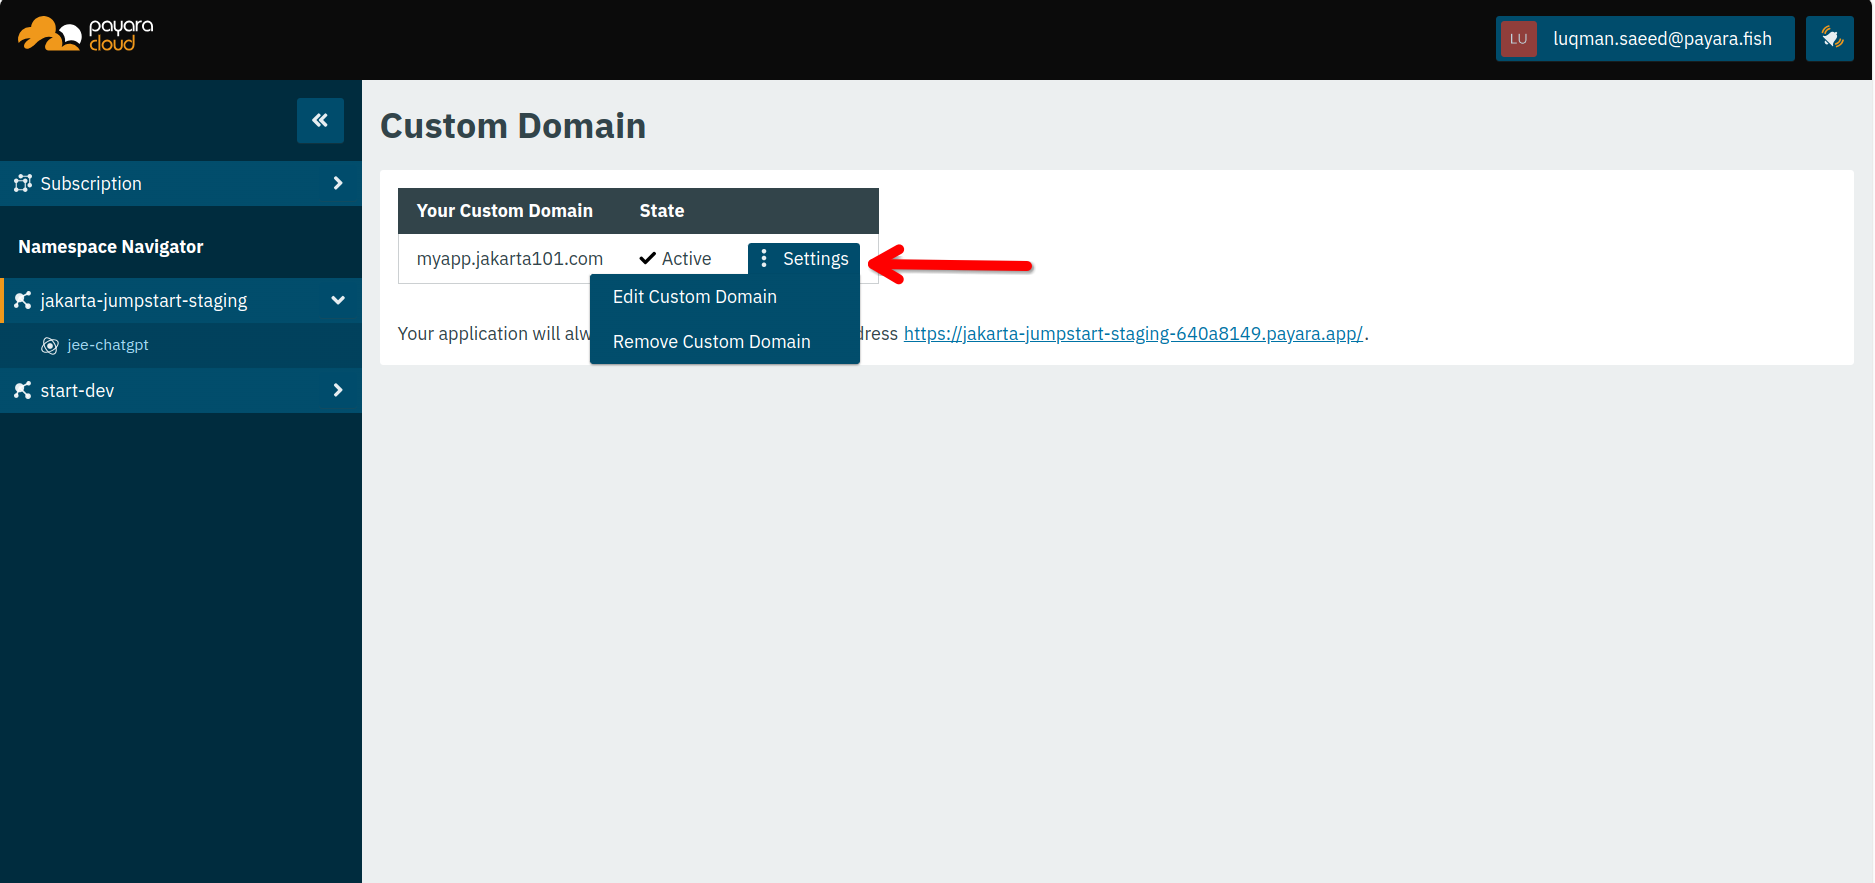
You’ll now see the Custom Domain screen along with the information needed for setting up the DNS record.
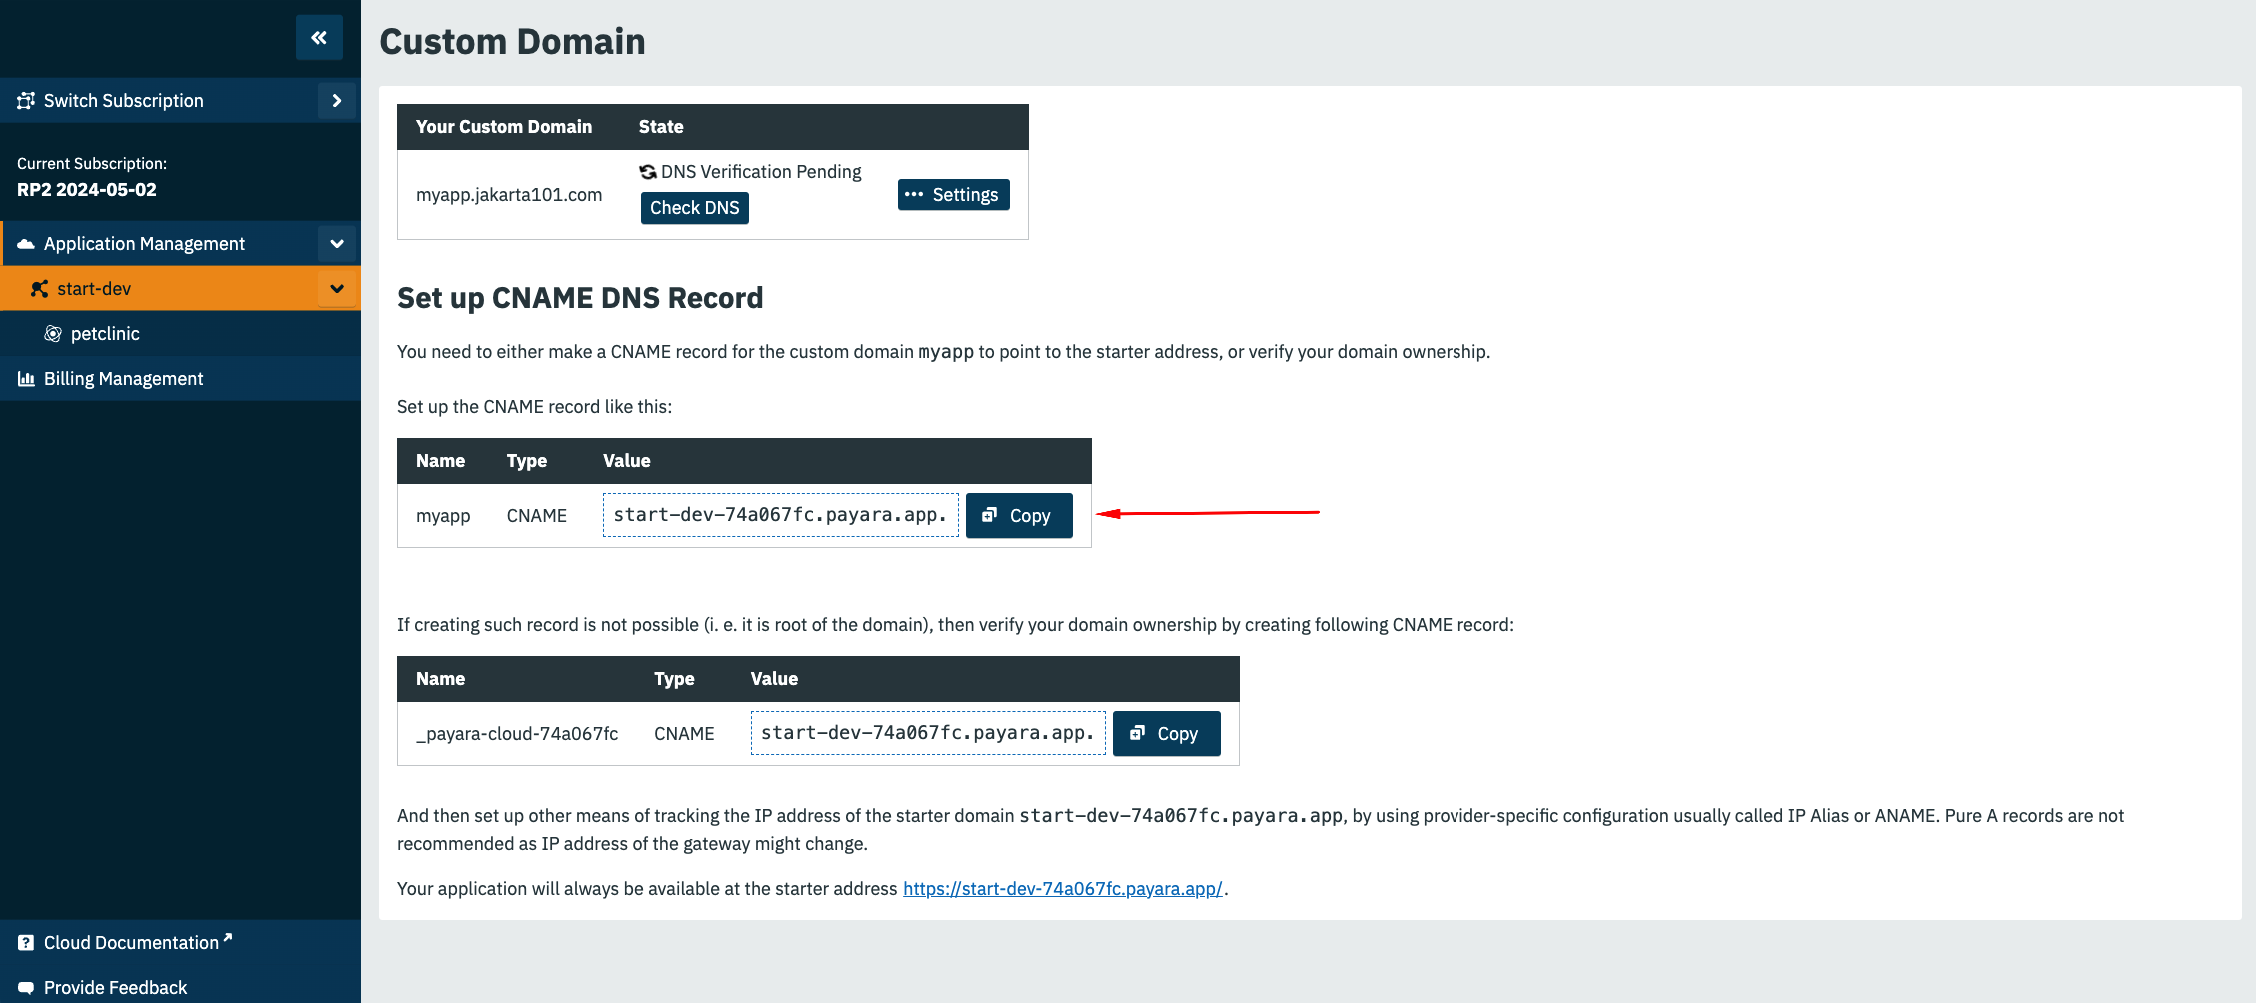
| The top-level domain name feature requires the domain registrar to support CNAME at the zone apex. This allows you to map the namespace URL directly to the root of the domain. Providers like Cloudflare use CNAME flattening to make such mapping possible. Check with your provider for details on setting CNAME records to the root of your domain. |
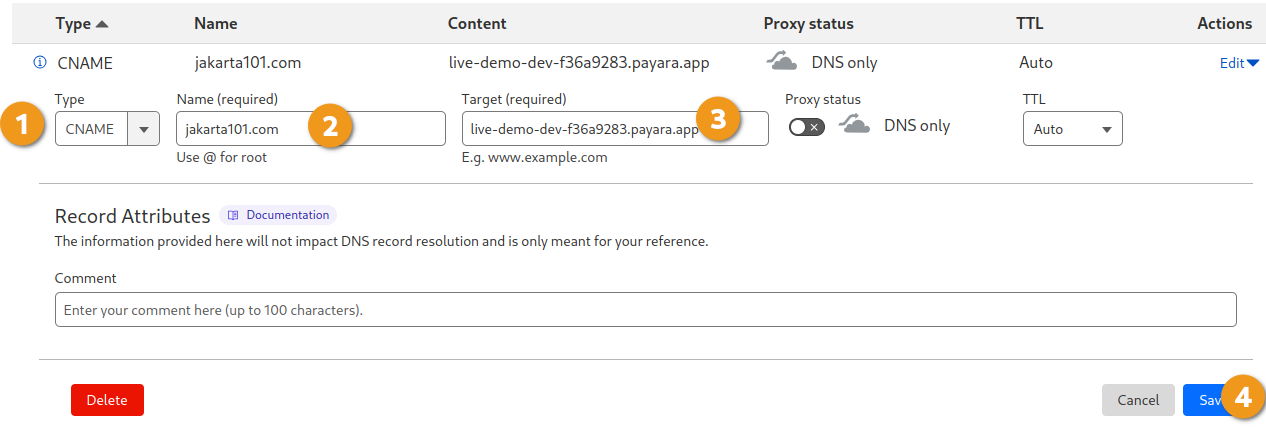
For instance, if using Cloudflare as your domain host, create a new CNAME record in your domain dashboard as shown.
-
❶ Set record type to CNAME
-
❷ Enter root domain name. Some providers also allow the use of the '@' symbol as a shorthand
-
❸ Paste the DNS record value copied from Payara Cloud’s custom domain screen
-
❹ Save
Return to the custom domain setup screen in Payara Cloud.
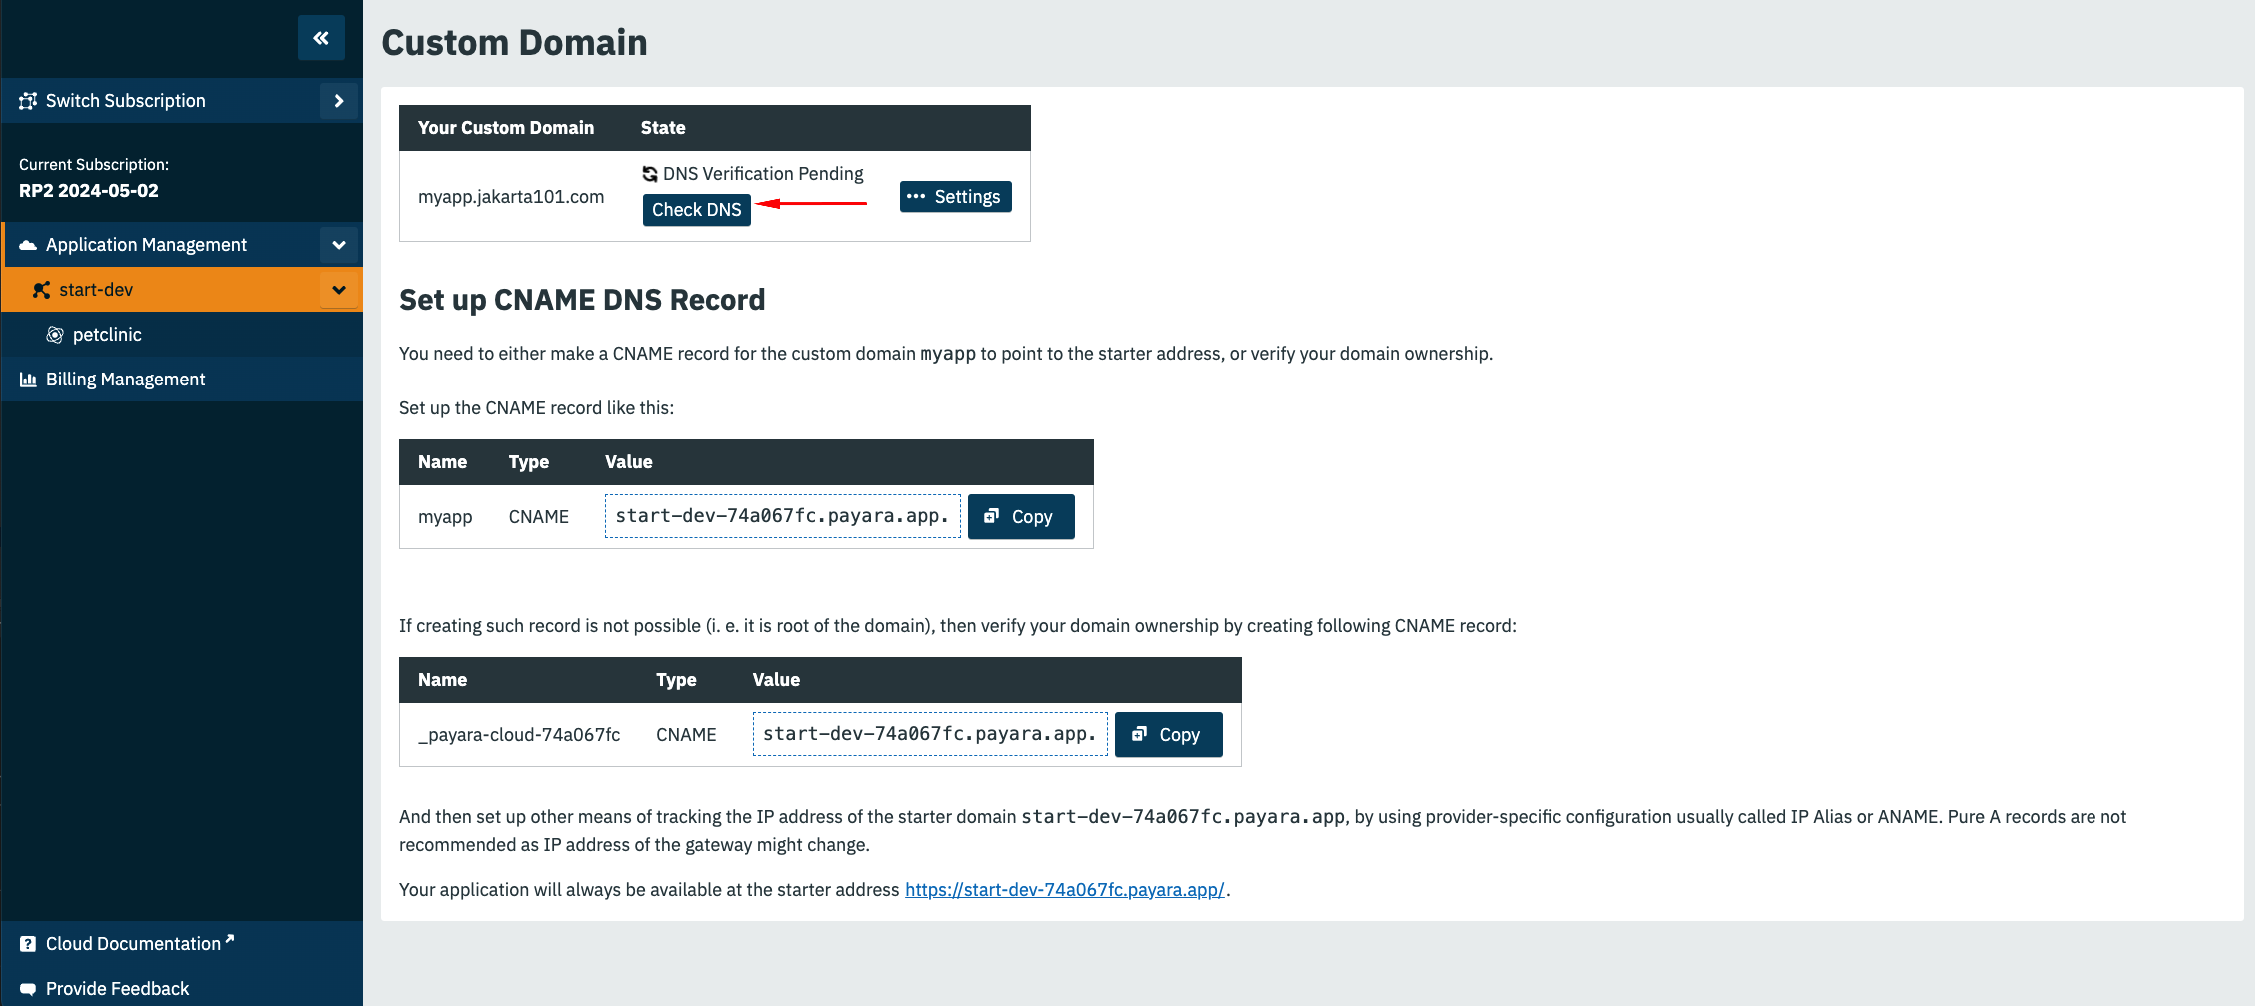
Click Check DNS
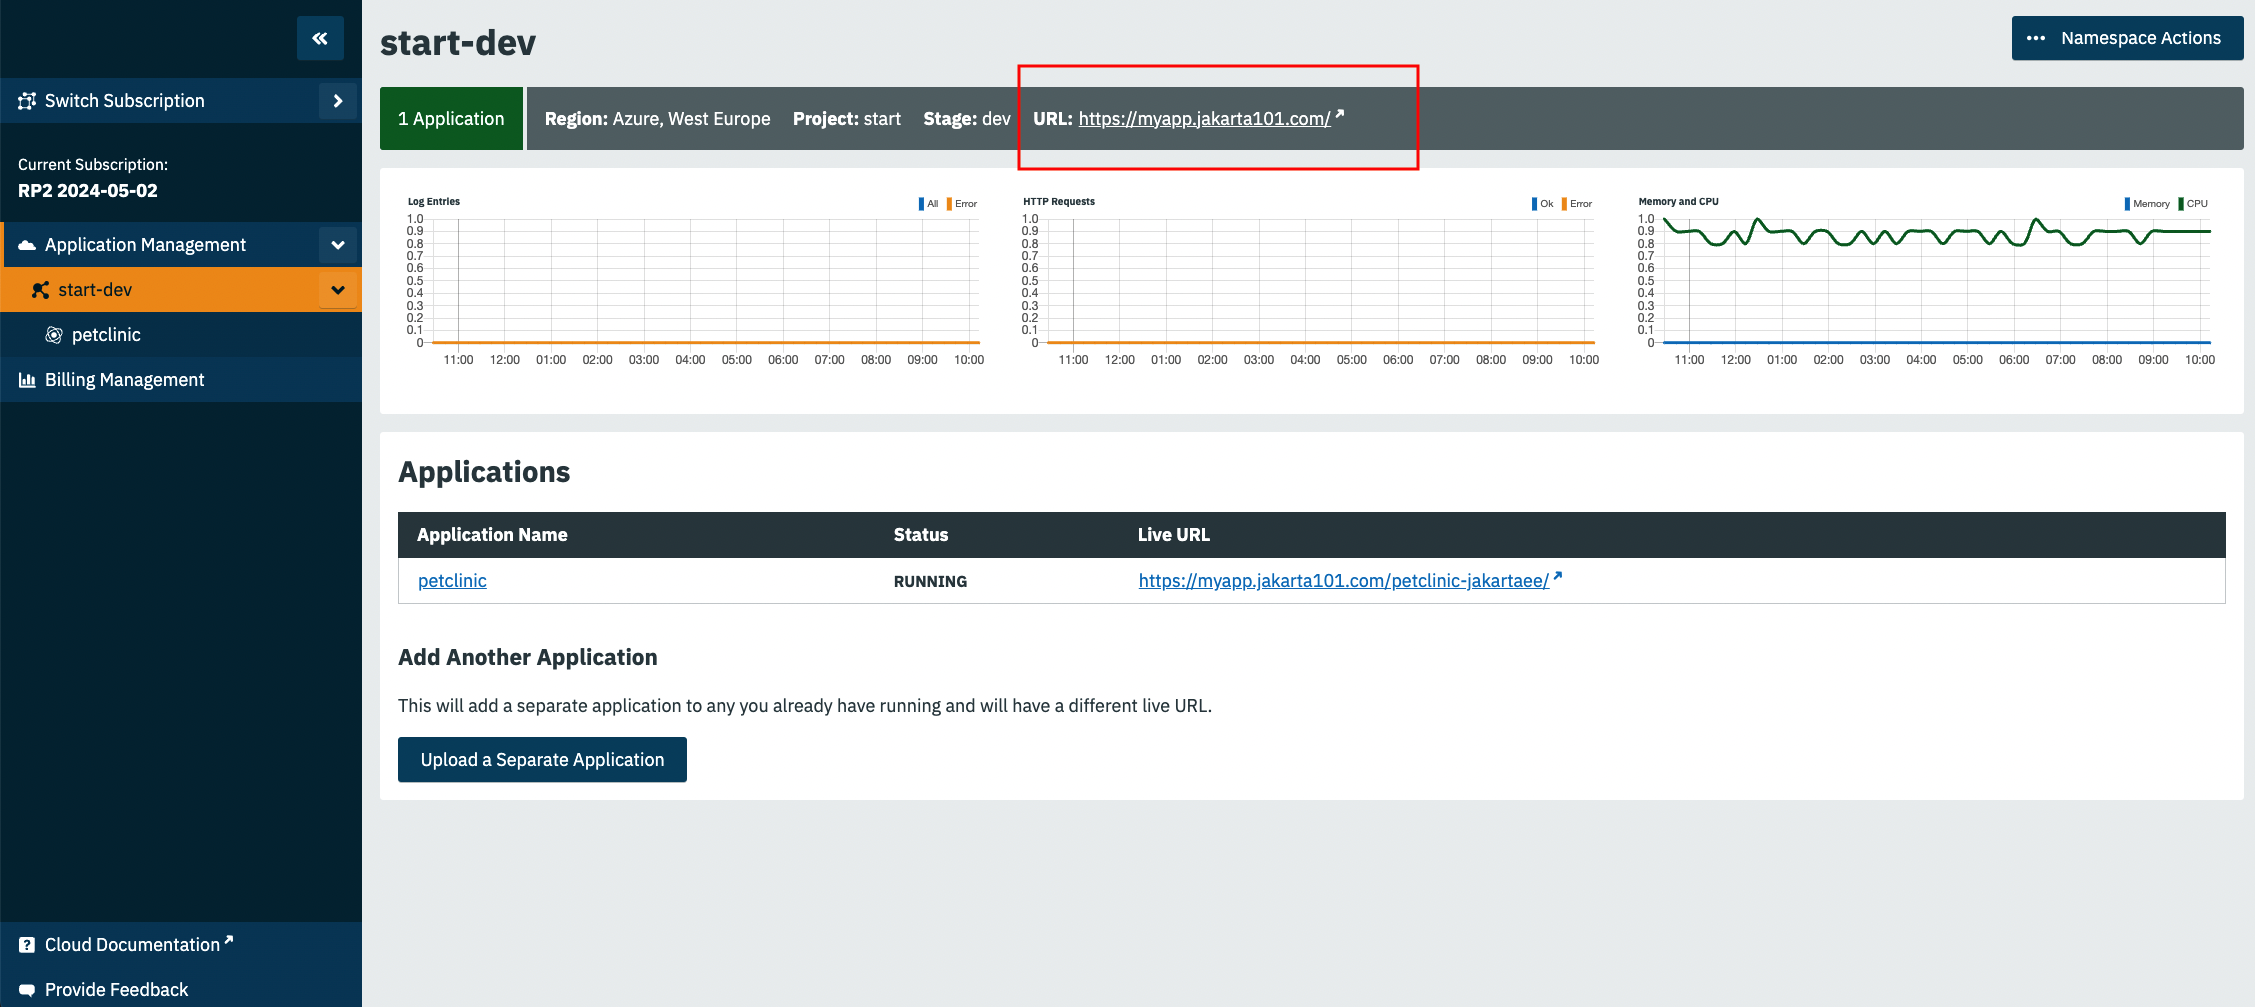
Your namespace should now be linked to the configured domain.
| DNS propagation duration may vary based on your domain name provider, taking anywhere from a few minutes to 48 hours. Check DNS propagation using online tools such as https://dnschecker.org/ |
With the custom domain configured, all applications deployed to the namespace can be accessed as sub-paths of the set domain. For instance, an application deployed to the context path myapp1 would be accessible via the URL https://jakarta101.com/myapp1.