Establishing a Namespace
In Payara Cloud, a Namespace is a home to a group of related applications. It’s characterized by a unique project name and a stage representing the current phase of your application.
To create a namespace, click Create New Namespace.

Ensure the project name is distinct, as it forms part of the URL for your deployed application. The "stage" field allows you to tag the current phase of your application, commonly denoted as "QA", "test", or "production".
Upon clicking Create namespace, you’ll be directed to the namespace details screen to begin adding applications to your new namespace.
Uploading an Application
Uploading an application is straightforward. From the Namespace Details Screen, click Upload Application.
A dialog box will appear, prompting you to choose the WAR file for deployment. If your application doesn’t require any special configuration, simply mark the Deploy Immediately checkbox.
The application name is crucial as it also serves as the DNS name for the container hosting your application.
This name is either specified in the Payara Cloud UI dialog, derived from the artifactId in the pom.xml file if your WAR file is Maven-built, or taken from the uploaded file name.

Once the WAR file is uploaded, you’ll be navigated to the application’s detail screen for configuration before deploying it to the cloud.
Reviewing Configuration
Configurations in Payara Cloud cover three main areas: MicroProfile Config properties, context root, and database connections for JPA data sources.
If your application uses the MicroProfile Config API and has the microprofile-config.properties file, all properties declared in that file will be available on the UI.
If your application bundles a persistence.xml file, then the datasource definition as declared through @Datasource annotation or in the web.xml will also be available for editing.
Runtime Type
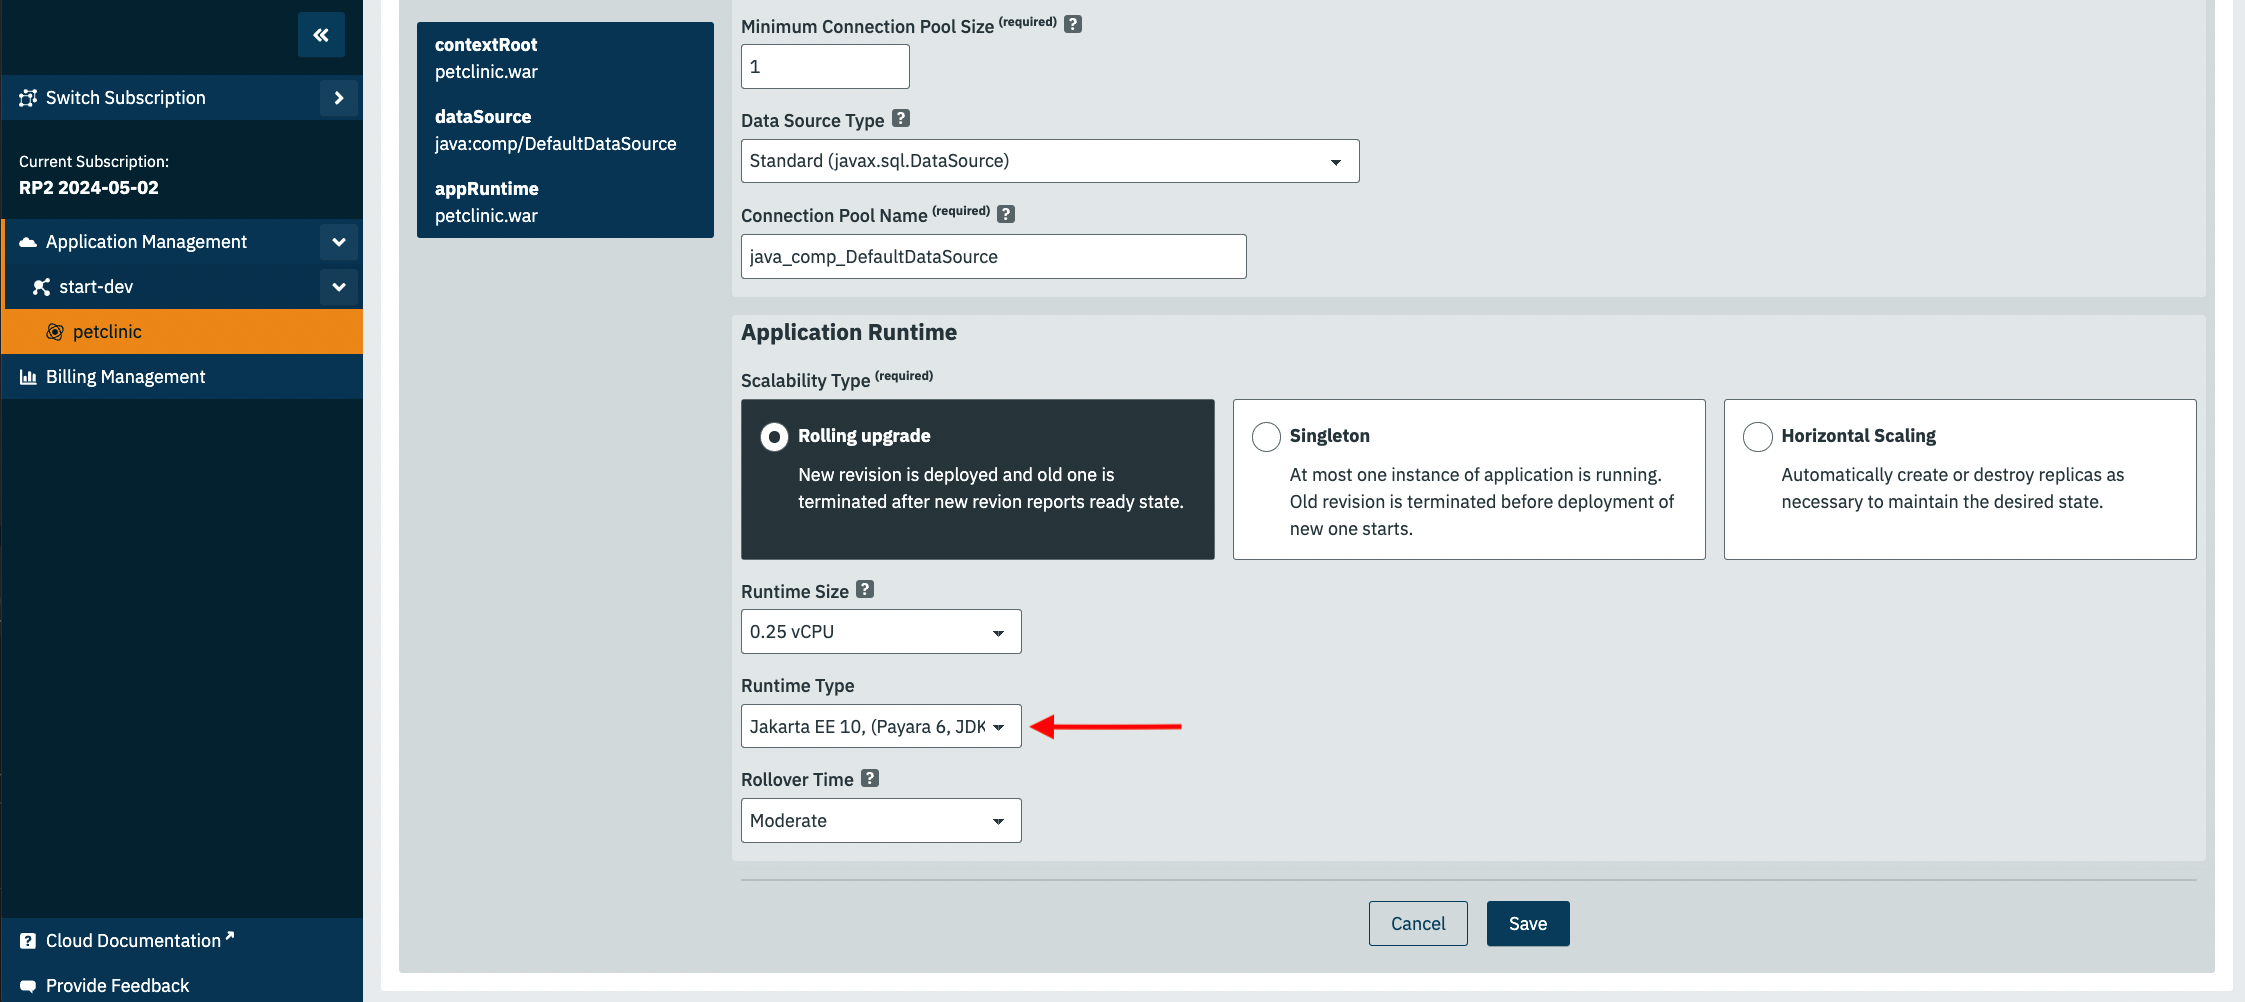
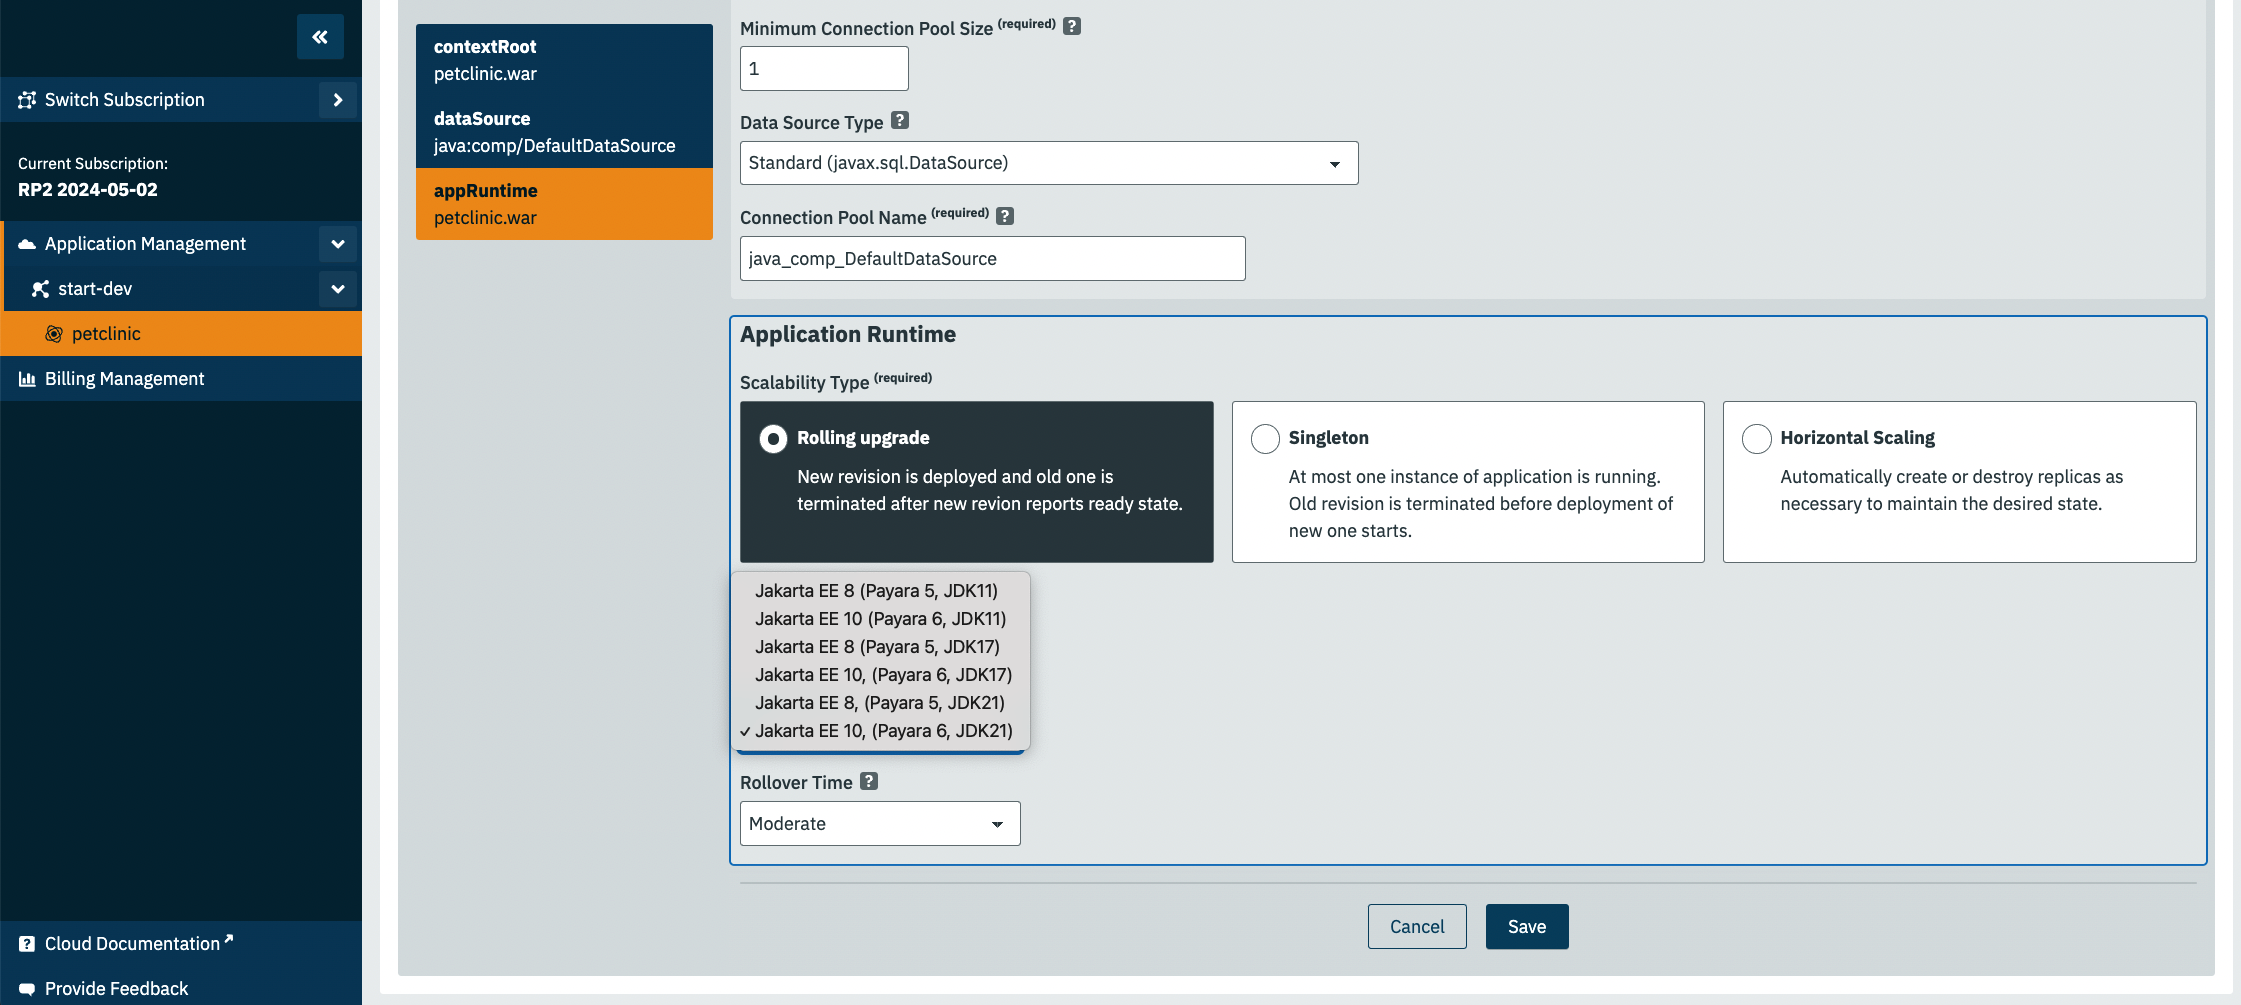
Choose a runtime type based on your application’s Jakarta EE, Payara, and JDK versions. The table below summarizes the supported versions:
| Jakarta EE Version | Payara Version | JDK |
|---|---|---|
8 |
5 |
11 /17/ 21 |
10 |
6 |
11 /17/ 21 |
As an example, if your application is developed on Jakarta EE 8 and compiled for JDK 17, then you can pick the option for Jakarta EE 8 (Payara 5, JDK17). And if your application is developed with Jakarta EE 10 and compiled for JDK 21, then you should select Jakarta EE 10 (Payara6, JDK 21) option
| Payara Cloud by default will assign a runtime based on referenced Jakarta EE classes and target JDK version for the compiled classes. |
Post-upload, you can view or edit configurations by clicking Action, then Edit Configurations.
Deploying the Application
Once configured, it’s time to deploy your application to make it publicly accessible.
Navigate to the application details screen, click Applications Actions, and choose the Deploy Changes option.
A successful deployment updates the application’s status on your screen.
You can now access your application via the provided Application URL. There might be a some delay due to DNS propagation.
Stopping an Application
Stopping a running application in Payara Cloud is simple.
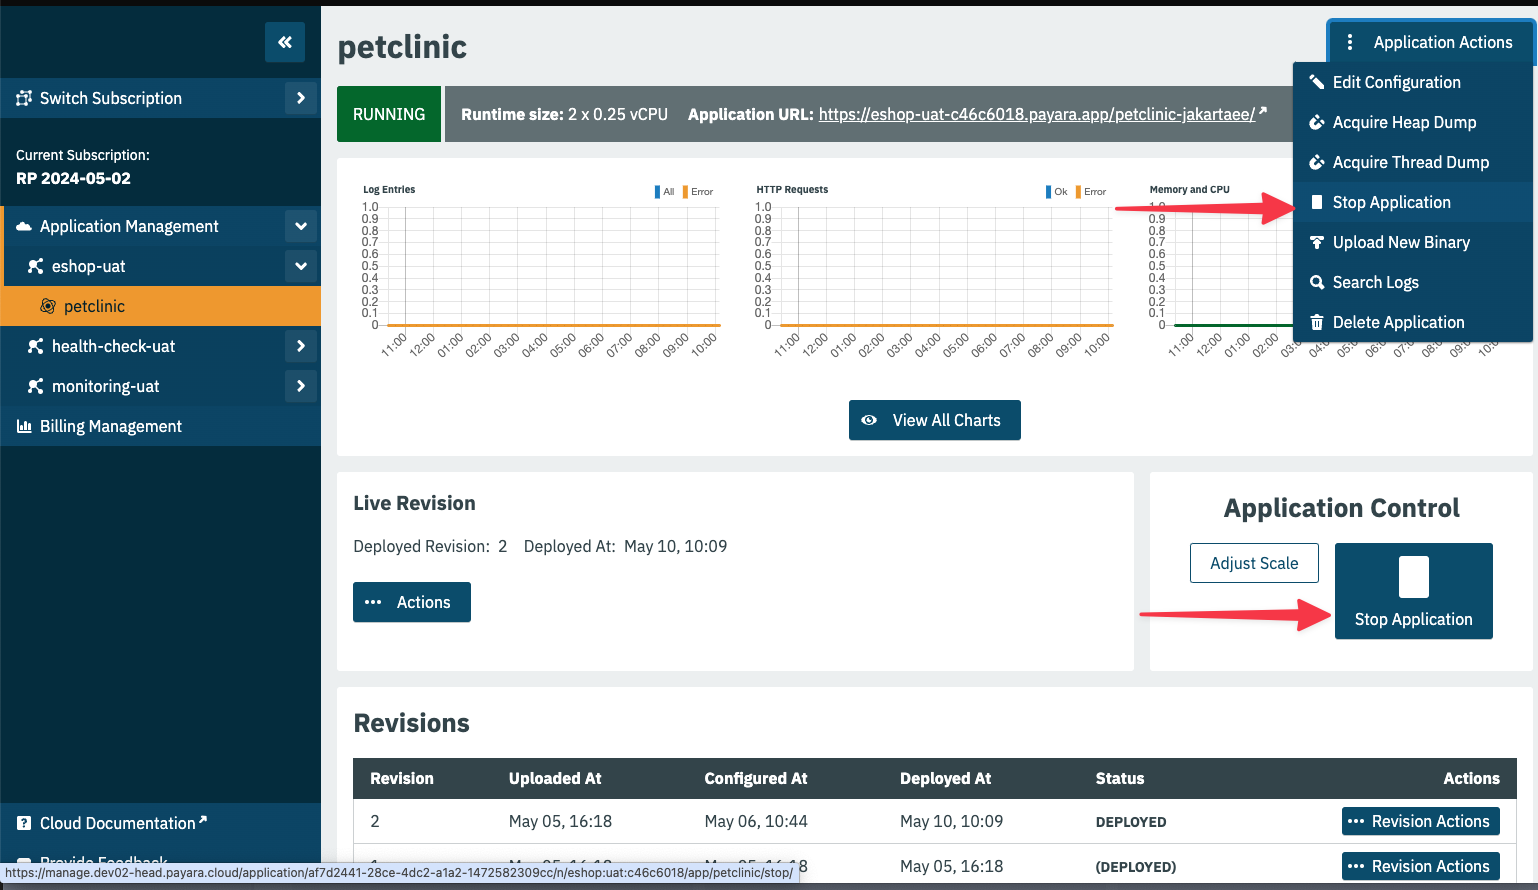
Select the application you wish to stop from the Namespace Navigator sidebar, open the Application Actions drop-down menu and choose Stop Application.
Confirm your action on the prompt that appears.

Removing an Application
Similarly, to delete an application, select the application you want to remove, open the Application Actions drop down menu, and choose Delete Application.
You’ll receive a confirmation prompt, type the name of the application you want to delete and click Delete to confirm.

Upon successful deletion, a confirmation message is displayed, and you’re redirected back to the Namespace Detail screen, where the application will no longer be listed.


