Uploading Applications
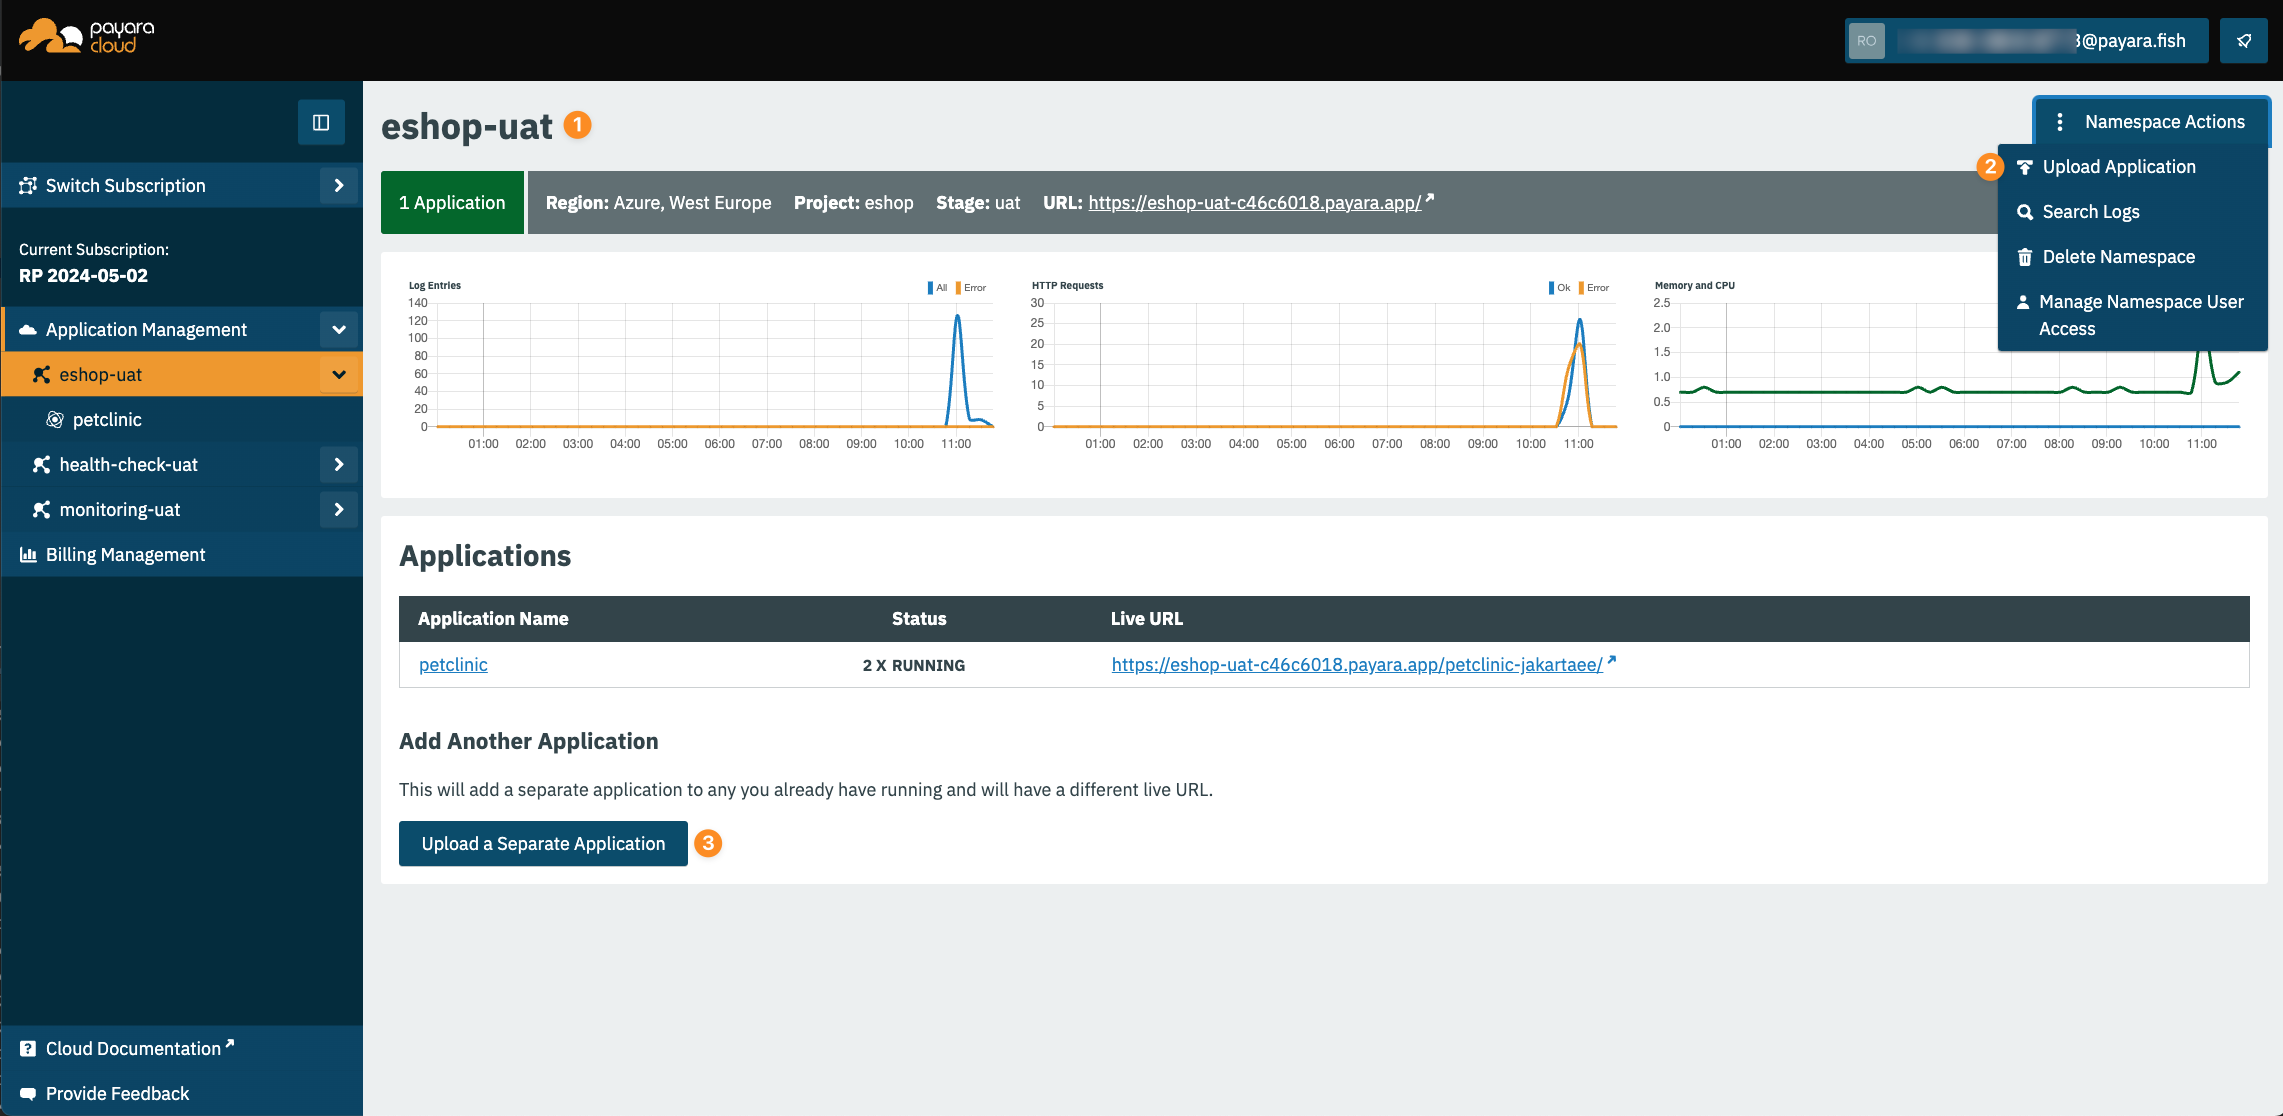
Applications can be uploaded within Namespace Multiple applications can be uploaded to the same Namespace.
-
❶ Namespace: The Namespace within which the application will be uploaded
-
❷ Namespace Actions Menu: Menu option to upload new application
-
❸ Upload Button: Dedicated new application upload button
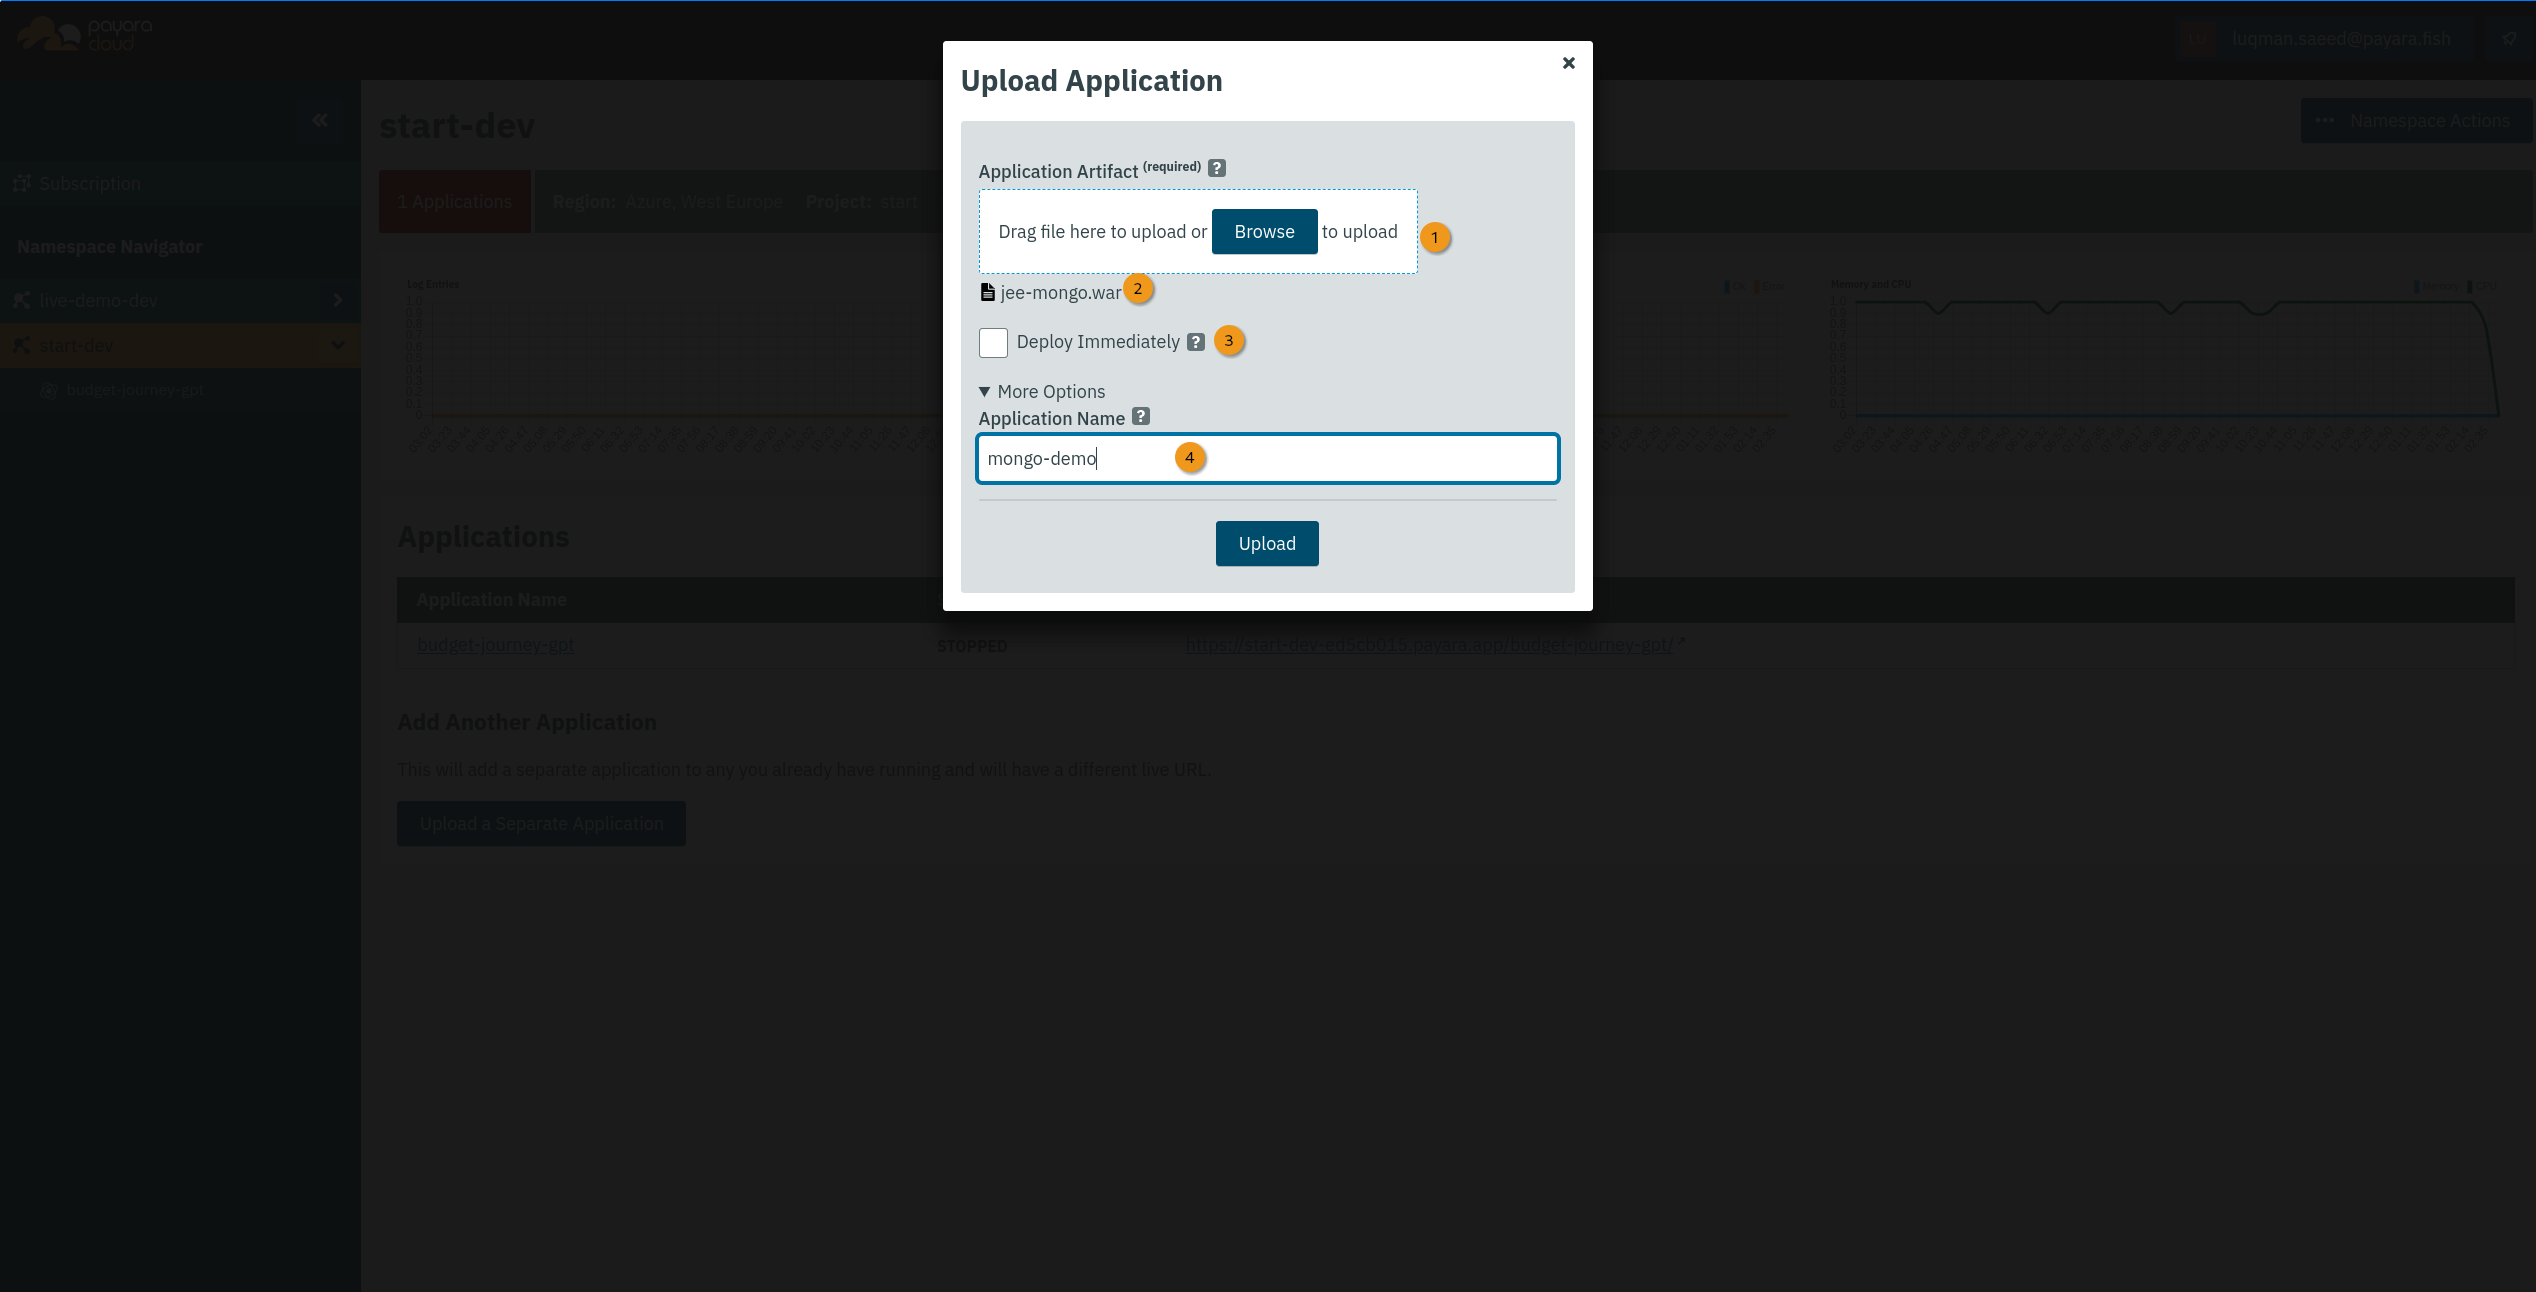
Clicking either of the new application upload options above brings up the following upload diaglog.
-
❶ Binary Upload Button: Click to bring up the file upload dialog to pick an application binary (.WAR file).
-
❷ Name Of Artifact: Shows the name of the selected application binary
-
❸ Deploy Option: Option to directly deploy the uploaded binary
-
❹ Application Name: Option to give the application a name distinct from the uploaded binary file
An uploaded application as shown in the above dialog will transition to the Pending State. Custom configurations can be carried out on the uploaded application to make it ready for deployment. An application can also be immediately deployed by selecting 'Deploy immediately' option and click Upload. A directly deployed application transitions to the Running State
Deploying Pending Applications
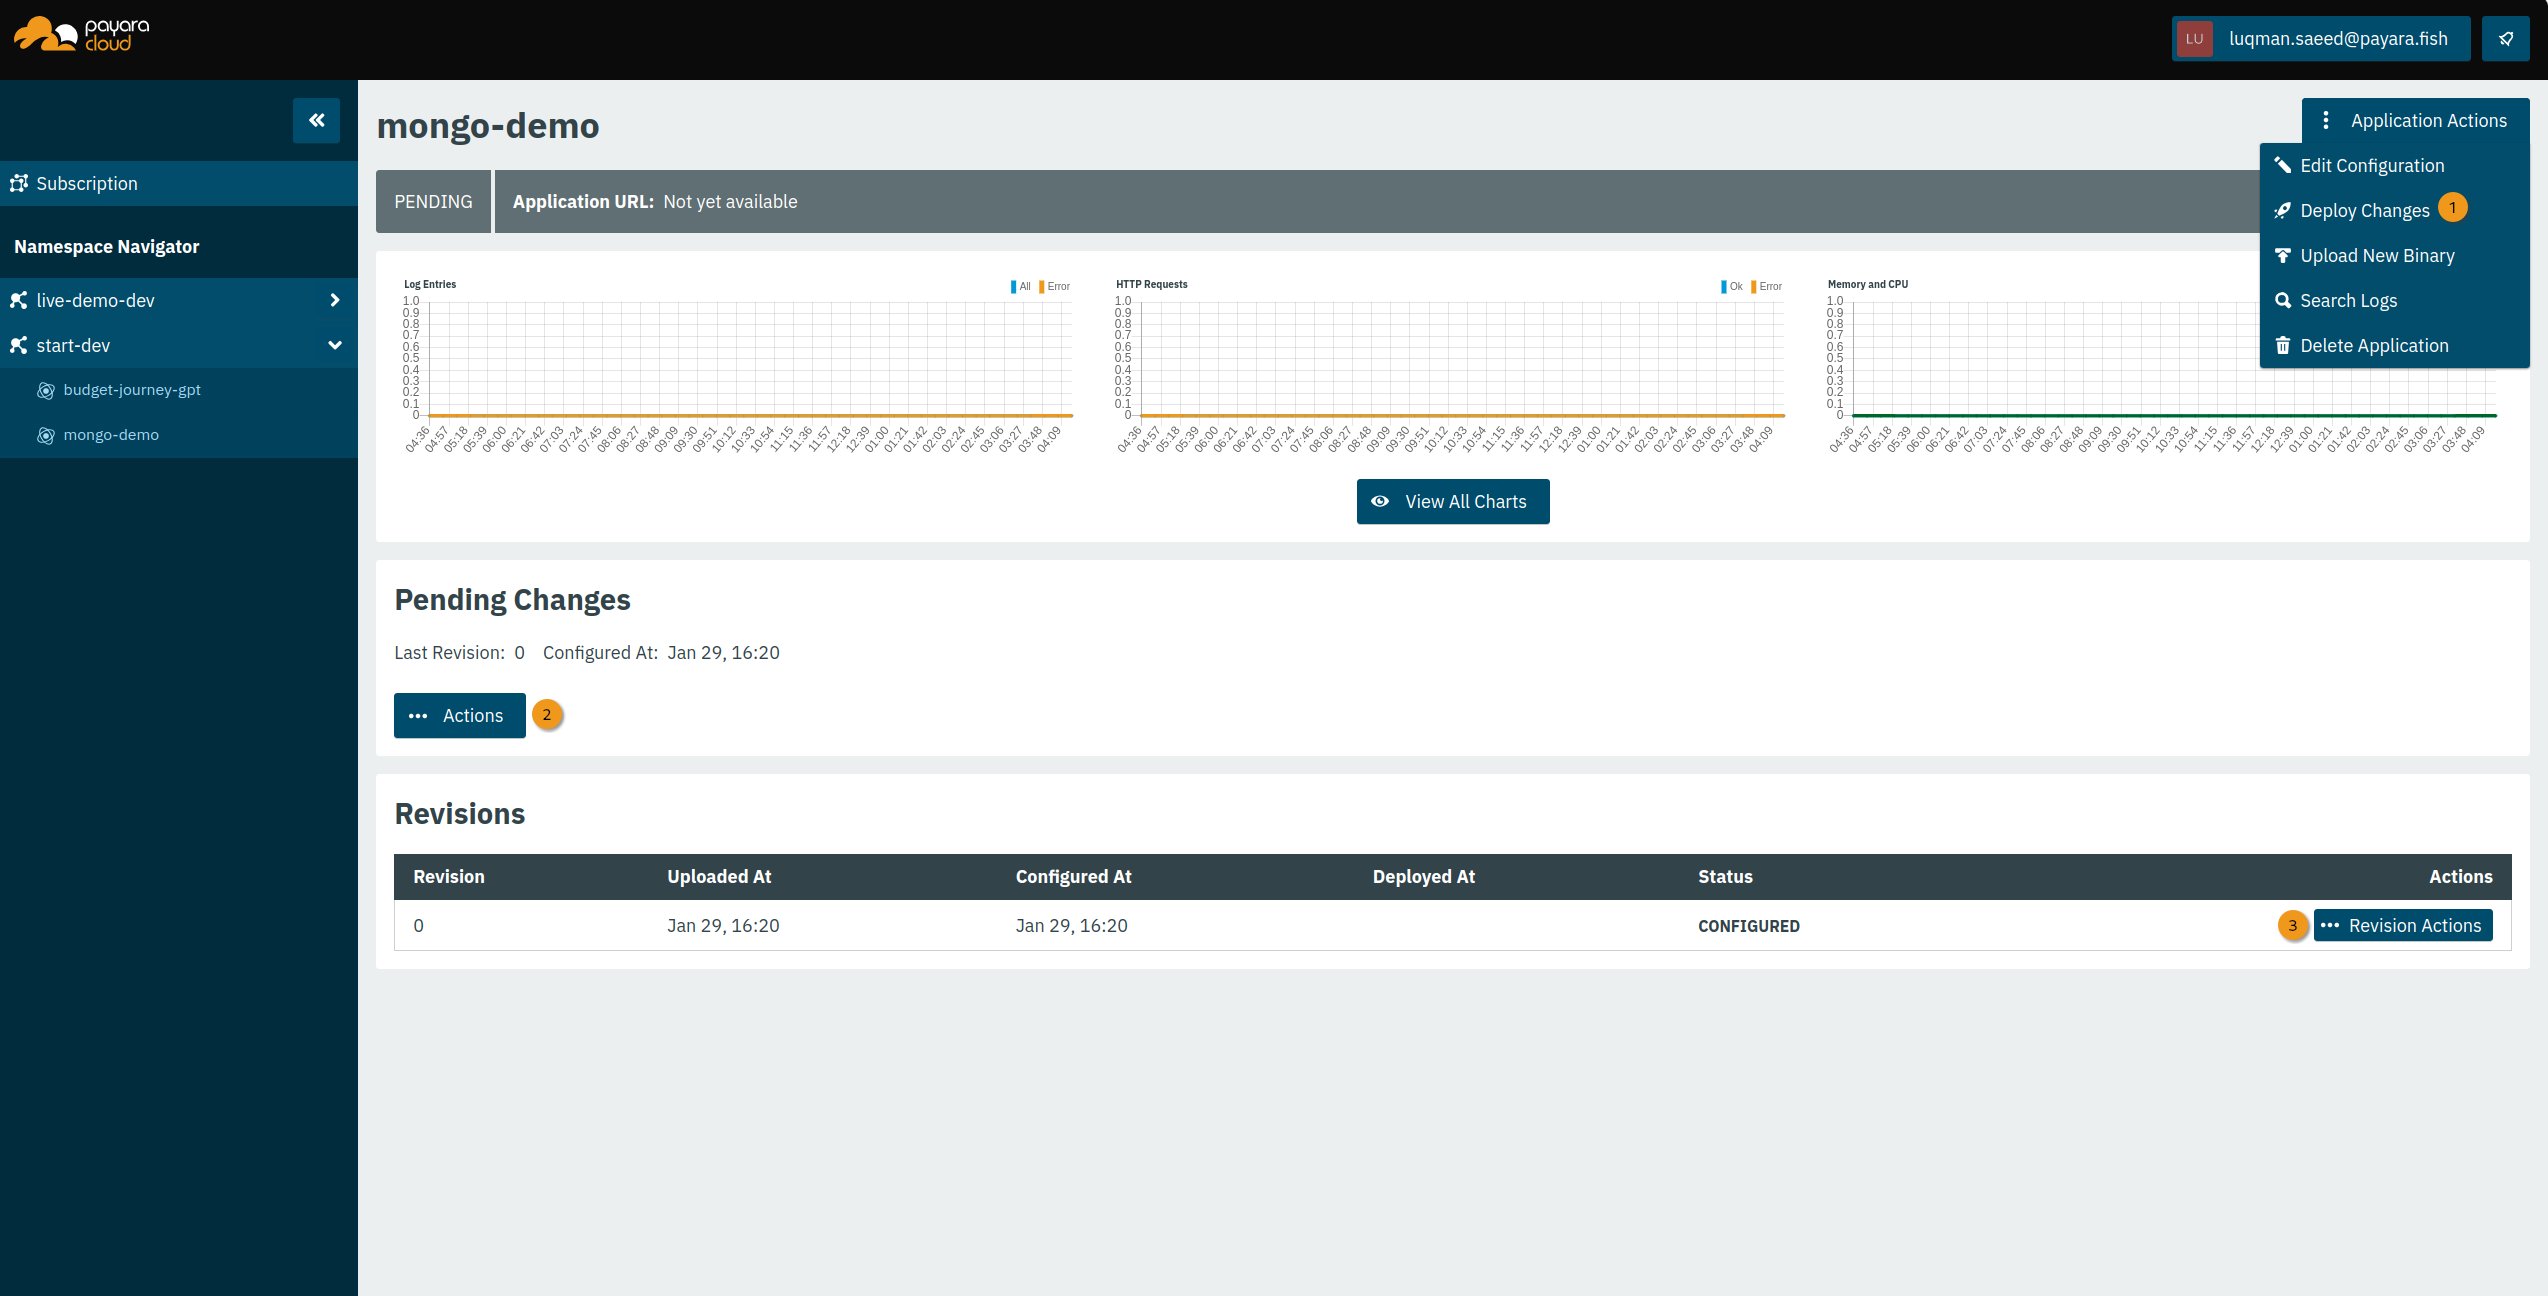
A pending application can be deployed by clicking the 'Deploy Changes' menu option from the Application Actions drop-down menu
-
❶ Deploy Changes: Deploy the uploaded application, transitioning it to the Running State
-
❷ and ❸ Both menus have the Deploy Changes option as well
A deployed application transitions to the Running State, which makes it accessible on the internet with its own unique domain.