Starting a Subscription
Selecting a Plan
Choose from a variety of Payara Cloud plans tailored to your needs. Each plan offers a specific amount of prepaid CPU time per month, a maximum instance size, and additional features like custom domain support.
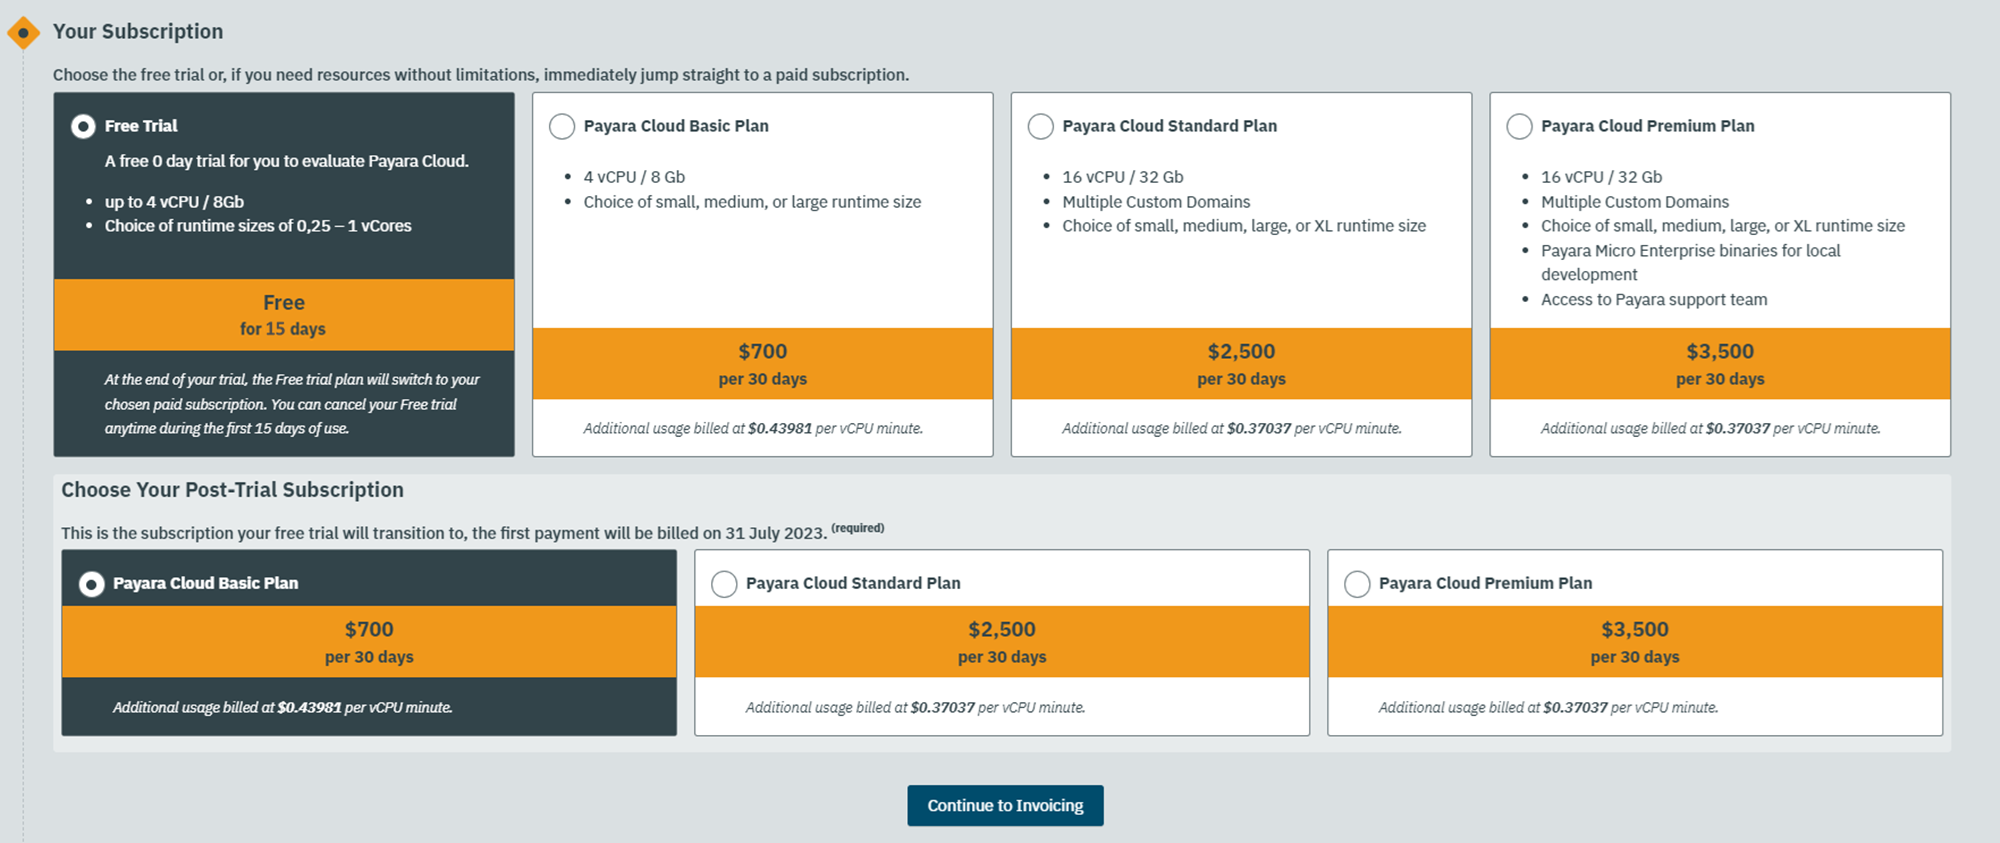
The first step of the Signup process is to select a plan. After making your selection and clicking Continue to Invoicing, a summary of your chosen plan appears above the invoicing details form. To change your plan, click Change Subscription.

Invoicing Details
Next, fill in your invoicing details:

- Contact Name and Email
-
Enter the contact details for receiving notifications and invoices. It defaults to your account’s email; modify if needed for different invoicing.
- Company Name, Address, City, Zip Code, Country
-
Provide your company’s invoicing information for the invoice.
- Tax ID Type, Tax ID
-
If VAT-registered, enter your VAT ID. Our payment processor will validate it according to the given ID Type. Tax type updates based on the selected country.
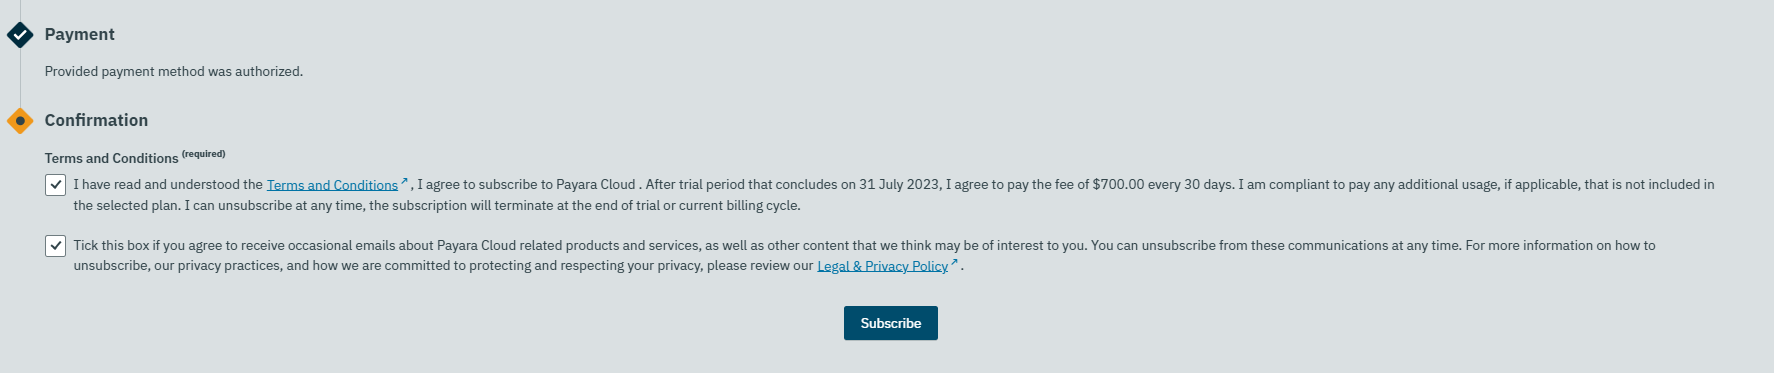
Click Continue to payment after filling in the details.
Payment method
Finally, authorize a payment method for automated invoice settlement. Clicking Confirm payment details might redirect you to your bank for payment authorization.
Your card is charged at the trial’s end and then at each billing period’s start.