Using the Payara Tools VS Code extension, you can integrate Payara Server within the VS Code IDE to start, stop and manage applications deployed to Payara Server. The extension also allows you to use the hotdeploy and autodeploy features for improving developer efficiency.
Adding Payara Server to VS Code
-
Open the command pallet using Ctrl + Shift + P, type Payara and select the Add Payara Server option.
-
Browse the Payara Server installation path (recently used servers location are listed by default).
-
Choose a name for the server.
-
Then select a domain from the list or create a new domain by pressing the + button.
| To add Payara Server to VSCode, the JAVA_HOME environment variable and the PATH system variable must be set. |
Managing Payara Server from VS Code
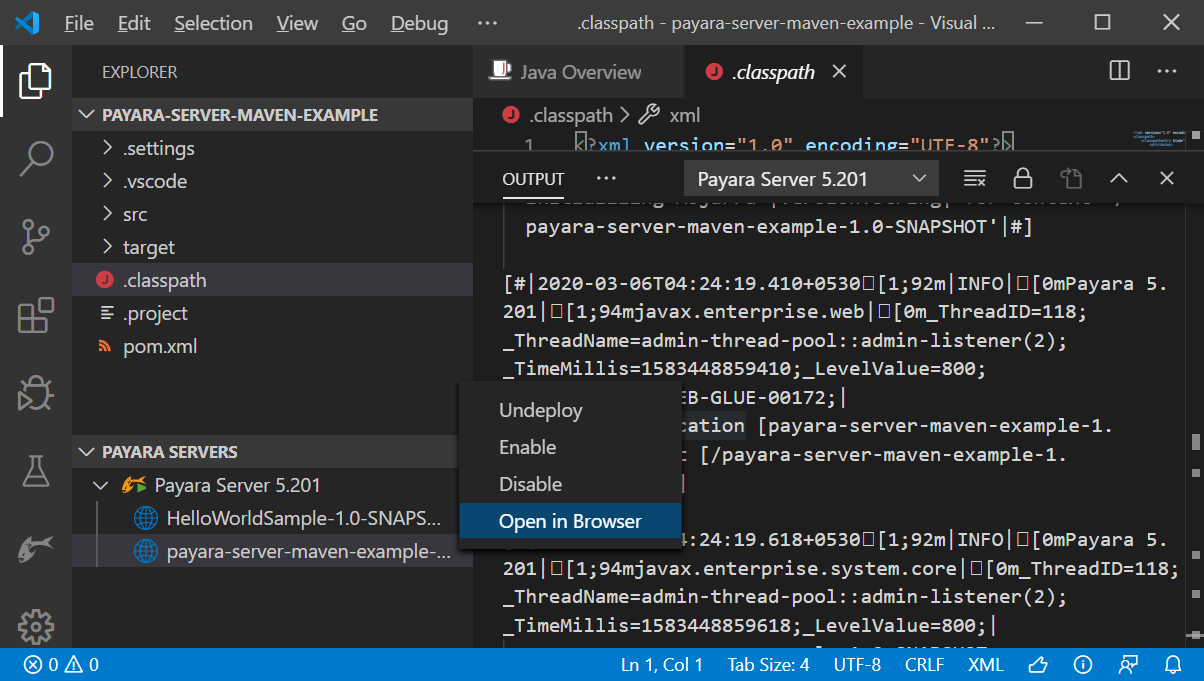
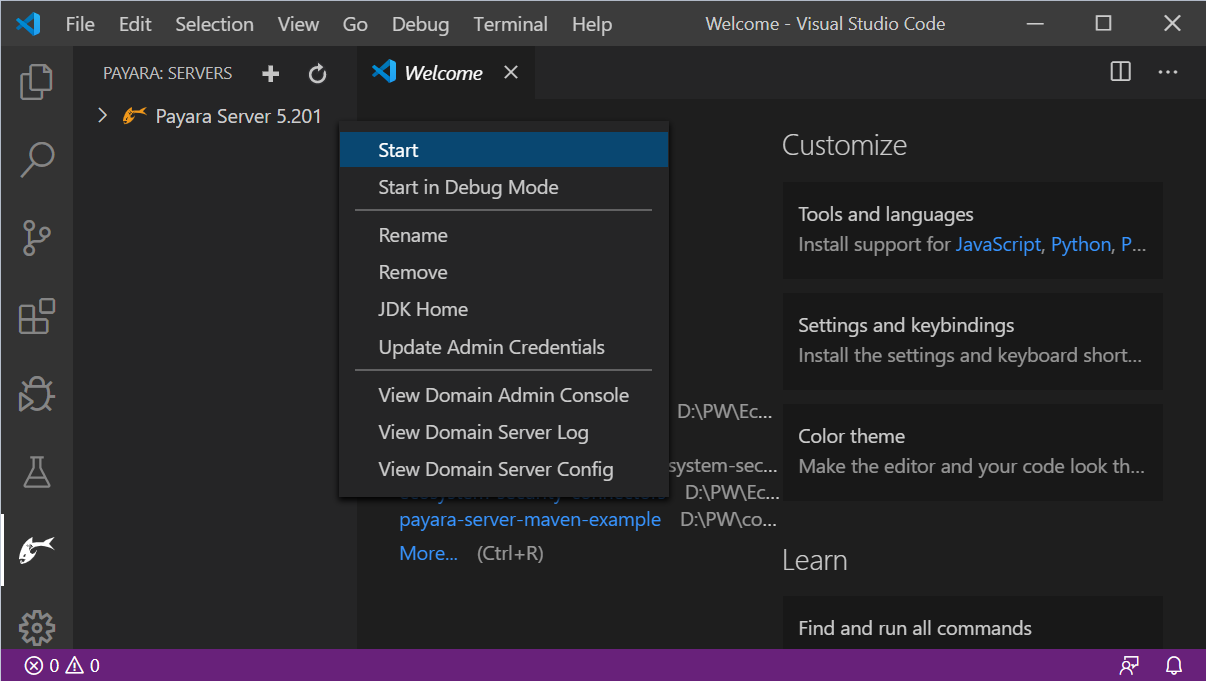
Once Payara Server is added to VS Code it can be found under the Payara Servers explorer panel with the configured name. Right-clicking on the server lets you perform any of the following actions:
-
Start, restart or stop the server
-
Start debugging the server
-
Rename or remove the server
-
Open admin console
-
Open server log
-
Open server domain.xml config
-
Update admin credentials
-
Update JDK path
Magaging Applications on Payara Server
Deploying Applications
An application can be deployed to Payara Server easily though VS Code. Applications can be deployed via either of the following two methods
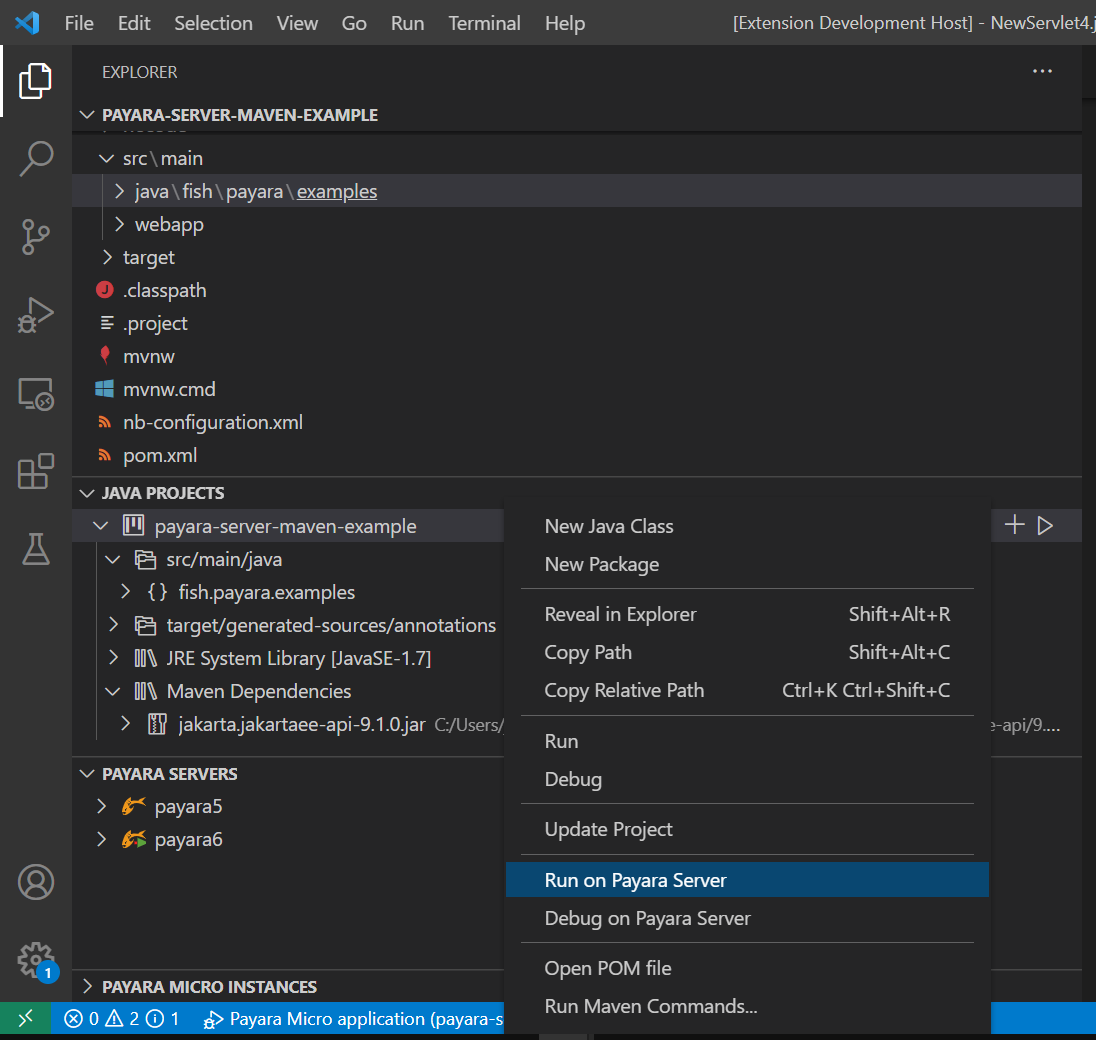
Right-click on the application and select Run on Payara Server to deploy the application:

Alternatively, an application can be deployed from the Java Projects interface: