The Payara Cloud Azure Customer Managed Region feature allows you to deploy your applications to a dedicated, private cloud region within your own Azure account, providing more control and isolation compared to a shared cloud environment.
In essence, this service enables you to use Payara Cloud’s managed Jakarta EE capabilities while maintaining your applications within your own Azure infrastructure.
Setting Up Your Payara Cloud Customer Managed Region on Azure
This guide will walk you through deploying a Payara Cloud Customer Managed Region on Azure, allowing you to run your Jakarta EE applications in a dedicated, private cloud environment.
Prerequisites
-
Public DNS Domain: You’ll need a domain you control to create a subdomain for your Payara Cloud region.
-
Azure Subscription: You must have an active Azure subscription to deploy the managed application.
Step-by-Step Setup
Sign Up for Payara Cloud
-
Go to the Payara Cloud signup page.
-
Create an account using your preferred method (username/password, GitHub, or Google).
If you already have a Payara Cloud account, login instead.
Create a Customer Managed Region
-
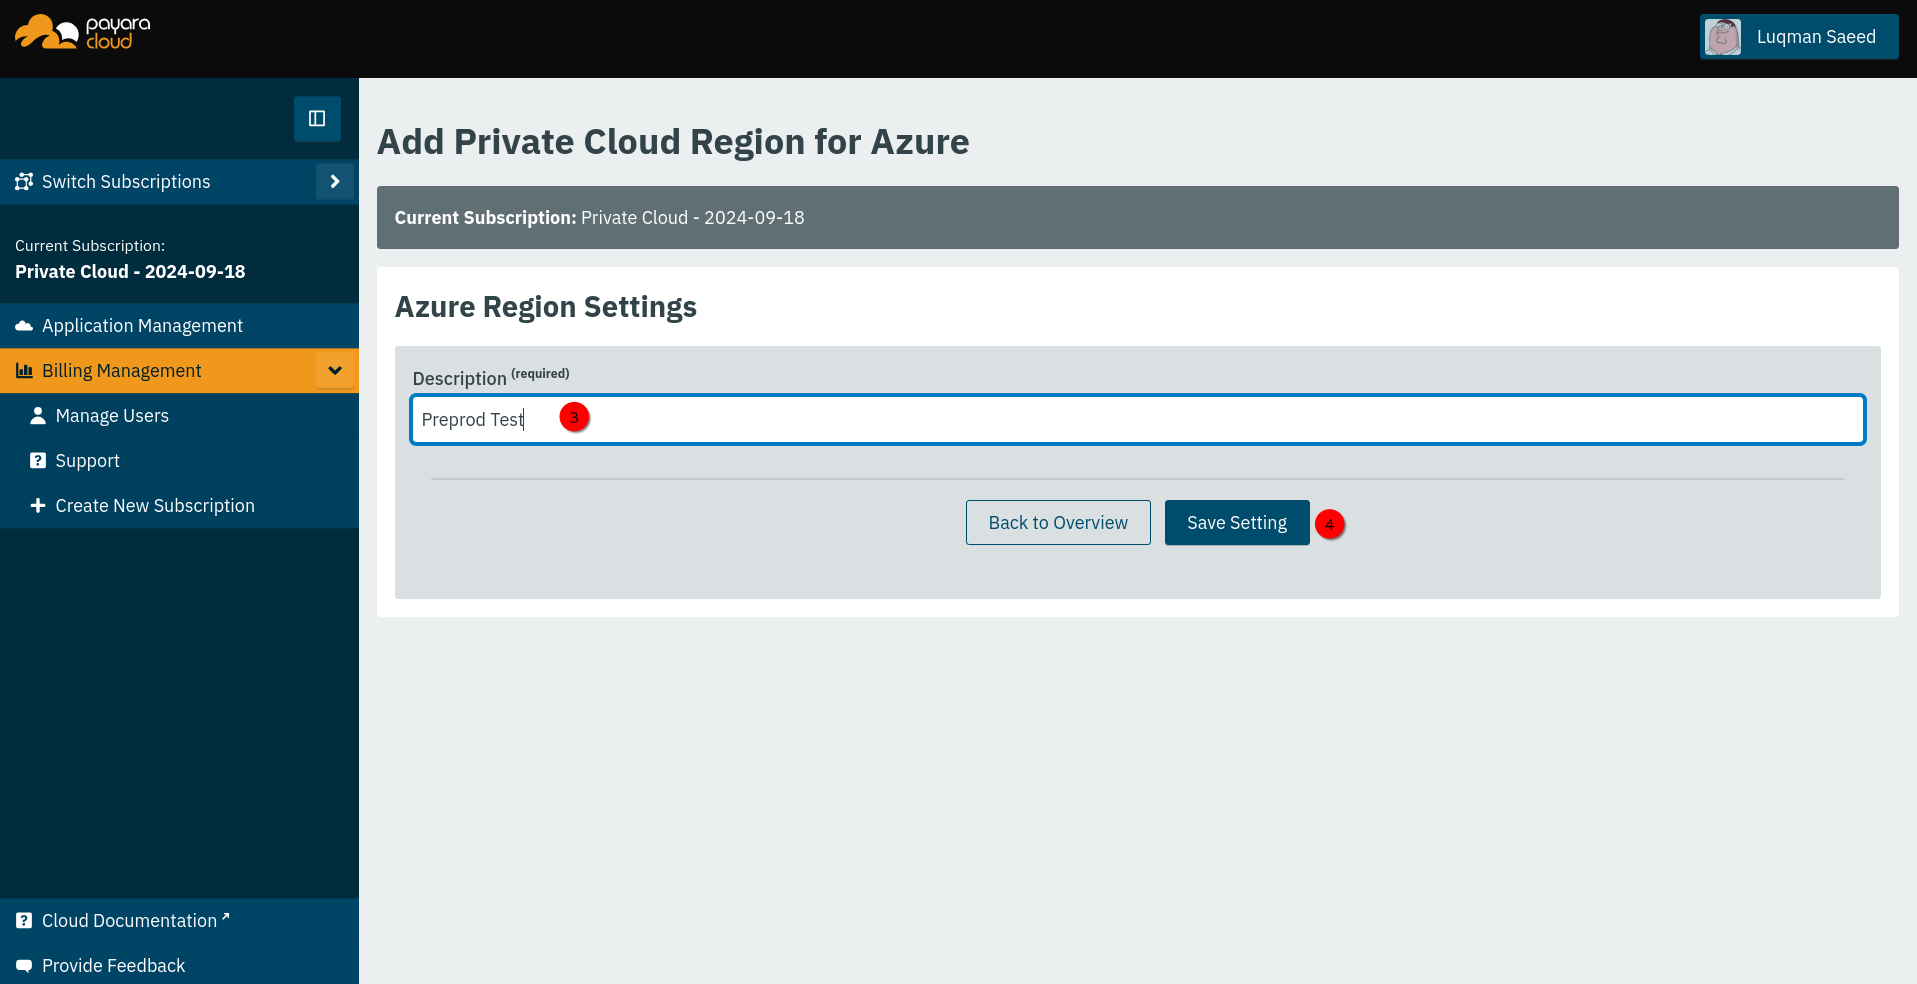
In Payara Cloud, select Switch Subscriptions menu.
-
Select Private Cloud menu under the Switch Subscription menu
-
Give your region a descriptive name
-
Click "Save Setting."
-
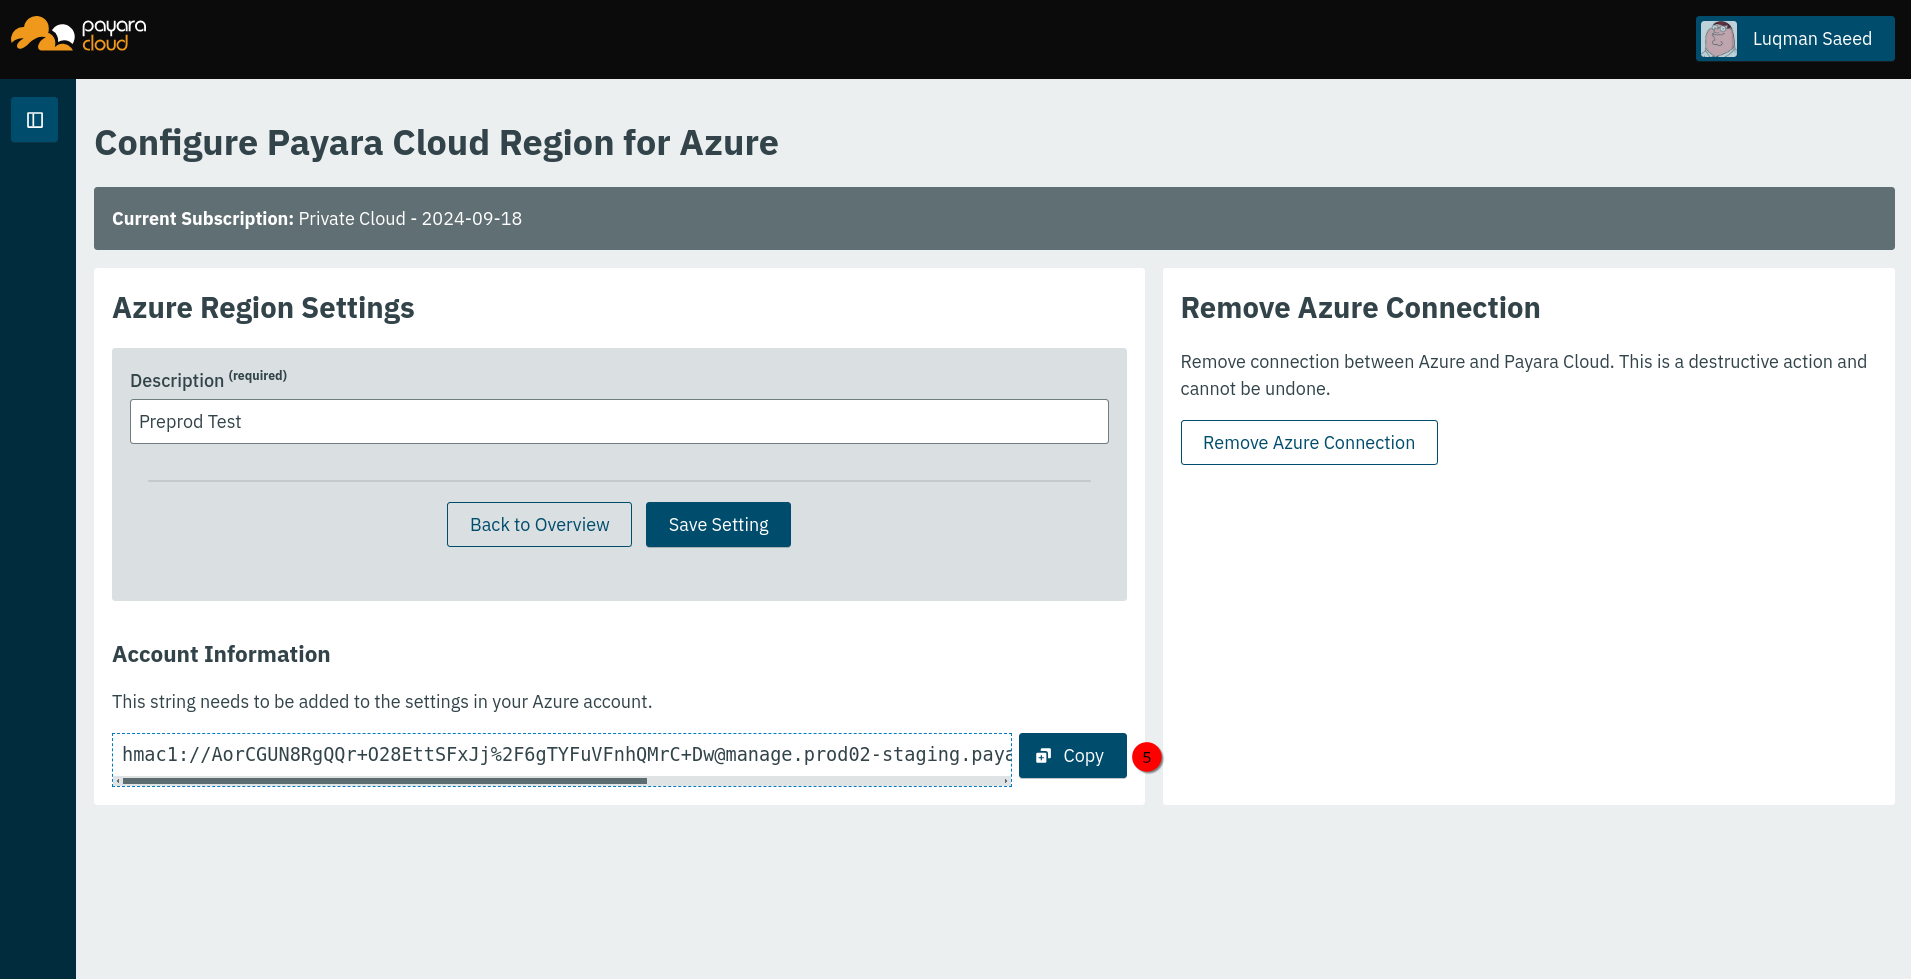
Copy the resulting Account Information Connection string. You’ll need that later in Azure.
Deploy the Managed Application on Azure
-
In the Azure portal, under My Market Place, click on plans and search for and select the "Payara Cloud Customer Managed Region" managed application.
-
Provide the following required parameters:
-
Payara Cloud Connection String: Paste the connection string you copied earlier.
-
Domain to Create: Enter the subdomain you want to use (e.g., 'payara.yourdomain.com').
-
Let’s Encrypt Email: Provide an email associated with your Let’s Encrypt certificates.
-
-
Deploy the managed application.
Configure DNS
-
Once the deployment is complete, note the dns_nameservers output from the application.
-
In your DNS provider’s settings for your main domain, create an NS record pointing your subdomain (e.g., 'payara') to the provided nameservers.
Verify and Deploy Applications
-
Back in Payara Cloud, go to "Subscription Management" and ensure your new region is "Active."
-
Navigate to "Application Management" and create a new namespace, selecting your custom region.
-
Upload your Jakarta EE web application (WAR file).
-
Select "Deploy Immediately" and click "Upload."
-
Once deployed, you can access your application using the provided URL.


