This chapter provides procedures for performing HTTP connectivity tasks in the Payara Server environment by using the asadmin command-line utility.
Instructions for accomplishing the tasks in this chapter by using the Administration Console are contained in the Administration Console online help.
About Internet Connectivity
The HTTP service provides functionality for deploying web applications and for making deployed web applications accessible by Internet clients, either in a single application server instance or in a cluster of multiple server instances. HTTP services are provided by two kinds of related objects: listeners and virtual servers.
For more information about clusters, see the Payara Server High Availability section.
About HTTP Network Listeners
An HTTP listener, also known as a network listener, is a listen socket that has an Internet Protocol (IP) address, a port number, a server name, and a default virtual server. Each virtual server provides connections between the server and clients through one or more listeners. Each listener must have a unique combination of port number and IP address. For example, an HTTP listener can listen for a host on all configured IP addresses on a given port by specifying the IP address 0.0.0.0.
A listener can listen on a specific port on all network interfaces by using the IP 0.0.0.0, and a configured port. Alternatively, the listener can specify a unique IP address for each listener while using the same port.
A virtual server will then be used to select a combination of network listeners to use for an application. For example, Payara Server has two default network listeners for user deployed applications: an insecure listener on port 8080 (http-listener-1), and a secure listener on port 8181 (http-listener-2).
Because an HTTP listener is a combination of IP address and port number, you can have multiple HTTP listeners with the same IP address and different port numbers, or with different IP addresses and the same port number (if your host was configured to respond to these addresses). However, if an HTTP listener uses the 0.0.0.0 IP address, which listens on all IP addresses on a port, you cannot create HTTP listeners for additional IP addresses that listen on the same port for a specific IP address. For example, if an HTTP listener uses 0.0.0.0:8080 (all IP addresses on port 8080), another HTTP listener cannot use 1.2.3.4:8080.
The host running the Payara Server typically has access to only one IP address. HTTP listeners typically use the 0.0.0.0 IP address and different port numbers, with each port number serving a different purpose. However, if the host does have access to more than one IP address, each address can serve a different purpose.
To access a web application deployed on Payara Server, use the URL http://localhost:8080/ (or https://localhost:8081/ for a secure application), along with the context root specified for the web application.
To access the Administration Console, use the URL https://localhost:4848/ or http://localhost:4848/asadmin/ (console default context root).
About Virtual Servers
A virtual server, sometimes called a virtual host, is an object that allows the same physical server to host multiple Internet domain names.
All virtual servers hosted on the same physical server share the IP address of that physical server. A virtual server associates a domain name for a server (such as www.aaa.com) with the particular server on which Payara Server is running. Each virtual server must be registered with the DNS server for your network.
| Do not confuse an Internet domain with the administrative domain of Payara Server. |
For example, assume that you want to host the following domains on your physical server: www.aaa.com, www.bbb.com, and www.ccc.com. Assume that these domains are respectively associated with web modules web1, web2, and web3. This means that the following URLs are handled by your physical server:
http://www.aaa.com:8080/web1
http://www.bbb.com:8080/web2
http://www.ccc.com:8080/web3
The first URL is mapped to virtual server www.aaa.com, the second URL is mapped to virtual server www.bbb.com, and the third is mapped to virtual server www.ccc.com. For this mapping to work, www.aaa.com, www.bbb.com, and www.ccc.com must all resolve to your physical server’s IP address and each virtual server must be registered with the DNS server for your network. In addition, on a UNIX system, add these domains to your /etc/hosts file (if the setting for hosts in your /etc/nsswitch.conf file includes files).
Administering HTTP Network Listeners
By default, when Payara Server starts, the following HTTP listeners are started automatically:
-
HTTP listeners associated with the virtual server named
server:-
The listener named
http-listener-1does not have security enabled. -
The listener named
http-listener-2has security enabled
-
-
An HTTP listener named
admin-listener, associated with the virtual server named__asadmin. For this listener, security is not enabled.
The following table describes the Payara Server default ports for the listeners that use ports.
| Listener | Default Port | Description |
|---|---|---|
Administrative server |
|
A domain’s administrative server is accessed by the Administration Console and the For the Administration Console, specify the port number in the URL of the browser. When running an |
HTTP |
|
The web server listens for HTTP requests on a port. To access deployed web applications and services, clients connect to this port. |
HTTPS |
|
Web applications configured for secure communications listen on a separate port. |
Network Listeners Configuration
|
When configuring network listeners from the admin console, there are some visible configuration options that transparently configure the protocol being used. If a configuration property isn’t shown here but is visible in the admin console, see Protocols. |
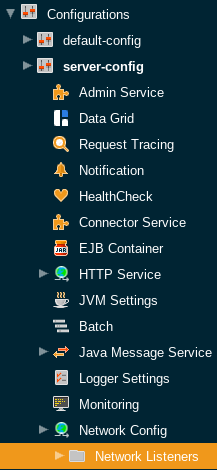
Existing network listeners can be configured from the admin console or with asadmin commands. The network listener configurations can be found in the admin console under Configurations → your-config → Network Config → Network Listeners.
The following fields can be configured for network listeners:
| configuration settings | Description | Asadmin Command |
|---|---|---|
Name |
The unique name of the network listener. This cannot be edited from the admin console. |
|
Protocol |
The protocol used by the network listener. This cannot be edited from the admin console. |
|
Status |
The status of the network listener. This determines whether the listener will be actively listening for requests. |
|
JK Enabled |
Whether mod_jk support should be enabled for this listener. Should only be enabled if mod_jk is being explicitly configured on an Apache Web Server in conjunction with Payara Server. |
|
JK Configuration File |
The location of the mod_jk configuration file. Defaults to ${com.sun.aas.instanceRoot}/config/glassfish-jk.properties. |
|
Port |
The port used by the network listener. The selected port will be used to listen for requests. |
|
Address |
The address used by the network listener. 0.0.0.0 corresponds to all addresses. |
|
Transport |
The transport used by the network listener. This cannot be edited from the admin console. Defaults to tcp. |
|
Thread Pool |
The thread pool used by the network listener. This determines the pool of threads used to service requests. |
|
To Create an Internet Connection
Use the subcommands in this procedure to create an internet connection with the full range of listener options. A network listener is created behind the scenes. For the shortcut version of this process , see To Create an HTTP Network Listener.
-
Ensure that the server is running.
Remote subcommands require a running server.
-
Create an HTTP or HTTPS protocol by using the
create-protocolsubcommand with the--securityenabledoption.To use the built-in
http-listener-1HTTP protocol, orhttp-listener-2HTTPS protocol, skip this step. -
Create an HTTP configuration by using the
create-httpsubcommand.To use a built-in protocol, skip this step.
-
Create a transport by using the
create-transportsubcommand.To use the built-in
tcptransport, skip this step. -
Create a thread pool by using the
create-threadpoolsubcommand.To avoid using a thread pool, or to use the built-in
http-thread-poolthread pool, skip this step.For additional thread pool information, see Administering Thread Pools.
-
Create an HTTP listener by using the
create-network-listenersubcommand.Specify a protocol and transport, optionally a thread pool.
-
To apply your changes, restart Payara Server.
See To Restart a Domain.
To Create an HTTP Network Listener
Use the create-http-listener subcommand or the create-network-listener subcommand in remote mode to create a listener. These subcommands provide backward compatibility and also provide a shortcut for creating network listeners that use the HTTP protocol.
Behind the scenes, a network listener is created as well as its associated protocol, transport, and HTTP configuration. This method is a convenient shortcut, but it gives access to only a limited number of options. If you want to specify the full range of listener options, follow the instructions in To Create an Internet Connection.
-
Ensure that the server is running. Remote subcommands require a running server.
-
Create an HTTP network listener by using the
create-network-listenersubcommand or thecreate-http-listenersubcommand. -
If needed, restart the server. If you edit the special HTTP network listener named
admin-listener, you must restart the server for changes to take effect.See To Restart a Domain.
Example - Creating an HTTP Listener
This example creates an HTTP listener named sampleListener that uses a non-default number of acceptor threads. Security is not enabled at runtime.
asadmin create-http-listener --listeneraddress `0.0.0.0` --listenerport 7272 --default-virtual-server server --servername host1.sun.com --acceptorthreads 100 --securityenabled=false --enabled=false sampleListener
Command create-http-listener executed successfully.
Example - Creating a Network Listener
This example a network listener named sampleListener that is not enabled at runtime:
asadmin create-network-listener --listenerport 7272 protocol http-1 --enabled=false sampleListener
Command create-network-listener executed successfully.
You can also view the full syntax and options of the subcommand by typing asadmin help create-http-listener or asadmin help create-network-listener at the command line.
To List HTTP Network Listeners
Use the list-http-listeners subcommand or the list-network-listeners subcommand in remote mode to list the existing HTTP listeners.
-
Ensure that the server is running. Remote subcommands require a running server.
-
List HTTP listeners by using the
list-http-listenersorlist-network-listenerssubcommand.
Example - Listing HTTP Listeners*
This example lists the HTTP listeners. The same output is given if you use the list-network-listeners subcommand.
asadmin list-http-listeners
admin-listener
http-listener-2
http-listener-1
Command list-http-listeners executed successfully.
You can also view the full syntax and options of the subcommand by typing asadmin help list-http-listeners or asadmin help list-network-listeners at the command line.
To Update an HTTP Network Listener
-
List HTTP listeners by using the
list-http-listenersorlist-network-listenerssubcommand. -
Modify the values for the specified listener by using the
setsubcommand.The listener is identified by its dotted name.
To Restart an HTTP Network Listener
The restart-http-listeners commands restarts all HTTP listeners but the admin-listener of the targeted instance(s). It is either used with the --all flag to target all instances or with a particular target instance, deployment group or cluster following the --target parameter.
When target and all parameters are both omitted the default target is the DAS.
This command only restarts all HTTP listeners except the admin-listener. IIOP listeners are not affected and may require a server restart to make changes take effect.
|
To Delete an HTTP Network Listener
Use the delete-http-listener subcommand or the delete-network-listener subcommand in remote mode to delete an existing HTTP listener. This disables secure communications for the listener.
-
Ensure that the server is running. Remote subcommands require a running server.
-
List HTTP listeners by using the
list-http-listenerssubcommand. -
Delete an HTTP listener by using the
delete-http-listenerordelete-network-listenersubcommand. -
To apply your changes, restart Payara Server. See To Restart a Domain.
Example - Deleting an HTTP Listener
This example deletes the HTTP listener named sampleListener:
asadmin delete-http-listener sampleListener
Command delete-http-listener executed successfully.
You can also view the full syntax and options of the subcommand by typing asadmin help delete-http-listener or asadmin help delete-network-listener at the command line.
Configure an HTTP Listener for SSL
Use the create-ssl subcommand in remote mode to create and configure an SSL element in the specified listener. This enables secure communication for the listener.
-
Ensure that the server is running.
Remote subcommands require a running server.
-
Configure an HTTP listener by using the
create-sslsubcommand. -
To apply your changes, restart Payara Server.
See To Restart a Domain.
Example - Configuring an HTTP Listener for SSL
This example enables the HTTP listener named http-listener-1 for SSL:
asadmin create-ssl --type http-listener --certname sampleCert http-listener-1
Command create-ssl executed successfully.
You can also view the full syntax and options of the subcommand by typing asadmin help create-ssl at the command line.
Configure SNI for HTTP Listeners
Server Name Indication, SNI for short, allows you to use multiple SSL certificates with the same IP address. When enabled, the server will look for a certificate in the configured keystore using a nickname that matches the host name requested.
SNI can be enabled by configuring a network listener. Existing network listeners can be configured from the admin console or with asadmin commands. The network listener configurations can be found in the admin console under Configurations → <your-config> → Network Config → Network Listeners.
From here, click on the SSL tab, and make sure that the SNI Support checkbox is ticked.
| For SNI to take effect, the network listener must have security enabled by providing a default keypair and certificate, and by checking the Security box on the HTTP tab. |
Configure Optional Client Authentication for SSL
In Payara Server, you can configure the SSL protocol of an HTTP listener such that it requests a certificate before permitting a client connection, but does not refuse a connection if the client does not provide one. To enable this feature, set the client-auth property of the SSL protocol to the value want. For example:
asadmin set configs.config.config-name.network-config.protocols.protocol.listener-name.ssl.client-auth=wantConfigure a Custom SSL Implementation
In Payara Server, you can configure the SSL protocol an HTTP listener such that it uses a custom implementation of SSL. To enable this feature, set the classname property of the SSL protocol to the name of a class that implements the com.sun.grizzly.util.net.SSLImplementation interface. For example:
asadmin> set configs.config.config-name.network-config.protocols.protocol.listener-name.ssl.classname=SSLImplementation-class-nameBy default, Payara Server uses the implementation com.sun.enterprise.security.ssl.GlassfishSSLImpl for the SSL protocol.
Delete SSL From an HTTP Listener
Use the delete-ssl subcommand in remote mode to delete the SSL element in the specified listener. This disables secure communications for the listener.
-
Ensure that the server is running.
Remote subcommands require a running server.
-
Delete SSL from an HTTP listener by using the
delete-sslsubcommand. -
To apply your changes, restart Payara Server.
See To Restart a Domain.
Example - Deleting SSL From an HTTP Listener
This example disables SSL for the HTTP listener named http-listener-1:
asadmin delete-ssl --type http-listener http-listener-1
Command delete-ssl executed successfully.
You can also view the full syntax and options of the subcommand by typing asadmin help delete-ssl at the command line.
Assign a Default Virtual Server to an HTTP Listener
-
In the Administration Console, open the HTTP Service component under the relevant configuration.
-
Open the HTTP Listeners component under the HTTP Service component.
-
Select or create a new HTTP listener.
-
Select from the Default Virtual Server drop-down list. For more information, see:
For details, click the Help button in the Administration Console from the HTTP Listeners page.
Administering HTTP Protocols
A protocol is used by a network listener to determine the nature of the communication expected by the listener. For example, a protocol determines the timeout of a request, as well as whether HTTPS should be used. The reason the protocol is separate to the listener is so that the same protocol configuration can be used to listen on multiple ports.
Existing protocols can be configured from the admin console or with asadmin commands. The protocol configurations can be found in the Admin Console under Configurations → your-config → Network Config → Protocols.
Each HTTP listener has an HTTP protocol, which is created either by using the create-protocol subcommand or by using the built-in protocols that are applied when you follow the instructions in To Create an HTTP Network Listener.
Protocol Configurations
| configuration settings | Description | Asadmin Command |
|---|---|---|
Security |
Whether security is enabled for the protocol. When disabled, all the SSL/TLS options are ignored. |
|
| configuration settings | Description | Asadmin Command | ||
|---|---|---|---|---|
Server Name |
The name of the server. This will be sent as the |
|
||
Default Virtual Server |
The default virtual server used for the protocol. Establishes the request priority when multiple virtual servers are configured. |
|
||
Redirect Port |
The port used for SSL transport redirection. |
|
||
Max Connections |
The maximum number of requests per connection to keep in keep-alive mode. |
|
||
Timeout |
The amount of time in seconds before a connection is deemed as idle. After this, the connection will no longer be in keep-alive state. |
|
||
Upload Timeout Enabled |
Enables closing a connection that is reading bytes slowly after the |
|
||
Connection Upload Timeout |
The timeout, in milliseconds, for uploads.
|
|
||
Request Timeout |
The timeout, in seconds, for requests.
|
|
||
Send Buffer Size |
The size, in bytes, of the send buffer. |
|
||
Header Buffer Length |
The size, in bytes, of the buffer used to read the request data. |
|
||
Max Post Size |
The maximum size, in bytes, of POST actions. |
|
||
Max Form Post Size |
The maximum size, in bytes, of a POST form. |
|
||
Max Save Post Size |
The maximum size, in bytes, of a POST request that will be saved during authentication. |
|
||
URI Encoding |
The character set used to decode the request URIs received. |
|
||
Compression |
Whether to enable HTTP/1.1 GZIP compression to save server bandwidth. Will be ignored when HTTP/2 is used. |
|
||
Compression Level |
The level of compression to be used:
|
|
||
Compression Strategy |
Sets the strategy to be used during HTTP compression. |
|
||
Compressible Mime Types |
Comma separated list of MIME types for which HTTP compression is used. |
|
||
Compression Minimum Size |
The minimum size of a file that determines whether compression is applied. |
|
||
No-Compression User Agents |
Comma separated list of regular expressions matching user agents for which compression should not be used. |
|
||
Restricted User Agents |
List of restricted user agents for which HTTP compression is applied. |
|
||
Default Response Type |
The default response type if none are matched. Specified as a semicolon delimited string consisting of content type, encoding, language, charset. |
|
||
Adapter |
The class name of the static resources adapter. |
|
||
Comet Support |
Whether comet support is enabled or not. |
|
||
DNS Lookup |
Enables Domain Name System lookups. |
|
||
Trace Enabled |
Enables the TRACE operation
|
|
||
Auth Pass Through |
Enable this if the network listener receives traffic from an SSL terminating proxy server. |
|
||
Chunking Enabled |
Enables HTTP response chunking. |
|
||
XFrame Options |
When enabled, the |
|
||
Encoded Slash |
Allow encoded slashes (e.g. |
|
||
Websockets Support Enabled |
Allows Websockets to be used. |
|
||
Scheme Mapping |
HTTP header name used for identifying the originating protocol of an HTTP request. |
|
||
Remote User Mapping |
HTTP header name used for identifying the originating user of an HTTP request. |
|
||
Enable Cookie SameSite |
Enabling to set all cookies to use the SameSite value. |
|
||
Cookie SameSite Value |
The values to be used:
Users can set up the SameSite Cookie attribute at the application level by using the Set this attribute by using the |
|
| configuration settings | Description | Asadmin Command | ||
|---|---|---|---|---|
HTTP/2 Enabled |
Whether to enable HTTP/2 support.
|
|
||
Disable HTTP/2 Cipher Check |
Whether TLS connections can be established using insecure cipher suites. |
|
||
HTTP/2 Max Concurrent Streams |
The number of maximum concurrent streams allowed per HTTP/2 connection. |
|
||
HTTP/2 Initial Window Size |
The initial window size in bytes. |
|
||
HTTP/2 Max Frame Payload Size |
The maximum size of the HTTP/2 frame payload to be accepted. |
|
||
HTTP/2 Max Header List Size |
The maximum size, in bytes, of the header list. |
|
||
Streams High Watermark |
The maximum number of streams that are allowed. Excess streams will be cleaned out periodically in proportion to the maximum number of streams. |
|
||
Streams Clean Percentage |
The number of streams to process when the high watermark is exceeded.
|
|
||
Streams Clean Frequency Check |
The number of streams that must be closed before checking if the number of streams exceeds the high watermark. |
|
||
HTTP/2 Push |
Enables server push. This is enabled by default. |
|
| configuration settings | Description | Asadmin Command | ||||
|---|---|---|---|---|---|---|
TLS V1.2 Enabled |
Whether to enable TLS V1.2 or not. Will be ignored if TLS is disabled. |
|
||||
TLS V1.3 Enabled |
Whether to enable TLS V1.3 or not. Will be ignored if TLS is disabled.
|
|
||||
Client Authentication |
When enabled, clients will be required to authenticate themselves to the server. |
|
||||
Certificate Nickname |
The alias of the certificate to be supplied on secure requests. The certificate should be present in the server keystore. |
|
||||
Key Store |
The name of the keystore file used to secure communication handled by this network listener. |
|
||||
Trust Store |
The name of the trust store file where trusted certificates are stored. |
|
||||
Trust Algorithm |
The name of the trust management algorithm (e.g. PKIX) to use for certification path validation. |
|
||||
Max Certificate Length |
Maximum number of non self-issued intermediate certificates that can exist in a certification path. Only used if the trust algorithm is set to PKIX. |
|
||||
Enabled Ciphers |
A list of the server enabled ciphers. This string is stores as a comma separated list of the enabled ciphers with a |
|
||||
Handshake Timeout |
The timeout, in milliseconds, for a handshake. After this timeout the handshake will be aborted. |
|
||||
TLS Rollback |
Whether TLS rollback is enabled or not. |
|
||||
HSTS Enabled |
Whether HSTS is enabled. When enabled, the server will respond to requests with the The header takes the following form: Strict-Transport-Security: max-age=31536000; includeSubDomains; preload The last 2 attributes are added based on the other HSTS configuration options.
|
|
||||
HSTS Subdomains |
When enabled in combination with HSTS, |
|
||||
HSTS Preload |
When enabled in combination with HSTS, |
|
Create a Protocol
Use the create-protocol subcommand in remote mode to create a protocol.
-
Ensure that the server is running.
Remote subcommands require a running server.
-
Create a protocol by using the
create-protocolInformation about options and properties for the subcommand are included in this help page.
Example - Creating an HTTP Protocol
This example creates a protocol named http-1 with security enabled.
asadmin> create-protocol --securityenabled=true http-1
Command create-protocol executed successfully.
You can also view the full syntax and options of the subcommand by typing asadmin help create-protocol at the command line.
List Protocols
Use the list-protocols subcommand in remote mode to list the existing HTTP protocols.
-
Ensure that the server is running. Remote subcommands require a running server.
-
List the existing protocols by using the
list-protocolssubcommand.
Example - Listing the Protocols
This example lists the existing protocols.
asadmin list-protocols
admin-listener
http-1
http-listener-1
http-listener-2
Command list-protocols executed successfully.
You can also view the full syntax and options of the subcommand by typing asadmin help list-protocols at the command line.
Delete a Protocol
Use the delete-protocol subcommand in remote mode to remove a protocol.
-
Ensure that the server is running. Remote subcommands require a running server.
-
Delete a protocol by using the
delete-protocolsubcommand
Administering HTTP Configurations
Each HTTP listener has an HTTP configuration, which is created either by using the create-http subcommand or by using the built-in configurations that are applied when you follow the instructions in To Create an HTTP Network Listener.
Create an HTTP Configuration
Use the create-http subcommand in remote mode to create a set of HTTP parameters for a protocol. This set of parameters configures one or more network listeners,
-
Ensure that the server is running. Remote subcommands require a running server.
-
Create an HTTP configuration by using the
create-httpsubcommand.Information about options and properties for the subcommand are included in this help page.
Example - Creating an HTTP Configuration
This example creates an HTTP parameter set for the protocol named http-1.
asadmin create-http --timeout-seconds 60 --default-virtual-server server http-1
Command create-http executed successfully.
You can also view the full syntax and options of the subcommand by typing asadmin help create-http at the command line.
Delete an HTTP Configuration
Use the delete-http subcommand in remote mode to remove HTTP parameters from a protocol.
-
Ensure that the server is running. Remote subcommands require a running server.
-
Delete the HTTP parameters from a protocol by using the
delete-httpsubcommand.
Example - Deleting an HTTP Configuration
This example deletes the HTTP parameter set from a protocol named http-1.
asadmin delete-http http-1
Command delete-http executed successfully.
You can also view the full syntax and options of the subcommand by typing asadmin help delete-http at the command line.
Administering HTTP Transports
Each HTTP listener has an HTTP transport, which is created either by using the create-transport subcommand or by using the built-in transports that are applied when you follow the instructions in To Create an HTTP Network Listener.
Create a Transport
Use the create-transport subcommand in remote mode to create a transport for a network listener,
-
Ensure that the server is running. Remote subcommands require a running server.
-
Create a transport by using the
create-transportsubcommand.Information about options and properties for the subcommand are included in this help page.
Example - Creating a Transport
This example creates a transport named http1-trans that uses a non-default number of acceptor threads.
asadmin create-transport --acceptorthreads 100 http1-trans
Command create-transport executed successfully.
You can also view the full syntax and options of the subcommand by typing asadmin help create-transport at the command line.
List Transports
Use the list-transports subcommand in remote mode to list the existing HTTP transports.
-
Ensure that the server is running. Remote subcommands require a running server.
-
List the existing transports by using the
list-transportssubcommand.
Example - Listing HTTP Transports
This example lists the existing transports.
asadmin list-transports
Enter the value for the target operand> server
http1-trans
tcp
Command list-transports executed successfully.
The values for target operand are as follows:
- target
-
Restricts the listing to transports for a specified target. Valid values are as follows:
server-
Lists the transports for the default server instance. This is the default value.
- configuration-name
-
Lists the transports for the specified configuration.
- cluster-name
-
Lists the transports for all server instances in the specified cluster.
- instance-name
-
Lists the transports for the specified server instance. You can also view the full syntax and options of the subcommand by typing
asadmin help list-transportsat the command line.
Delete a Transport
Use the delete-transport subcommand in remote mode to remove a transport.
-
Ensure that the server is running. Remote subcommands require a running server.
-
Delete a transport by using the
delete-transportsubcommand.
Administering Virtual Servers
A virtual server is a virtual web server that serves content targeted for a specific URL. Multiple virtual servers can serve content using the same or different host names, port numbers, or IP addresses. The HTTP service directs incoming web requests to different virtual servers based on the URL.
Just as multiple network cards in a single PC make the network see them as separate hosts, virtual servers allow one physical server instance to appear as many, enabling multiple domain names to be associated with the same server.
When you first install Payara Server, a default virtual server is created. You can assign a default virtual server to each new HTTP listener you create.
Web applications and Jakarta EE applications containing web components (web modules) can be assigned to virtual servers during deployment. A web module can be assigned to more than one virtual server, and a virtual server can have more than one web module assigned to it. If you deploy a web application and don’t specify any assigned virtual servers, the web application is assigned to all currently defined virtual servers.
If you then create additional virtual servers and want to assign existing web applications to them, you must redeploy the web applications. For more information about deployment, see the Payara Server Application Deployment section.
You can define virtual server properties using the asadmin set command. For example:
asadmin set server-config.http-service.virtual-server.MyVS.property.sso-enabled="true"Some virtual server properties can be set for a specific web application. For details, see "payara-web-app" in the Payara Server Application Deployment section.
Virtual Server Configuration
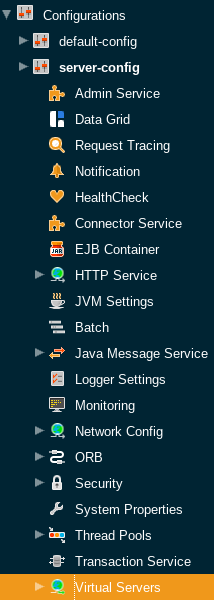
Existing virtual servers can be configured from the admin console or with set asadmin commands. The virtual server configurations can be found in the admin console under Configurations → your-config → Virtual Servers.
The following fields can be configured:
| configuration settings | Description | Asadmin Command |
|---|---|---|
ID |
The unique ID for the virtual server. The only field which cannot be altered from the admin console. The ID cannot begin with a number. |
|
Hosts |
A comma separated list of values allowed in the host request header to select this virtual server. Each virtual server with the same connection group must have a unique host for that group. |
|
State |
The enabled state of the virtual server. There are 3 options for this property:
|
|
SSO |
Allows multiple web applications deployed to the same virtual server to share the user authentication state. This would mean that signing in to one application would implicitly sign you into all others. There are 3 options for this property:
|
|
SSO Cookie Http Only |
Determines whether to add the This prevents malicious XSS attacks hijacking a Java session. It is enabled by default. |
|
Session Cookie Http Only |
Determines whether to add the This prevents malicious XSS attacks hijacking a Java session. It is enabled by default. |
|
Session Cookie Secure |
Determines whether to add the |
|
Network Listeners |
Comma separated list of network listeners which applications deployed to this virtual server are available on. |
|
Default Web Module |
This defines which application deployed to this virtual server will be requested if no modules are resolved in the request. For example if |
|
Log File |
This defines a file where log messages coming from this virtual server are redirected to. This allows you to separate application logs from server logs. |
|
Docroot |
This defines the directory used as the document root for this virtual server. A document root is a directory where static files can be placed and served from. For example, if you have a web application deployed to |
|
Access Logging |
Enables access logging for this virtual server. Access logging logs all requests made to that virtual server. There are 3 options for this property:
|
|
Access Log Directory |
Defines the directory used for access logs. |
|
Additional properties
Defines additional properties for the configuration of a virtual server.
| Key | Description | Default Value | ||||
|---|---|---|---|---|---|---|
sso-max-inactive-seconds |
The number of seconds of no activity after which a user’s SSO record becomes eligible for purging. |
|
||||
sso-reap-interval-seconds |
The number of seconds between purges of SSO records. |
|
||||
setCacheControl |
Comma separated list of Cache-Control response directives (See section 14.9 of: https://www.ietf.org/rfc/rfc2616.txt). |
none |
||||
allowLinking |
If set to Can be overridden for an individual application in the
|
false |
||||
accessLogWriteInterval |
The number of seconds between each time the log is written to disk. The access log is written when the buffer is full or when the interval expires. If the value is 0, the buffer is always written even if it’s not full. |
300 |
||||
accessLogBufferSize |
The size, in bytes, of the buffer where access log calls are stored. |
32768 |
||||
allowRemoteAddress |
Comma separated list of regular expression patterns to which the remote client’s IP address is compared. The IP must match one of the patterns to be accepted. |
none |
||||
denyRemoteAddress |
Comma separated list of regular expression patterns to which the remote client’s IP address is compared. The IP must not match any of the patterns to be accepted. |
none |
||||
allowRemoteHost |
Comma separated list of regular expression patterns to which the remote client’s host name is compared. The host name must match one of the patterns to be accepted. |
none |
||||
denyRemoteHost |
Comma separated list of regular expression patterns to which the remote client’s host name is compared. The host name must not match any of the patterns to be accepted. |
none |
||||
authRealm |
Specifies the name attribute of a security realm, which overrides the server’s default realm for standalone web applications deployed to this virtual server. Can be overridden for an individual application with a realm defined in the web.xml. |
none |
||||
securePagesWithPragma |
Set this property to |
true |
||||
contextXmlDefault |
Sets the directory of the |
none |
||||
alternatedocroot_n |
Specifies an alternate document root, where n is a positive integer that allows specification of more than one. |
none |
||||
send-error_n |
Specifies custom error page mappings for the virtual server, which are inherited by all web applications deployed on the virtual server, unless overridden in the web.xml. The value is a string, composed of three values:
E.g. |
none |
||||
redirect_n |
Specifies a redirect from an old url to a new one. The value is a string, composed of two values:
E.g. |
none |
||||
listener_n |
Specifies the fully qualified class name of a custom Catalina listener, where n is a positive integer that allows the specification of more than one. The listener class must implement the |
none |
||||
errorReportValve |
Specifies the fully qualified class name of a custom valve that produces default error pages for applications on this virtual server. Specify an empty string to disable the default error page mechanism for this virtual server. |
|
||||
cacheTTL |
Specifies the time to live (TTL), expressed in milliseconds, for the virtual server cache used to serve files. |
5000 |
Create a Virtual Server
By default, when Payara Server starts, the following virtual servers are started automatically:
-
A virtual server named
server, which hosts all user-defined web modules. For development, testing, and deployment of web services in a non-production environment,serveris often the only virtual server required. -
A virtual server named
__asadmin, which hosts all administration-related web modules (specifically, the Administration Console). This server is restricted, which means that you cannot deploy web modules to this virtual server.
In a production environment, additional virtual servers provide hosting facilities for users and customers so that each appears to have its own web server, even though there is only one physical server.
Use the create-virtual-server subcommand in remote mode to create the named virtual server.
Before You Begin
A virtual server must specify an existing HTTP listener. Because the virtual server cannot specify an HTTP listener that is already being used by another virtual server, create at least one HTTP listener before creating a new virtual server.
-
Ensure that the server is running.
Remote subcommands require a running server.
-
Create a virtual server by using the
create-virtual-serversubcommand.Information about properties for this subcommand is included in this help page.
-
To apply your changes, restart Payara Server.
See To Restart a Domain.
Example - Creating a Virtual Server
This example creates a virtual server named sampleServer on localhost.
asadmin create-virtual-server --hosts pigeon,localhost --property authRealm=ldap sampleServer
Command create-virtual-server executed successfully.
You can also view the full syntax and options of the subcommand by typing asadmin help create-virutal-server at the command line.
To List Virtual Servers
Use the list-virtual-servers subcommand in remote mode to list the existing virtual servers.
-
Ensure that the server is running. Remote subcommands require a running server.
-
List virtual servers by using the
list-virtual-serverssubcommand.
Example - Listing Virtual Servers
This example lists the virtual servers for localhost.
asadmin list-virtual-servers

sampleListener
admin-listener
http-listener-2
http-listener-1
Command list-http-listeners executed successfully.
You can also view the full syntax and options of the subcommand by typing asadmin help list-virutal-servers at the command line.
Update a Virtual Server
-
List virtual servers by using the
list-virtual-serverssubcommand. -
Modify the values for the specified virtual server by using the
setsubcommand.The virtual server is identified by its dotted name.
Delete a Virtual Server
Use the delete-virtual-server subcommand in remote mode to delete an existing virtual server.
-
Ensure that the server is running. Remote subcommands require a running server.
-
List virtual servers by using the
list-virtual-serverssubcommand. -
If necessary, notify users that the virtual server is being deleted.
-
Delete a virtual server by using the
delete-virtual-serversubcommand. -
To apply your changes, restart Payara Server. See To Restart a Domain.
Example - Deleting a Virtual Server
This example deletes the virtual server named sampleServer from localhost.
asadmin> delete-virtual-server sampleServer
Command delete-virtual-server executed successfully.
You can also view the full syntax and options of the subcommand by typing asadmin help delete-virutal-server at the command line.
To Assign a Default Web Module to a Virtual Server
A default web module can be assigned to the default virtual server and to each new virtual server. To access the default web module for a virtual server, point the browser to the URL for the virtual server, but do not supply a context root.
For example:
http://myvserver:3184/A virtual server with no default web module assigned serves HTML or JavaServer Pages ( JSP) content from its document root, which is usually domain-dir/docroot.
To access this HTML or JSP content, point your browser to the URL for the virtual server, do not supply a context root, but specify the target file.
For example:
http://myvserver:3184/hellothere.jspAssign a Virtual Server to an Application or Module
You can assign a virtual server to a deployed application or web module.
Before You Begin
The application or module must already be deployed.
-
In the Administration Console, open the HTTP Service component under the relevant configuration.
-
Open the Virtual Servers component under the HTTP Service component.
-
Select the virtual server to which you want to assign a default web module.
-
Select the application or web module from the Default Web Module drop-down list.
To Set JSESSIONIDSSO Cookie Attributes
Use the sso-cookie-http-only and sso-cookie-secure virtual server attributes to set the HttpOnly and Secure attributes of any JSESSIONIDSSO cookies associated with web applications deployed to the virtual server.
Use the set subcommand to set the value of the sso-cookie-http-only and sso-cookie-secure virtual server attributes.
The values supported for these attributes are as follows:
sso-cookie-http-only-
A boolean value that specifies whether the
HttpOnlyattribute is included inJSESSIONIDSSOcookies.When set to
true, which is the default, theHttpOnlyattribute is included. When set tofalse, theHttpOnlyattribute is not included. sso-cookie-secure-
A string value that specifies whether the
Secureattribute is included inJSESSIONIDSSOcookies. Allowed values are as follows:-
true— TheSecureattribute is included. -
false— TheSecureattribute is not included. -
dynamic— TheSecureattribute setting is inherited from the default ports table for all HTTP listeners first session participating in SSO. This is the default value.
-
To Set JSESSIONID Cookie Attributes
Use the session-cookie-http-only and session-cookie-secure virtual server attributes to set the HttpOnly and Secure attributes of any JSESSIONID cookies associated with web applications deployed to the virtual server.
Use the set subcommand to set the value of the session-cookie-http-only and session-cookie-secure virtual server attributes.
The values supported for these attributes are as follows:
session-cookie-http-only-
A boolean value that specifies whether the
HttpOnlyattribute is included inJSESSIONIDcookies.When set to
true, which is the default, theHttpOnlyattribute is included. When set tofalse, theHttpOnlyattribute is not included. session-cookie-secure-
A string value that specifies whether the
Secureattribute is included inJSESSIONIDcookies. Allowed values are as follows:-
true— TheSecureattribute is included. -
false— TheSecureattribute is not included. -
dynamic— TheSecureattribute setting depends on whether the HTTP connection is secure. This is the default value.
-
HTTP Header Fields Validation
By default, The following characters are stipulated to be dangerous to parse in both the name and value of all headers passed down on an HTTP request:
| Character | Representation |
|---|---|
NUL character |
This character is expressed in the following forms on a literal value: |
LF Character (new line) |
This character is expressed in the following forms on a literal value: |
CR Character (carriage return) |
This character is expressed in the following forms on a literal value: |
As stipulated in section 5.5 Field Values of the RFC-9110 specification, these characters are deemed invalid and as such the server, as recipient of the request WILL reject it automatically upon detecting the presence of these characters.
| On previous RFC specifications that detailed HTTP 1.1 semantics, these characters were considered acceptable, however from RFC-9110 onwards, the use of these characters is no longer acceptable for header fields names and values. |
In some cases, to support backwards compatibility it might be necessary to allow these characters to be processed by the server runtime. In these instances, the following Grizzly (HTTP) system properties allow header fields character validation to be turned on/off:
| Property | Description |
|---|---|
|
This property enables the validation of all header field names on incoming HTTP requests to prevent any usage of invalid characters on it. When set to The default value is |
|
This property enables the validation of all header field values on incoming HTTP requests to prevent any usage of invalid characters on it. When set to The default value is |