Apache NetBeans has Payara Micro support built into the IDE, so there is no need to install a plugin to integrate and control Payara Micro from Apache NetBeans.
Creating a Payara Micro Project
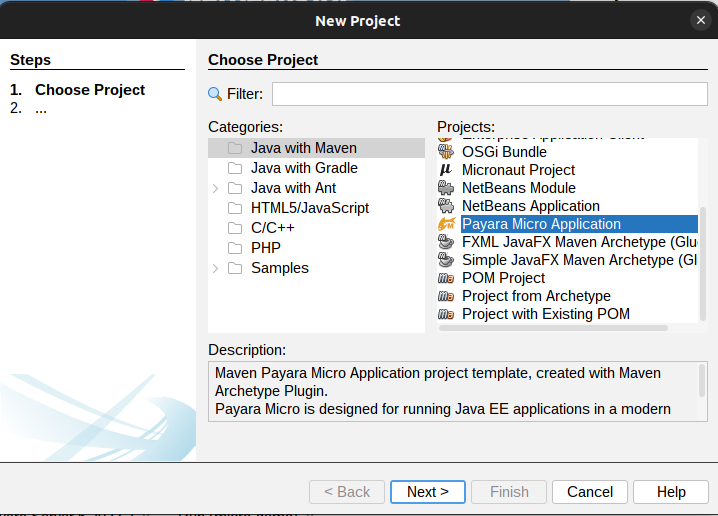
Apache NetBeans IDE supports Payara Micro out of the box. To create a Payara Micro project, follow these steps:
-
Create a new project using Payara Micro Application archetype under Java with Maven category.
-
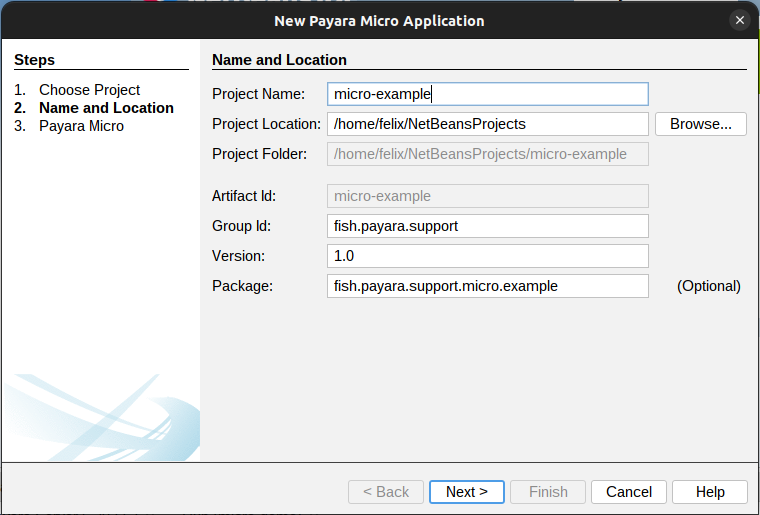
Input the desired project name, project name, artifact id, group id and version.
-
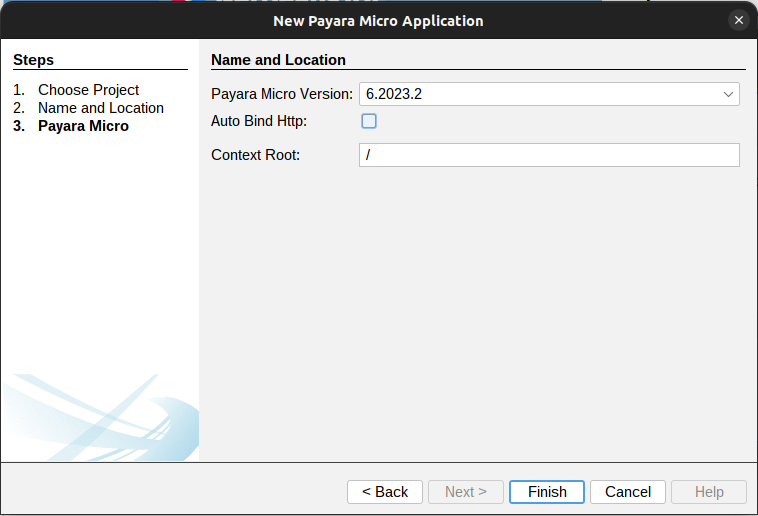
Select the desired Payara Micro version. Make sure that Auto Bind HTTP is left unchecked.
Deploying the Payara Micro project
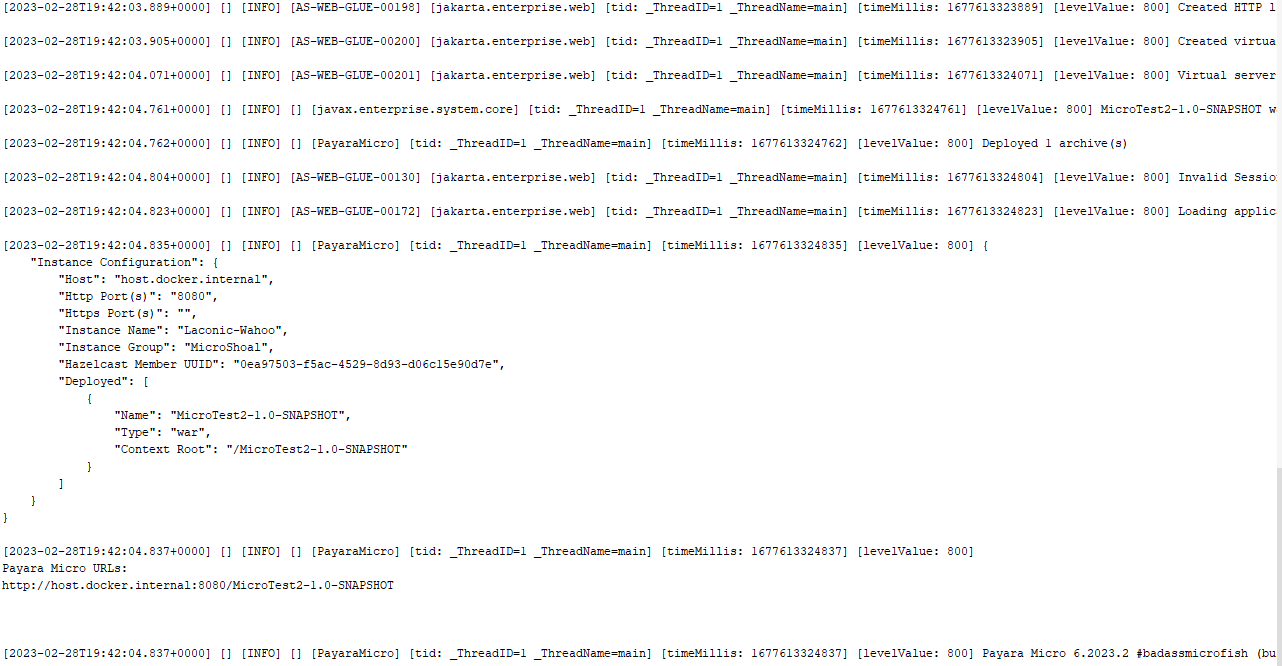
To deploy the Payara Micro project, simply run the application using the Run Project option from the Run menu. The Payara Micro application will be deployed and the URL will be displayed in the Output window:
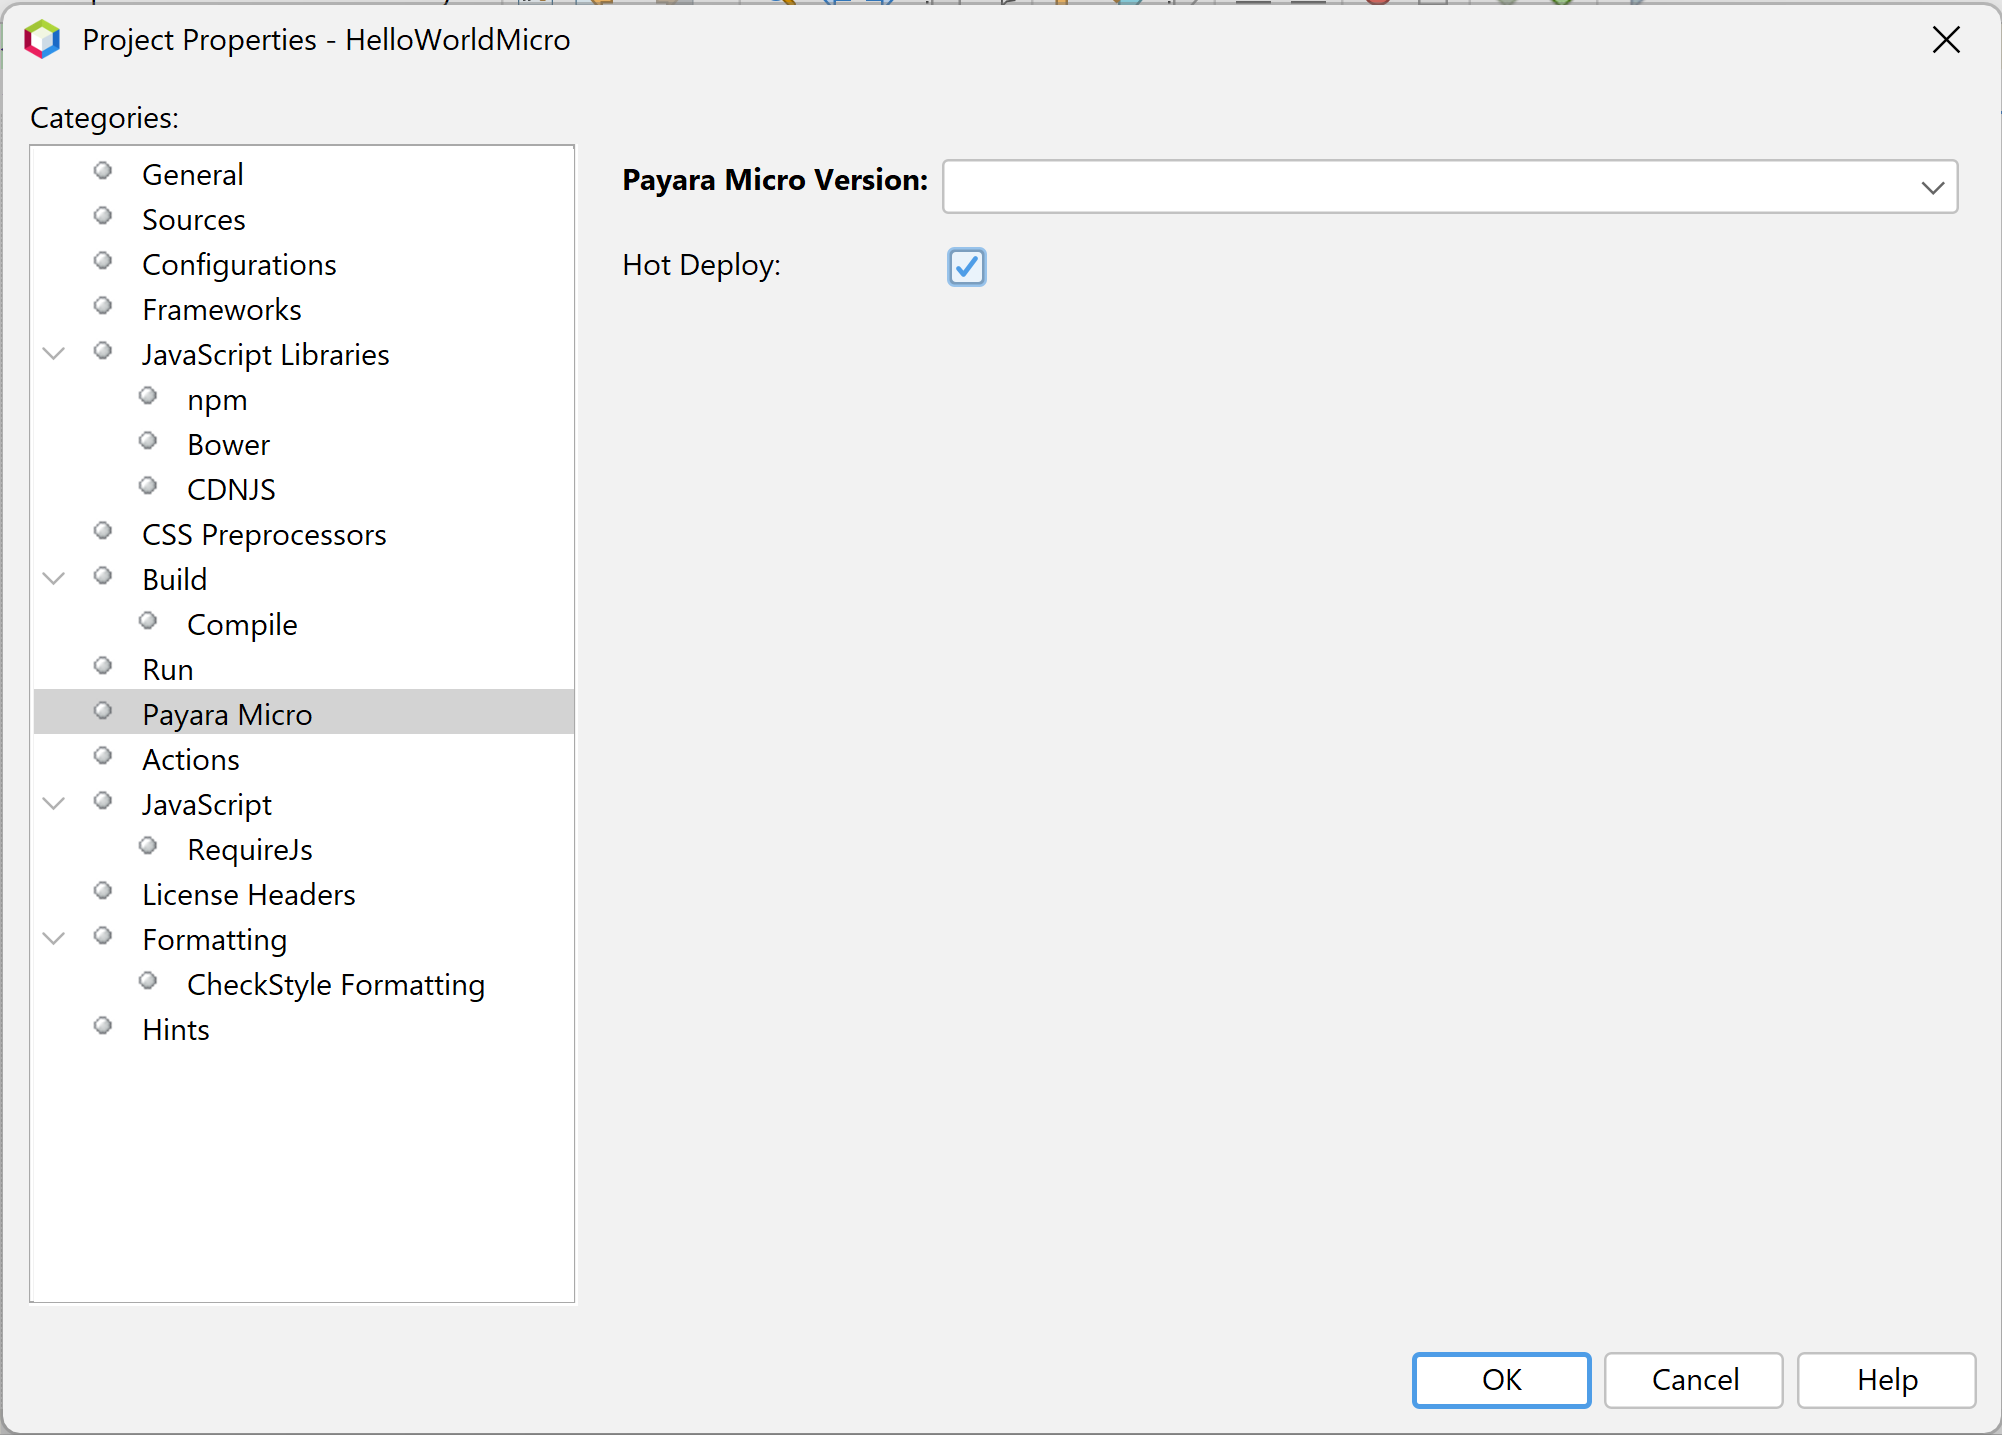
Hot Deploy and Auto Deploy Settings
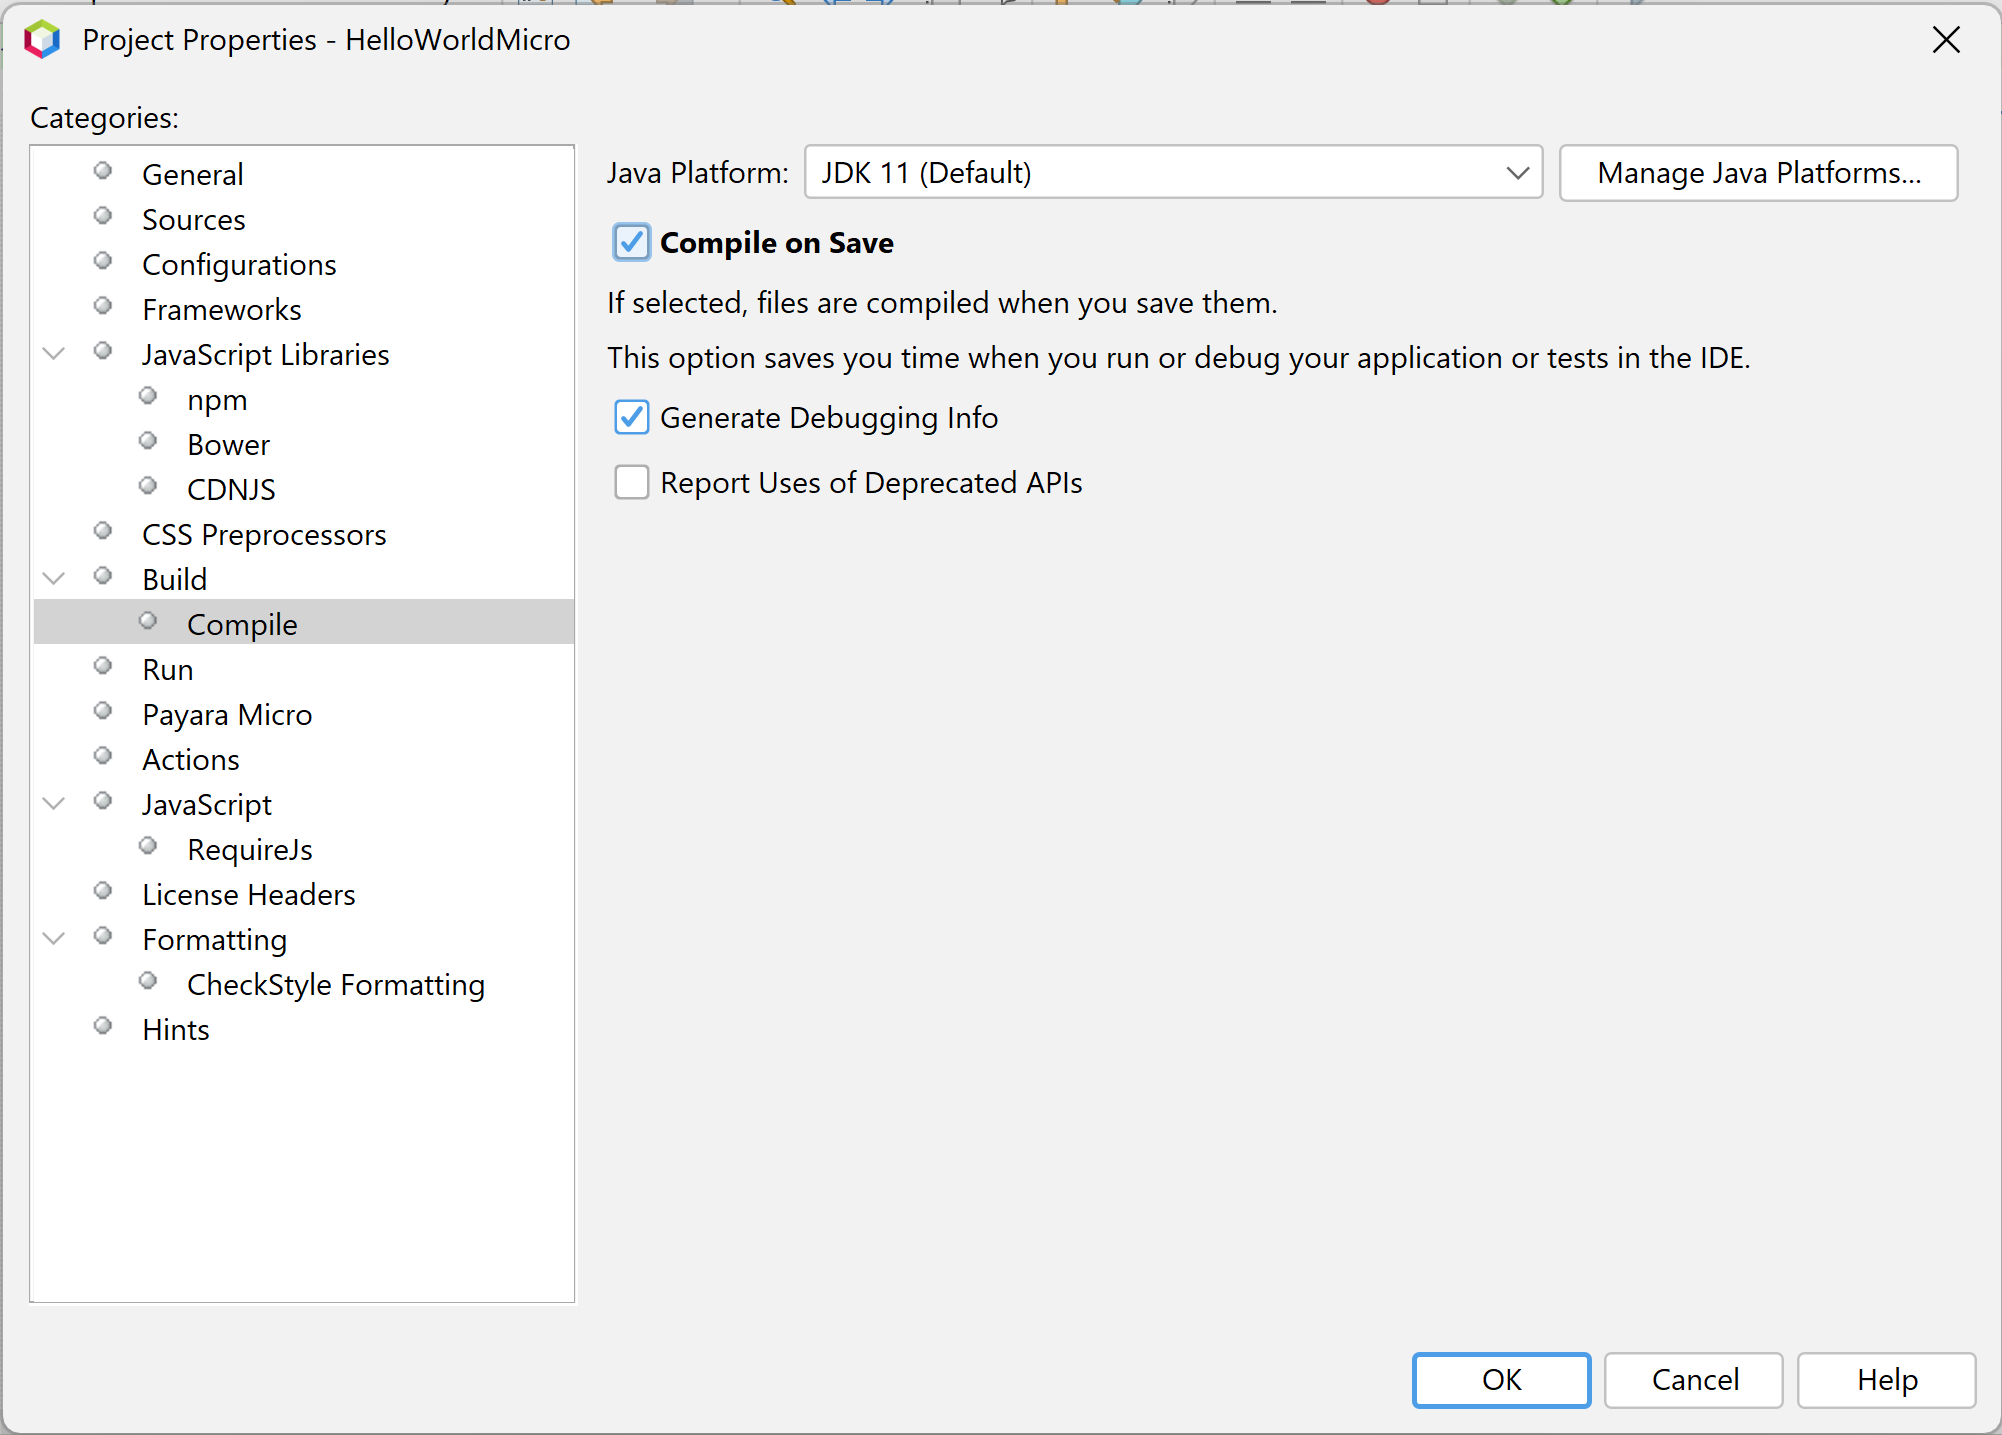
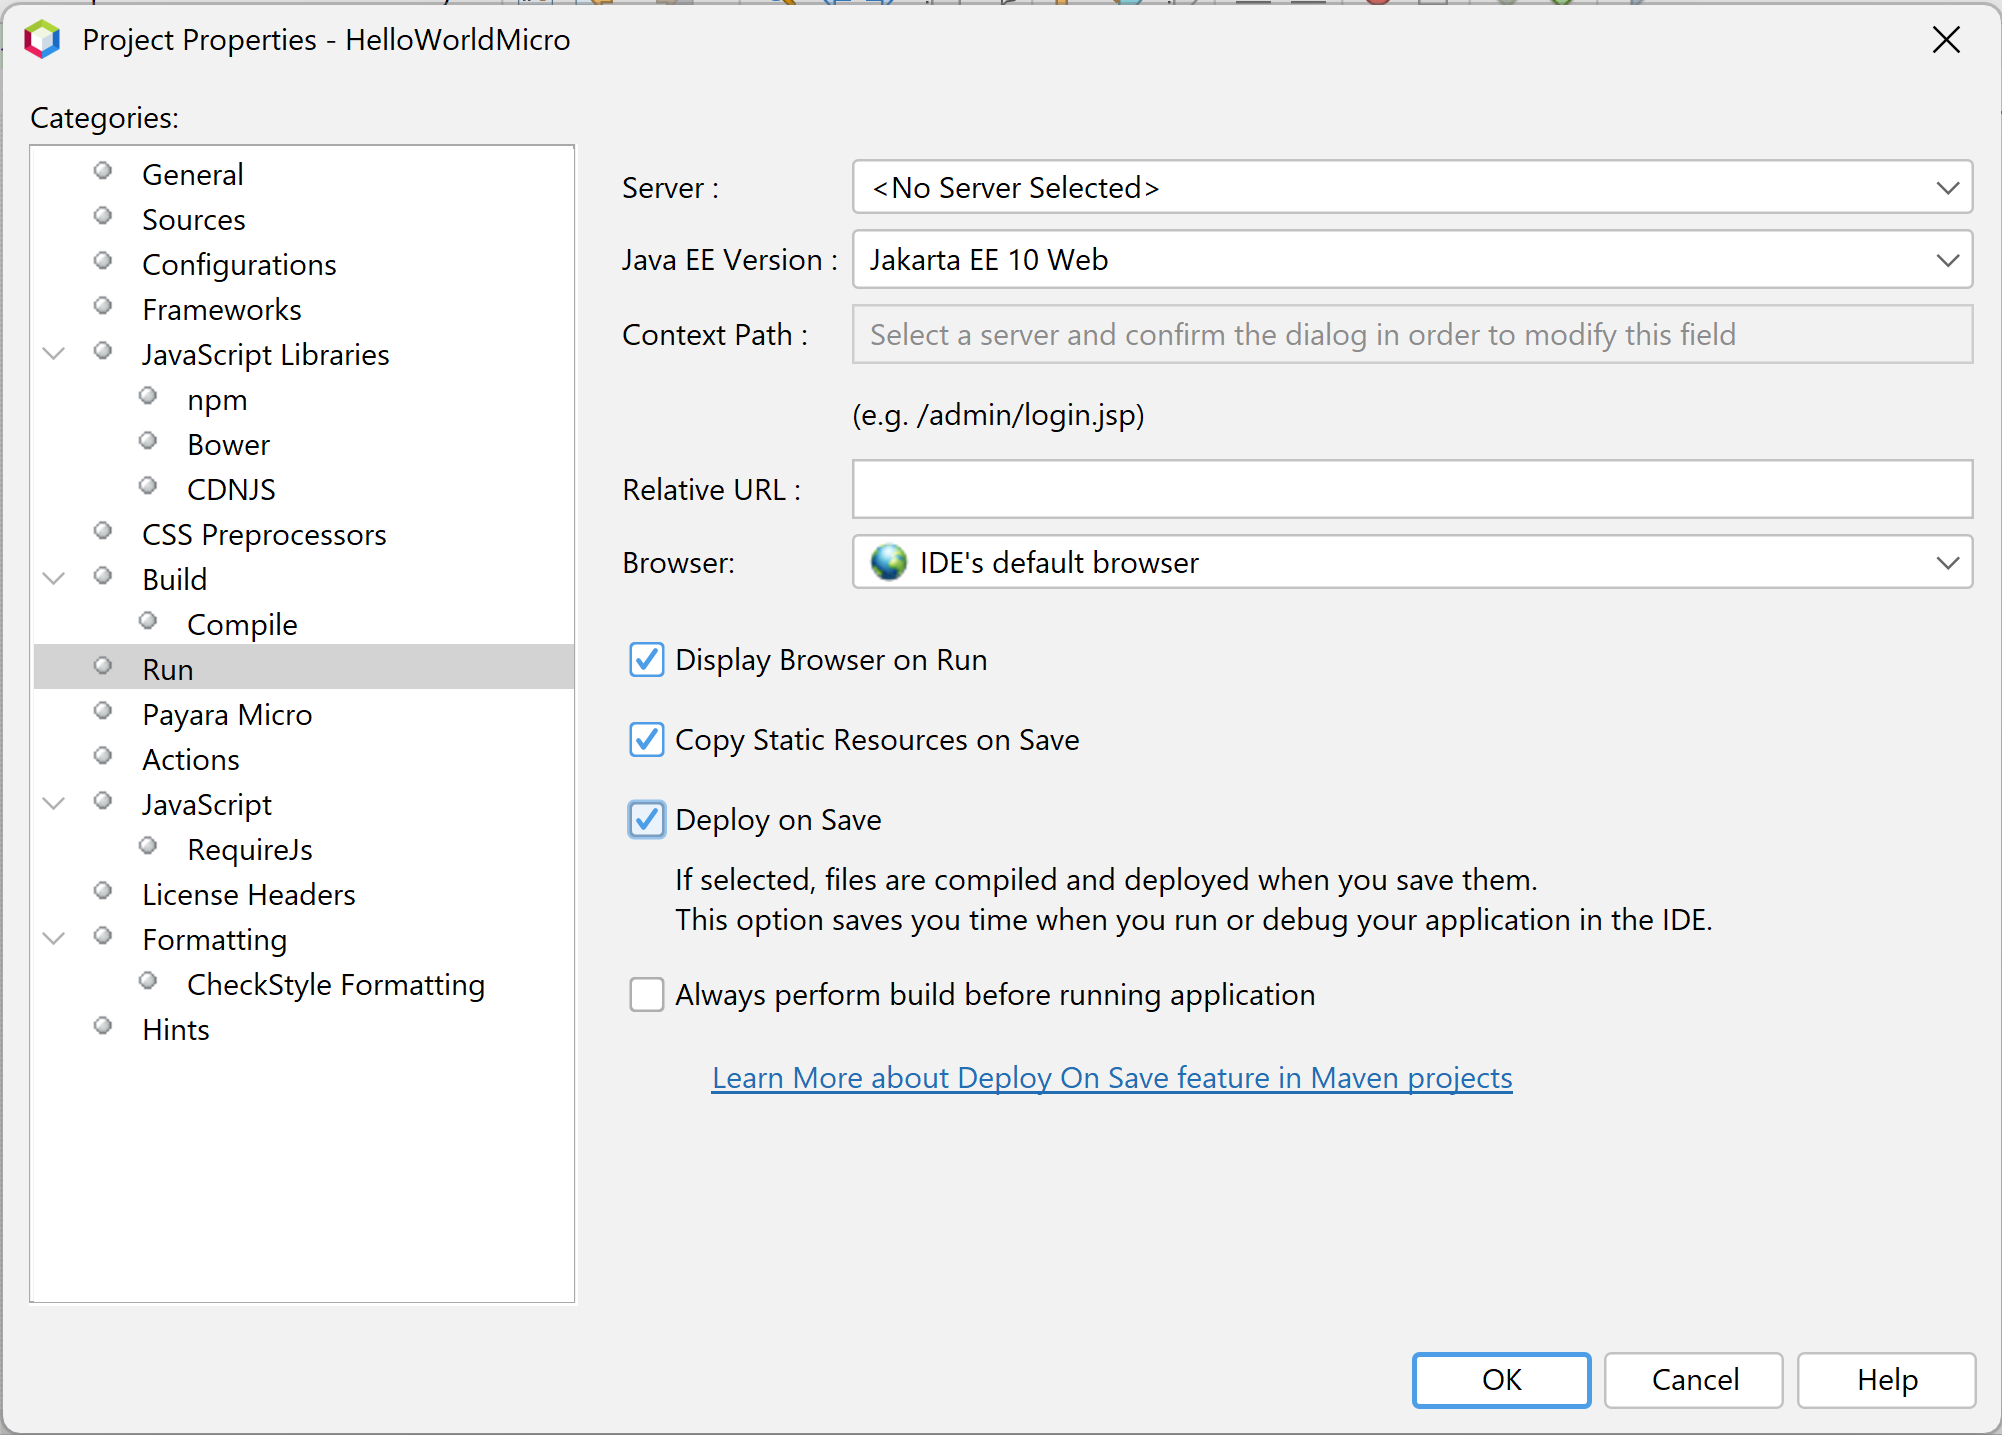
To enable the Auto Deploy features for Payara Micro on the Apache NetBeans IDE, you must enable the Compile on Save and Deploy on Save features from the Project Properties.
Compile on Save can be found in the Build→Compile submenu of the project properties.
Deploy on Save can be found in the Run submenu of the project properties.
To enable the Hot Deploy feature for Payara Micro on the Apache NetBeans IDE, you must enable the Hot Deploy checkbox which can be found in the Payara Micro submenu of the project properties.