The Payara Tools Eclipse IDE Plugin source code is available in the Eclipse Plugin repository.
Prerequisites
Before building the Payara Tools Eclipse plugin, you will need to configure your local environment. Subsequent builds will not require these steps.
- Clone the ecosystem-eclipse-plugin repository
-
You must first clone the repository where the plugin source code is stored. Eclipse Plugin repository
- Set the
JAVA_HOMEenvironment variable -
An environment variable named JAVA_HOME must be created and point to a valid JDK 17 installation.
- Install Apache Maven
-
Apache Maven is the build tool for the Payara Tools Eclipse IDE Plugin and must be configured locally. Visit Apache Maven Installation to install Maven.
Build Payara Tools
To build Payara Tools for Eclipse, navigate to the root directory of the cloned repository and run the following command:
mvn clean installThis command will initiate the build process for the Payara Tools Eclipse plugin using Maven.
The build job will create both a zip and exploded-directory format. The zip format of this build can be found in the [project_root]/releng/fish.payara.eclipse.update/target directory, and the exploded-directory format can be found in the [project_root]/releng/fish.payara.eclipse.update/target/repository directory.
Install Payara Tools into Eclipse
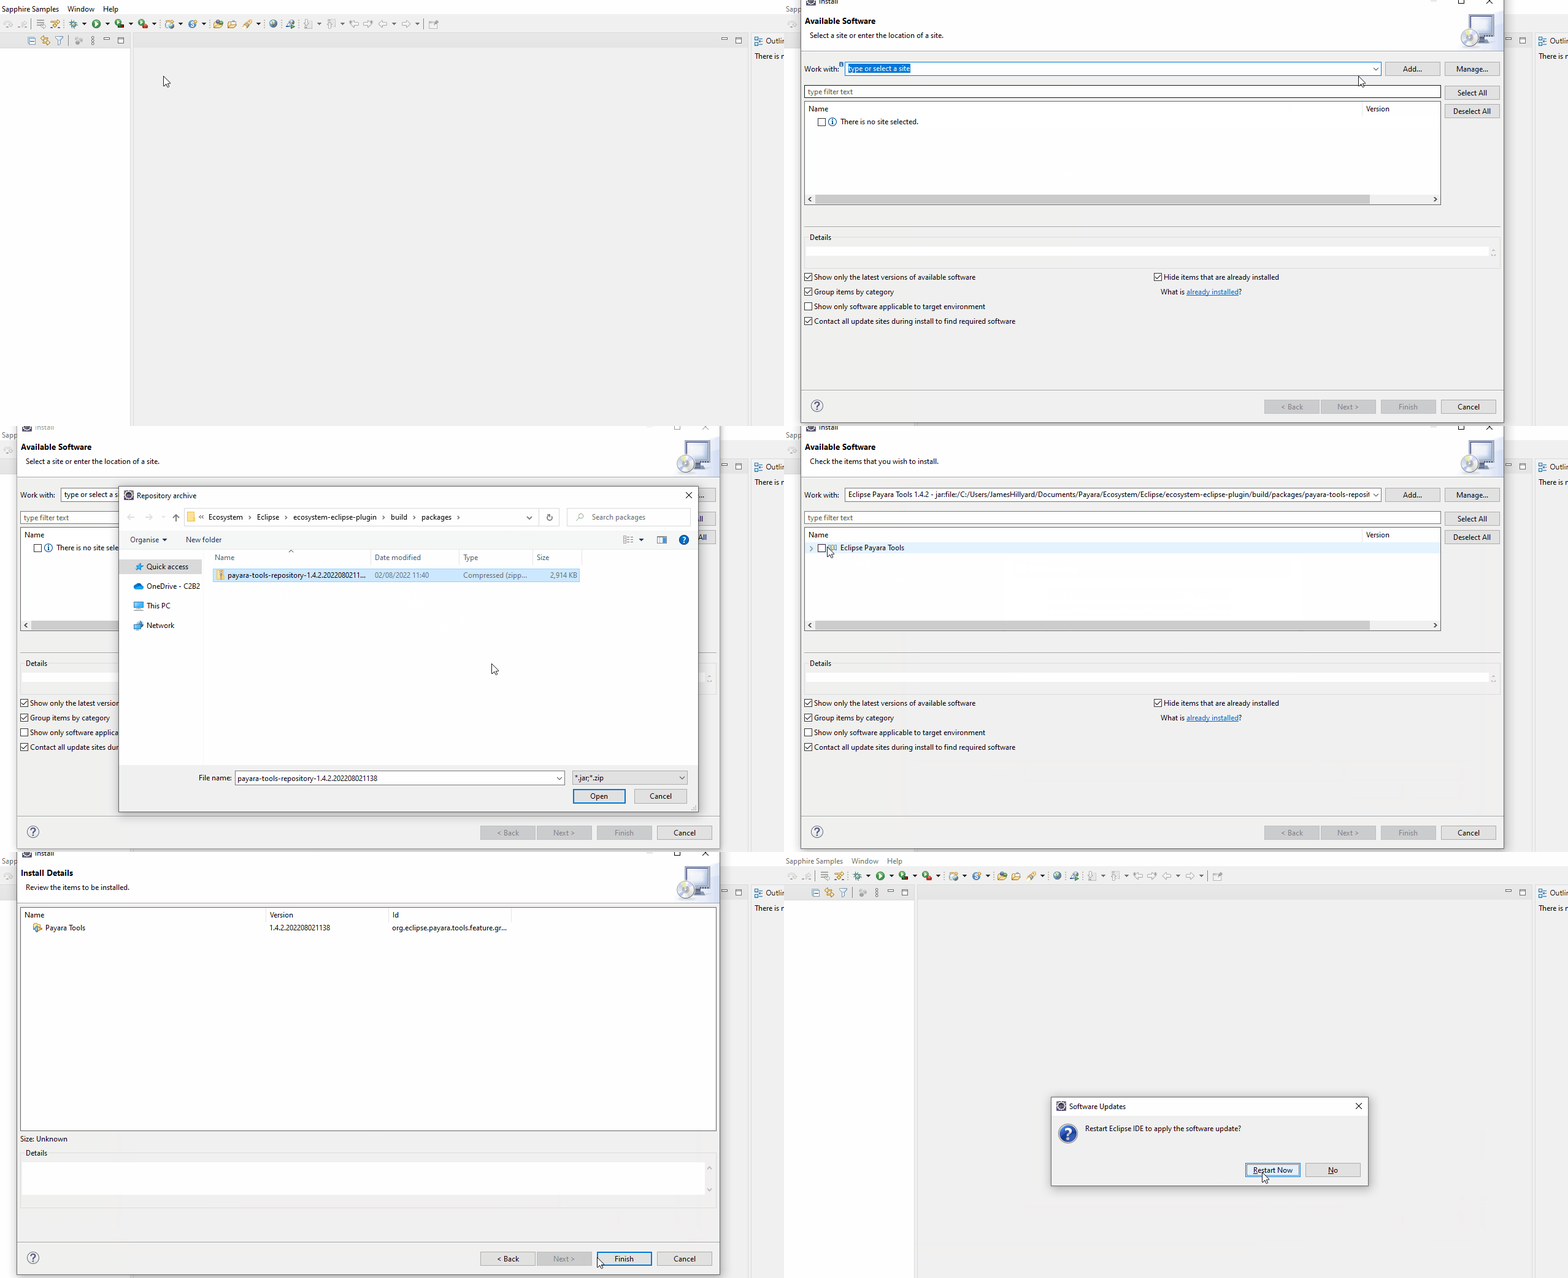
After Payara Tools for Eclipse has been compiled successfully, you need to add it into the Eclipse IDE.
-
Navigate to Help → Install New Software…
-
Click Add → Archive…
-
Select the zip format in
[project_root]/releng/fish.payara.eclipse.update/target -
Select the Eclipse Payara Tools checkbox
-
Click Next → Finish
-
Select Install Anyway
-
Restart Eclipse when prompted

