Slack is a functional enterprise chat and team collaboration tool inspired by IRC. It allows an organization to create specific domains and discuss work topics or subjects in separate channels that can either be public or private.
Payara Server includes a special notifier to send notifications from the Notification service to an organization’s domain channel using Slack API integrations.
Slack Integration Configuration
In order to allow the notification service to log events on a Slack channel of your choice, you must fulfill the following requirements first:
-
Have created a Slack account within your organization’s domain (for example payara.slack.com)
-
Have an Slack account with granted permissions to create channels and configure API integrations.
-
Have created a Slack channel which will be used by the notification service to report notification events.
Once you have completed these requirements, you can configure an Incoming Webhook integration for the channel. An Incoming Webhook is the simplest integration mechanism that Slack provides, in that they make use of normal HTTP requests with a JSON payload that includes the message text and additional options to format incoming messages to the channel.
Configure Incoming WebHook
-
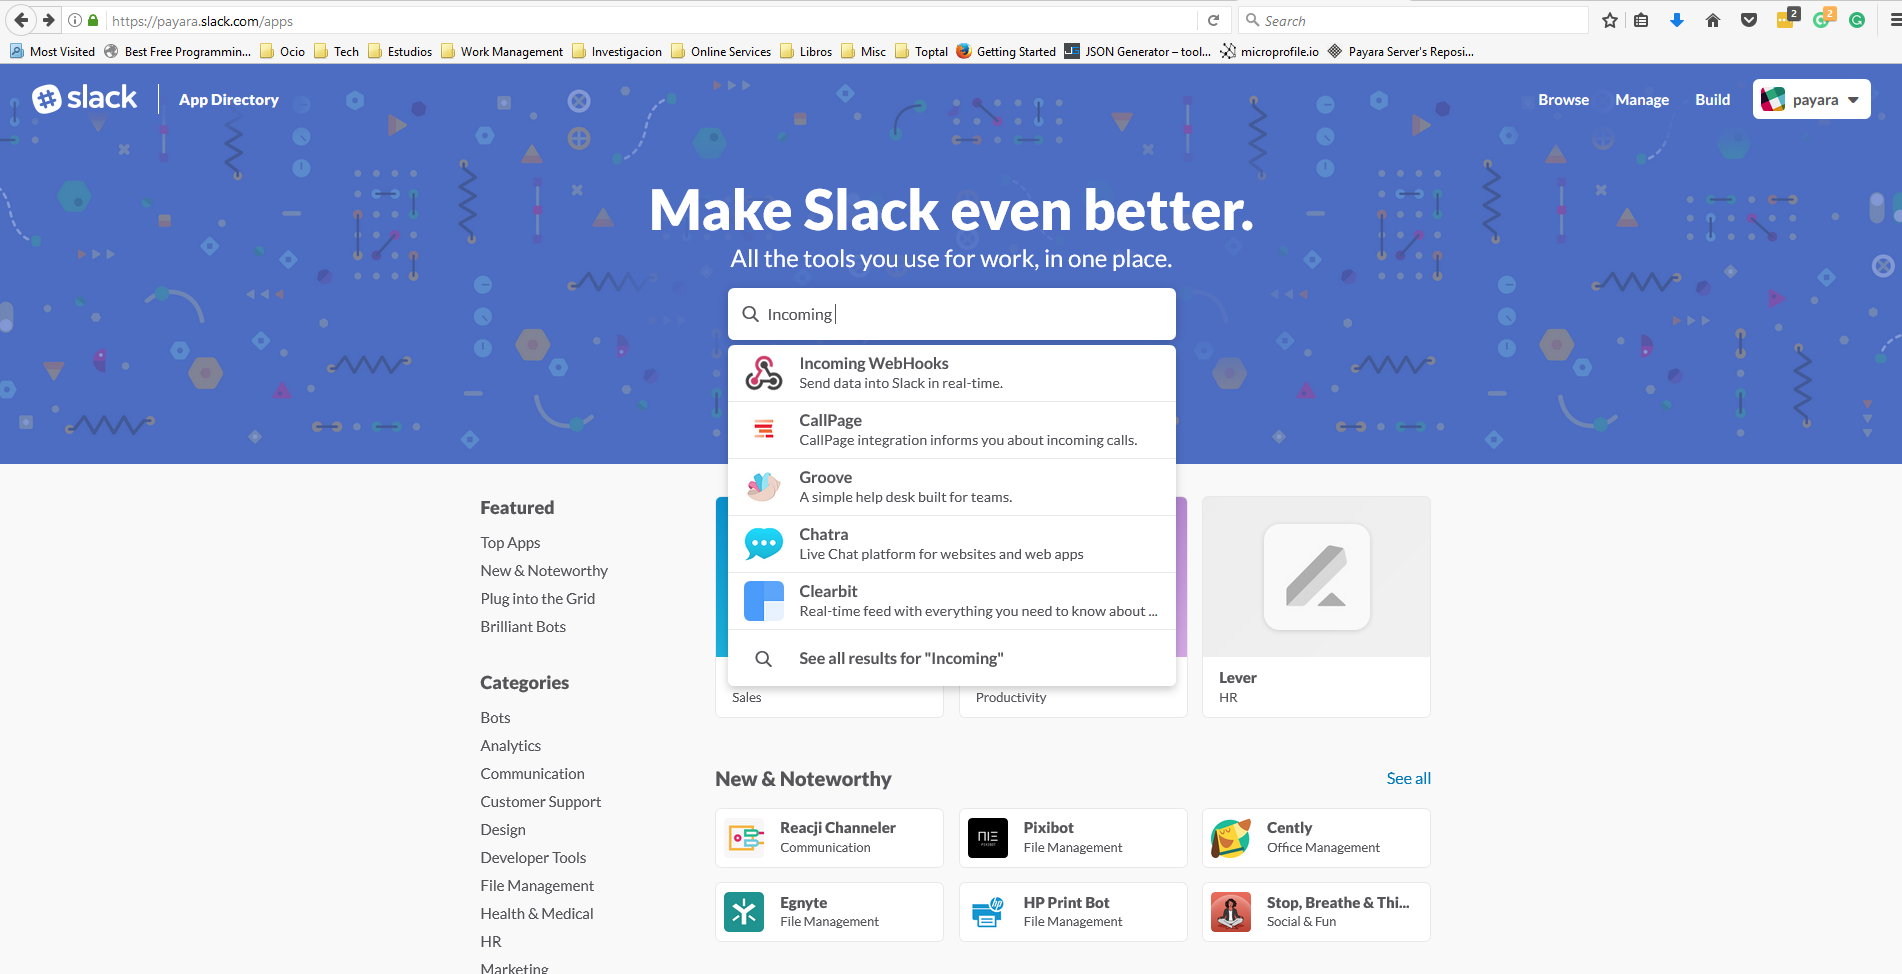
First, access the developer portal’s application directory located at https://payara.slack.com/apps. Then, in the search box type Incoming Webhooks. A suggestion will appear in the results display:
-
Now, proceed to select the channel that the WebHook will use to direct the notification events to:
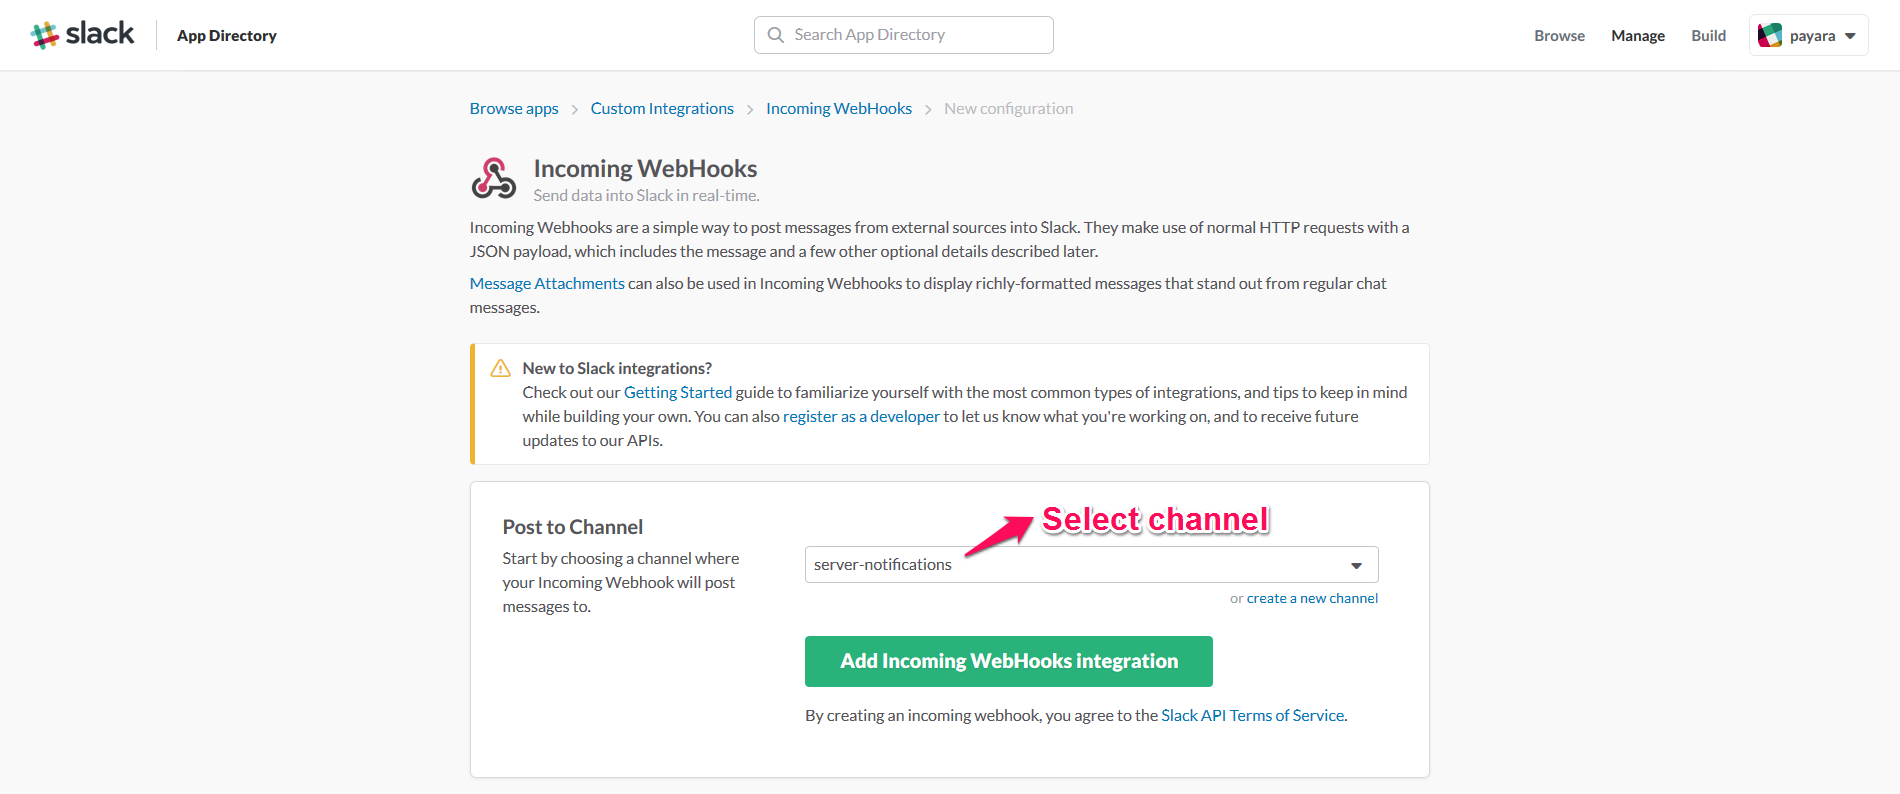
It’s recommended to choose a private channel, since it will keep these notifications events protected in case of unwanted disclosure and it won’t spam other users of your organization with unwanted notifications -
With this, the WebHook configuration is finished. Now, take special attention to the WebHook URL, which is usually follows this structure:
Like in the following sample:

We will use these 3 tokens when configuring the server’s integration later.
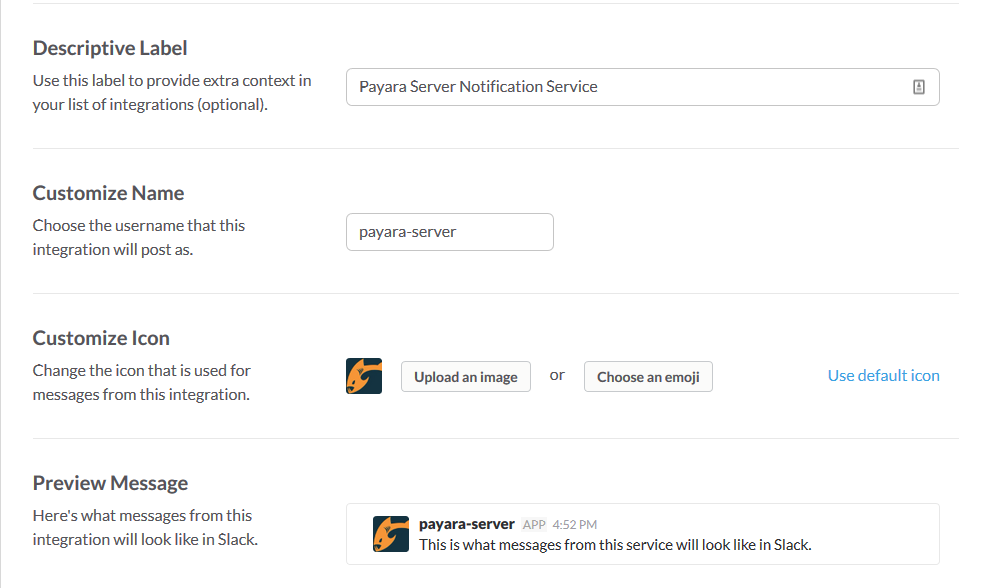
We recommend that you configure the following settings in the channel integration to give better visualization for your notifications:
-
Descriptive Label: Use a well descripted text to identify this WebHook integration
-
Customize Name: Insert a name for the "agent" that will report the notification messages
-
Customize Icon: Insert a custom icon to identify the agent that will be visualized in the messages We recommend using one of the Payara logos like in this sample:
-
Payara Server Configuration
With the Incoming WebHook properly configured, now it’s time to setup the Notification Service in the domain configuration. As usual you can do this using the administration web console, from the command line or editing the domain.xml configuration file directly.
Using the Administration Web Console
To configure the Notification Service in the Administration Console, go to Configuration → [instance-configuration (like server-config)] → Notification Service and click on the Slack tab:
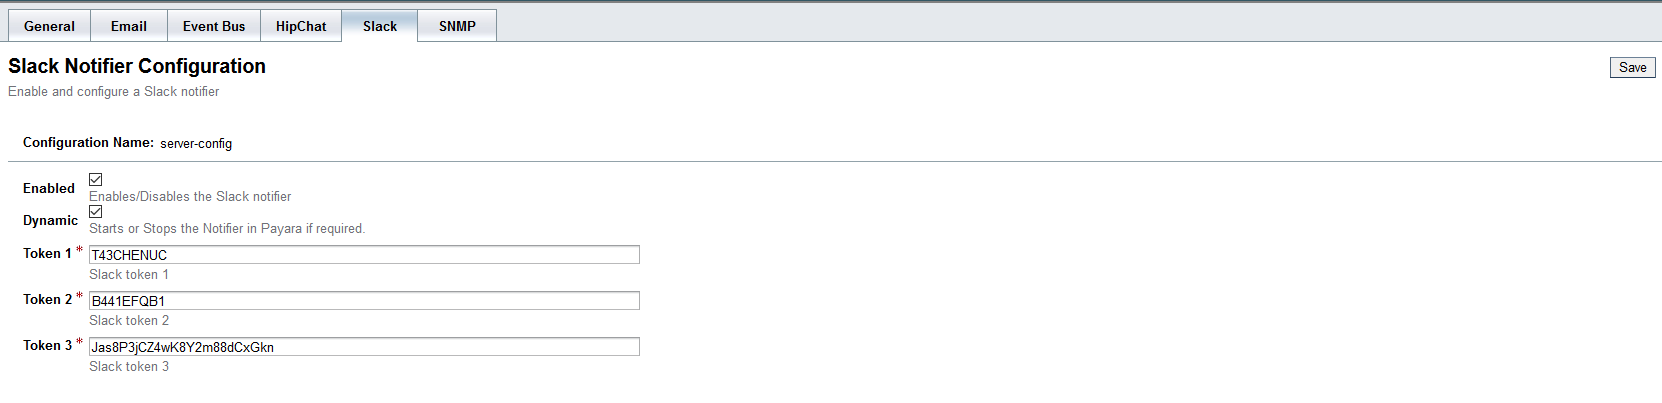
Check the Enabled box (and the Dynamic box too if you don’t want to restart the domain) and input the three tokens highlighted in the previous section. Hit the Save button to preserve the changes.
From the Command Line
To configure the Notification Service from the command line, use the
notification-slack-configure asadmin command, specifying the tokens
like this:
asadmin > notification-slack-configure --enabled=true --dynamic=true --token1=T43CHENUC --token2=B441EFQB1 --token3=Jas8P3jCZ4wK8Y2m88dCxGknYou can use the --enabled and --dynamic options to enable or disable
the Slack notifier on demand.
Also, you can retrieve the current configuration for the Slack notifier
using the get-slack-notifier-configuration asadmin command like this:
asadmin > get-slack-notifier-configuration

Enabled  Token 1    Token 2    Token 3
true     T43CHENUC  B441EFQB1  Jas8P3jCZ4wK8Y2m88dCxGkn
On the domain.xml configuration file
To configure the Notification Service in the domain.xml configuration
file, locate the notification-service-configuration element in the
tree and insert the slack-notifier-configuration with the respective
attributes like this:
<notification-service-configuration enabled="true">
    <slack-notifier-configuration token1="T43CHENUC" token2="B441EFQB1" token3="Jas8P3jCZ4wK8Y2m88dCxGkn" enabled="true"></slack-notifier-configuration>
</notification-service-configuration>| Modifying the domain.xml configuration is not a supported configuration method, so be careful when considering this option. |
Troubleshooting
When you have correctly configured the Slack notifier, it can be used to push notifications to your configured channel. If you do not see any notification event messages, check the following:
-
Is the Slack notifier enabled?
-
Is the Notification Service itself enabled?
-
Is there a service configured to use the notifier? (e.g. the HealthCheck service)
-
Is the service configured to send notifications frequently enough to observe?
-
Have you enabled the service after configuring it?
-
Is the Incoming WebHook correctly configured in the Slack API portal?
-
Check that you have not surpassed the current rate limit for the Slack API
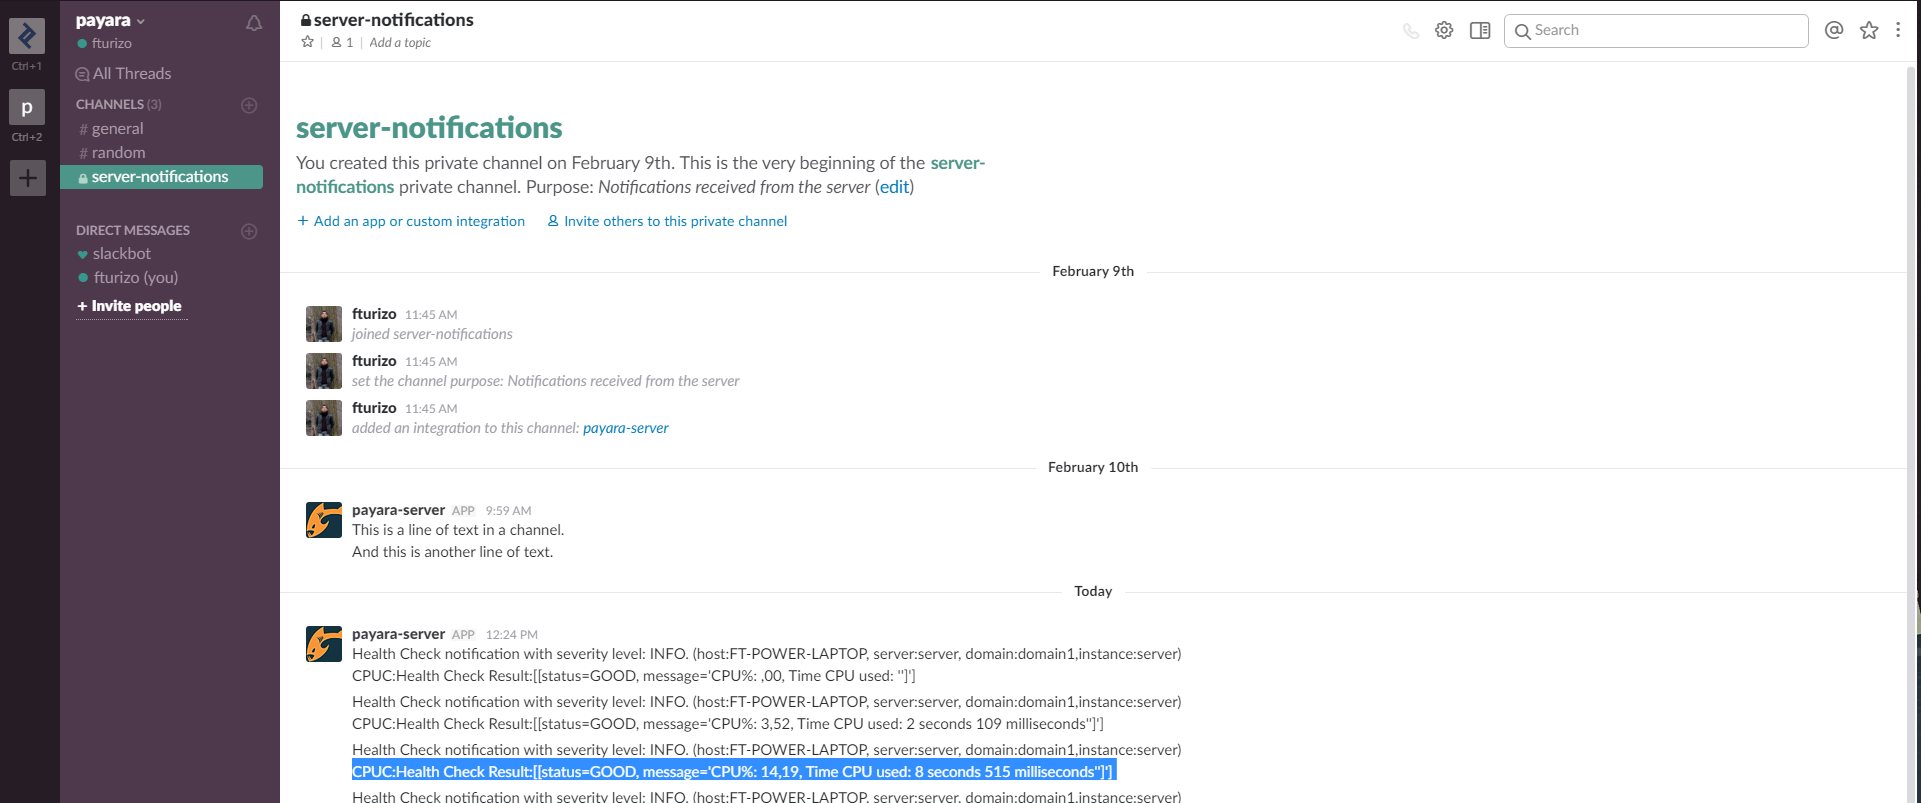
Here’s a sample of how the notifications are visualized on the Slack Desktop application: