The Payara Server Enterprise uses a dedicated key and certificate store when using SSL/TLS connections. The files are located in the configuration directory of the domain <payara-home>/glassfish/domains/<domain-name>/config and referenced through JVM options so that they are used for the entire JVM.
cacerts.jks: Java Keystore formatted file used as Trust Store file holding the X.509 certificates. keystore.jks: Java Keystore formatted file containing the Cryptographic keys, like the private keys associated with the certificates.
These keystores are protected with the Master Password of your domain.
Adding SSL Certificate
To add your SSL Certificate to the Payara Server configuration files, you need:
-
The private key associated with your certificate.
-
The Certificate you received from the Certificate Authority based on your Certificate Signing Request (CSR).
You can generate a self-signed certificate using the command detailed here
asadmin generate-self-signed-certificate --dn "CN=test.payara.fish,IP=127.0.0.1" mydomain_certificate- Alternatively
-
You can find the detailed steps of adding a self-signed certificate into Payara Server Enterprise for testing purposes using keytool and openssl in the blog Securing Payara Server with Custom SSL Certificate. The private key can be stored in various formats. We assume that the key is in a format which can be read by the Java key tool program, such as PKCS#8 (file starts with
BEGIN ENCRYPTED PRIVATE KEY)
In a first step (if following the blog), we combine the Private key and the Certificate we received into a file. This file can then be used to merge our data into the files used by the Payara installation. In this step, we also specify an alias name for our key/certificate. This alias name is important as we will use it later to refer to our specific SSL Certificate.
The command to perform this combination is the following with OpenSSL:
openssl pkcs12 -export -in mycert.crt -inkey mycert.key -out mycert.p12 -name mydomain_certificateThe resulting p12 bundle can then be add to the keystore and trutstore in Payara Server as described in the following sections.
Import into keystore.jks
The information needs to be imported into the keystore.jks file of your Payara Server Domain which will use it.
Using asadmin
You can use the add-to-keystore asadmin command, detailed
here.
asadmin add-to-keystore --file mycert.p12 mydomain_certificateUsing the Admin Console
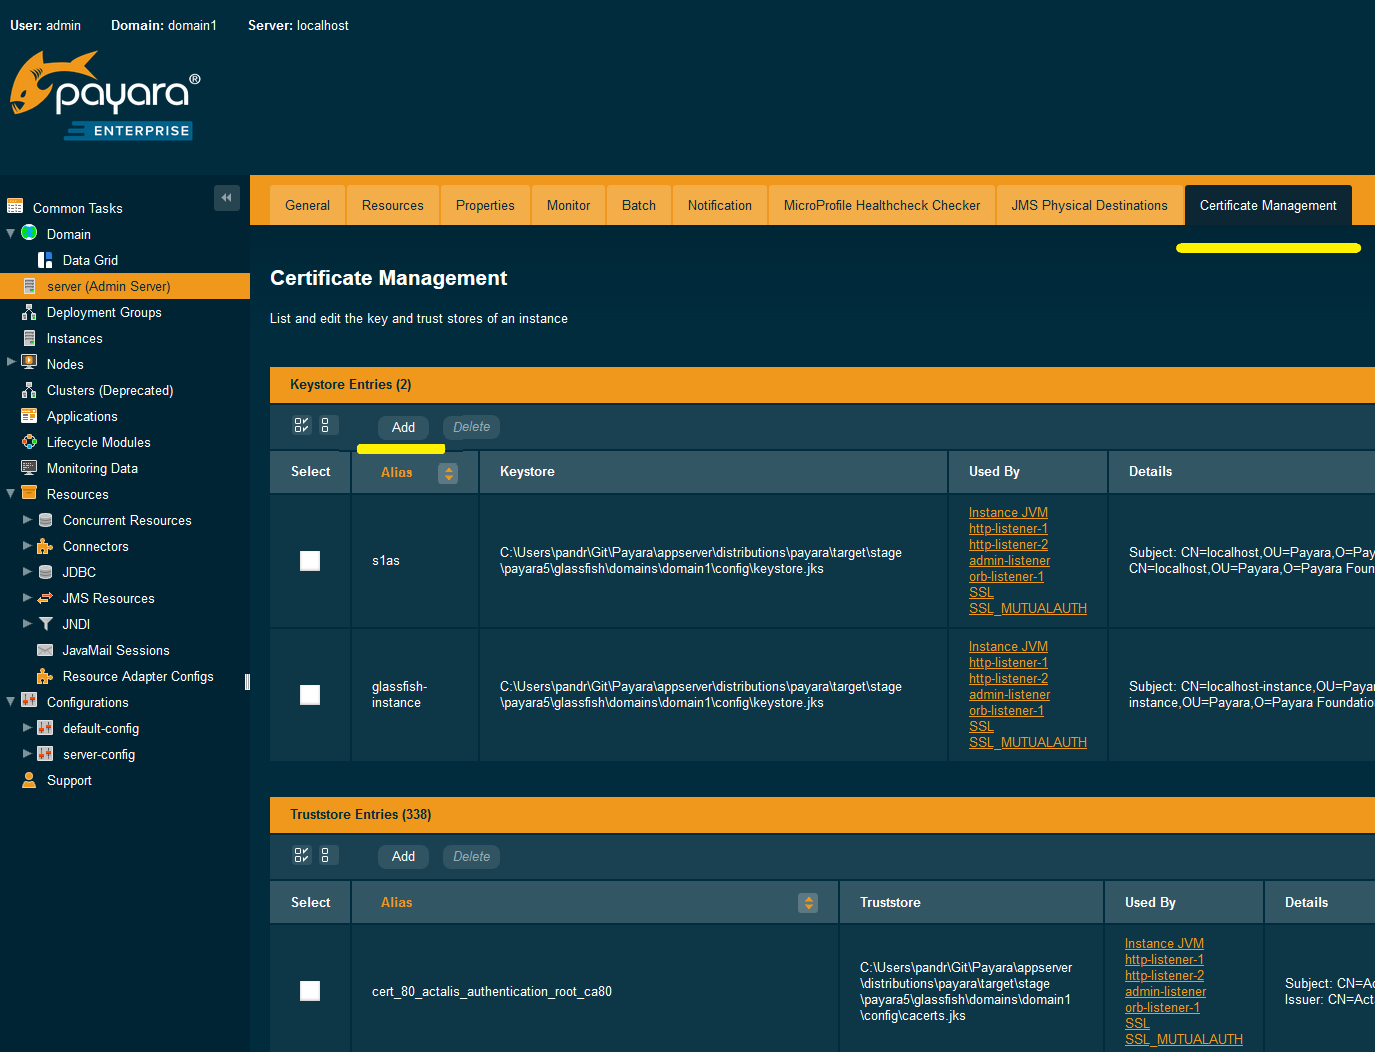
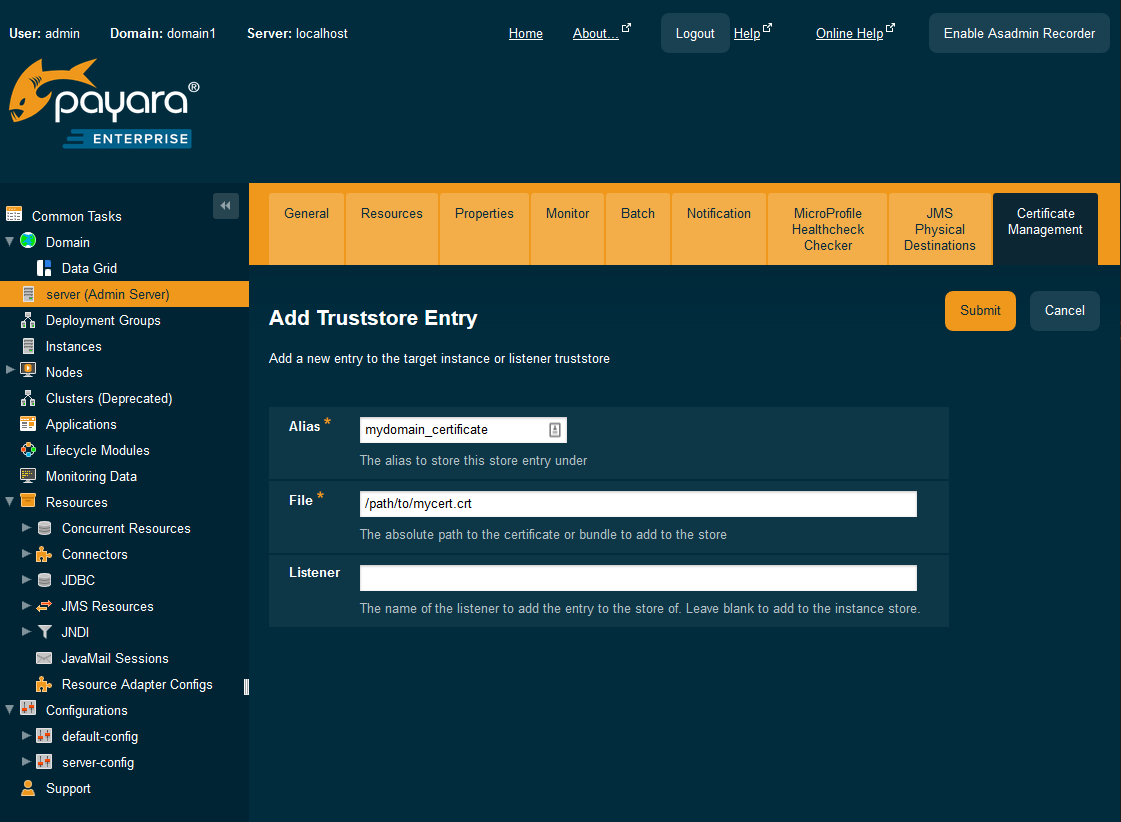
From the Admin Console, open the instance details page (e.g. on the navigation bar select Instances > $instanceName) and navigate to the Certificate Management tab. From here, Click on the Add button of the keystore table (highlighted).
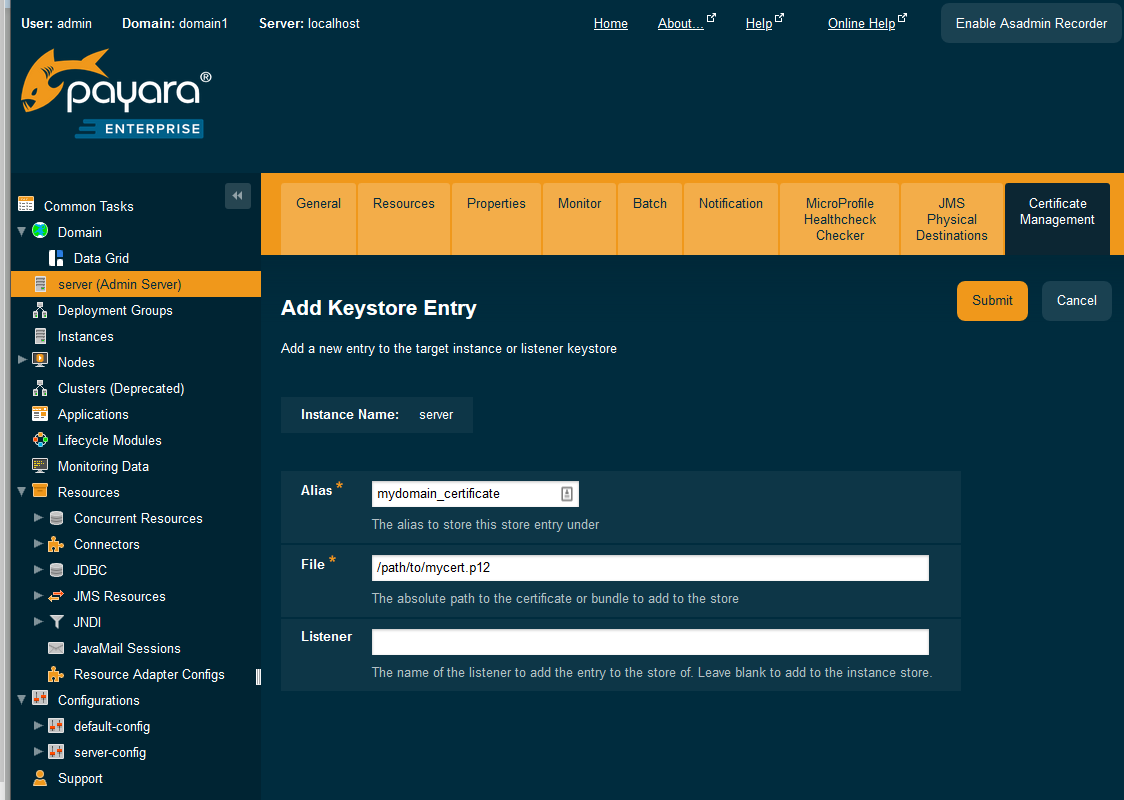
You can then enter the alias name and the path to the certificate bundle:
Using the keytool command
You can also use the keytool command of the JDK:
keytool -importkeystore -destkeystore keystore.jks -srckeystore mycert.p12 -srcstoretype PKCS12 -alias mydomain_certificateThe parameters of the above command are self-explanatory. Important here is the correct alias value.
Import into cacerts.jks
A similar command is used to import the information into the Trust Store file so that our certificate is trusted by the JVM.
Using asadmin
You can use the add-to-truststore asadmin command, detailed
here.
asadmin add-to-truststore --file mycert.crt mydomain_certificateUsing the Admin Console
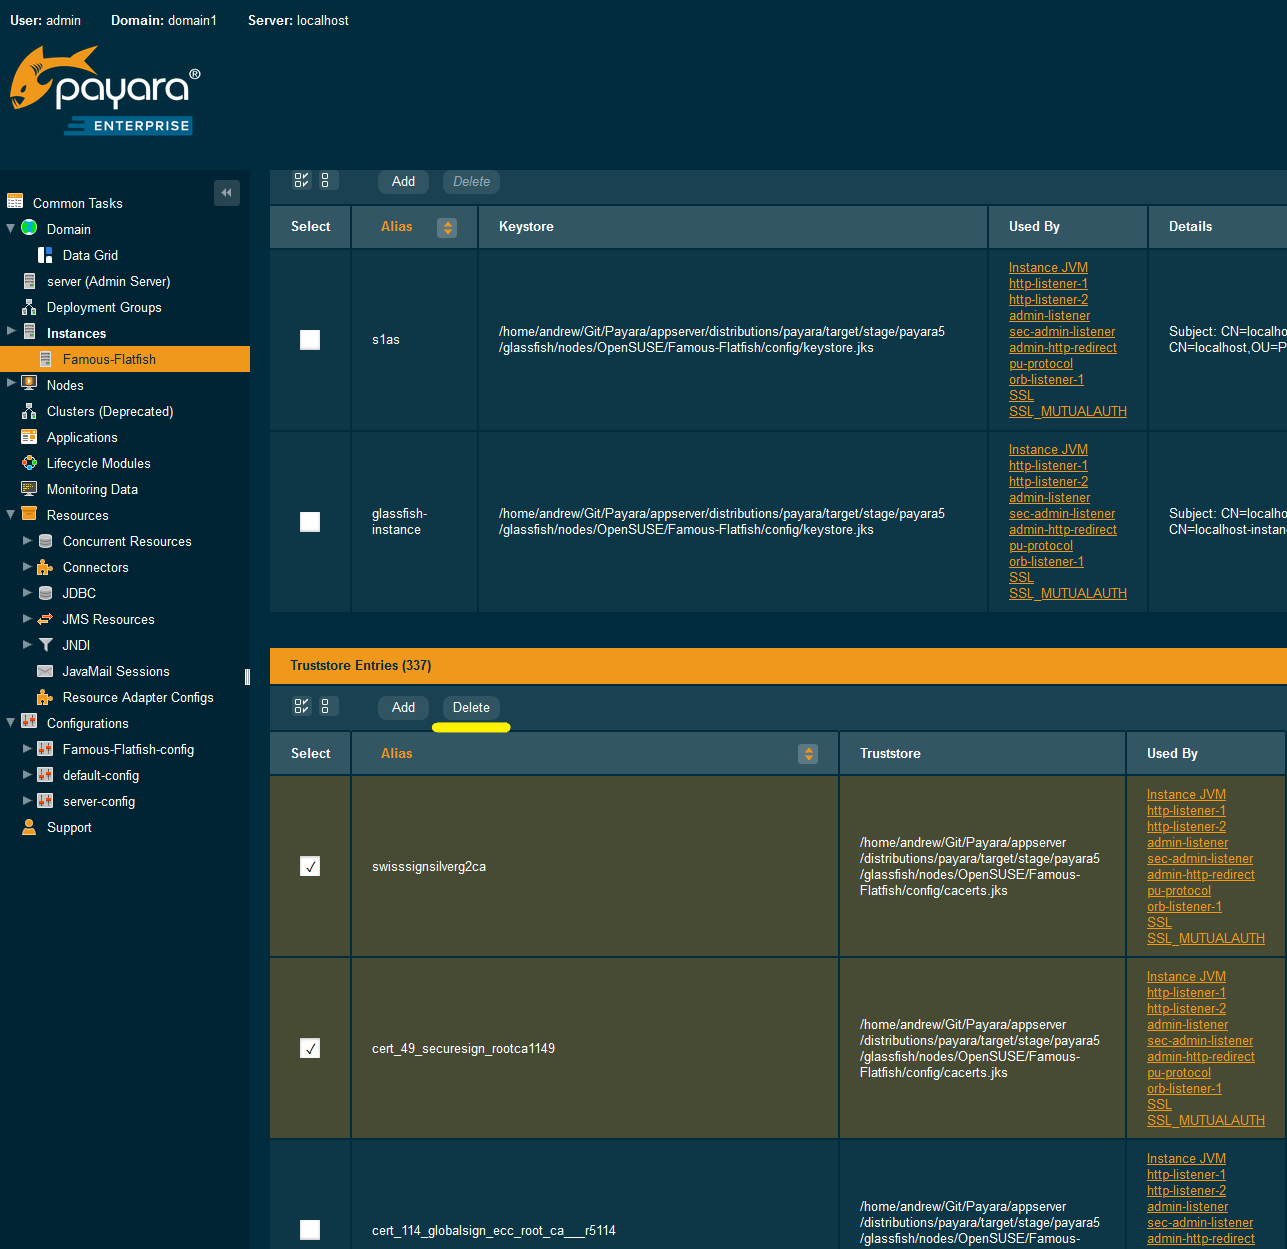
You can also follow the same steps as done for adding the bundle to the keystore via the admin console, though selecting the Add button of the truststore table…
... and specifying the mycert.crt file.
Using the keytool command
You can also use the keytool command of the JDK:
keytool -importcert -trustcacerts -destkeystore cacerts.jks -file mycert.crt -alias mydomain_certificateUpdate HTTP Listener
The last step we need to perform is the indication which 'certificate' needs to be used when Payara receives an SSL/TLS request. This can be done by specifying the alias name we have used when we integrated the required information into the key store files of the domain.
Using asadmin
This information can be set via the CLI:
asadmin set configs.config.server-config.network-config.protocols.protocol.http-listener-2.ssl.cert-nickname=mydomain_certificateIn a default installation, the http-listener-2 is responsible for handling the secure connections on port 8181. The above command sets the alias name so that the system knows which certificate needs to be used.
Using the Admin Console
The information can also be entered in the Web Administration console, by navigating to the page Configurations → server-config → HTTP Service → HTTP Listeners > http-listener-2.
Certificate expiration
All the X.509 certificates have a validity period when they can be used. Once this validity period is passed, the users will see a warning or error message depending on the browser that the certificate is no longer valid.
Within the server log file, the expired certificates are listed when the system encounters one. Besides your custom certificates which are added as described in a previous chapter, the Trust Store also contains certificates from the Certificate Authorities. Also, they can expire and thus can be listed in the log.
Since Payara Server 5.194 the log level of the expired certificates is of type WARNING. In previous versions, the entries showed as an ERROR.
Since the server continues to operate normally, it was decided to lower the level of the message.
Removing expired certificates
Using asadmin
Since Payara Server 5.20.0
If you wish to remove all expired certificates, you can use the remove-expired-certificates, remove-from-keystore,
or remove-from-truststore commands detailed
here,
here, and
here respectively.
asadmin remove-expired-certificates
asadmin remove-from-keystore mydomain_certificate
asadmin remove-from-truststore mydomain_certificate
Using the Admin Console
Since Payara Server 5.20.1
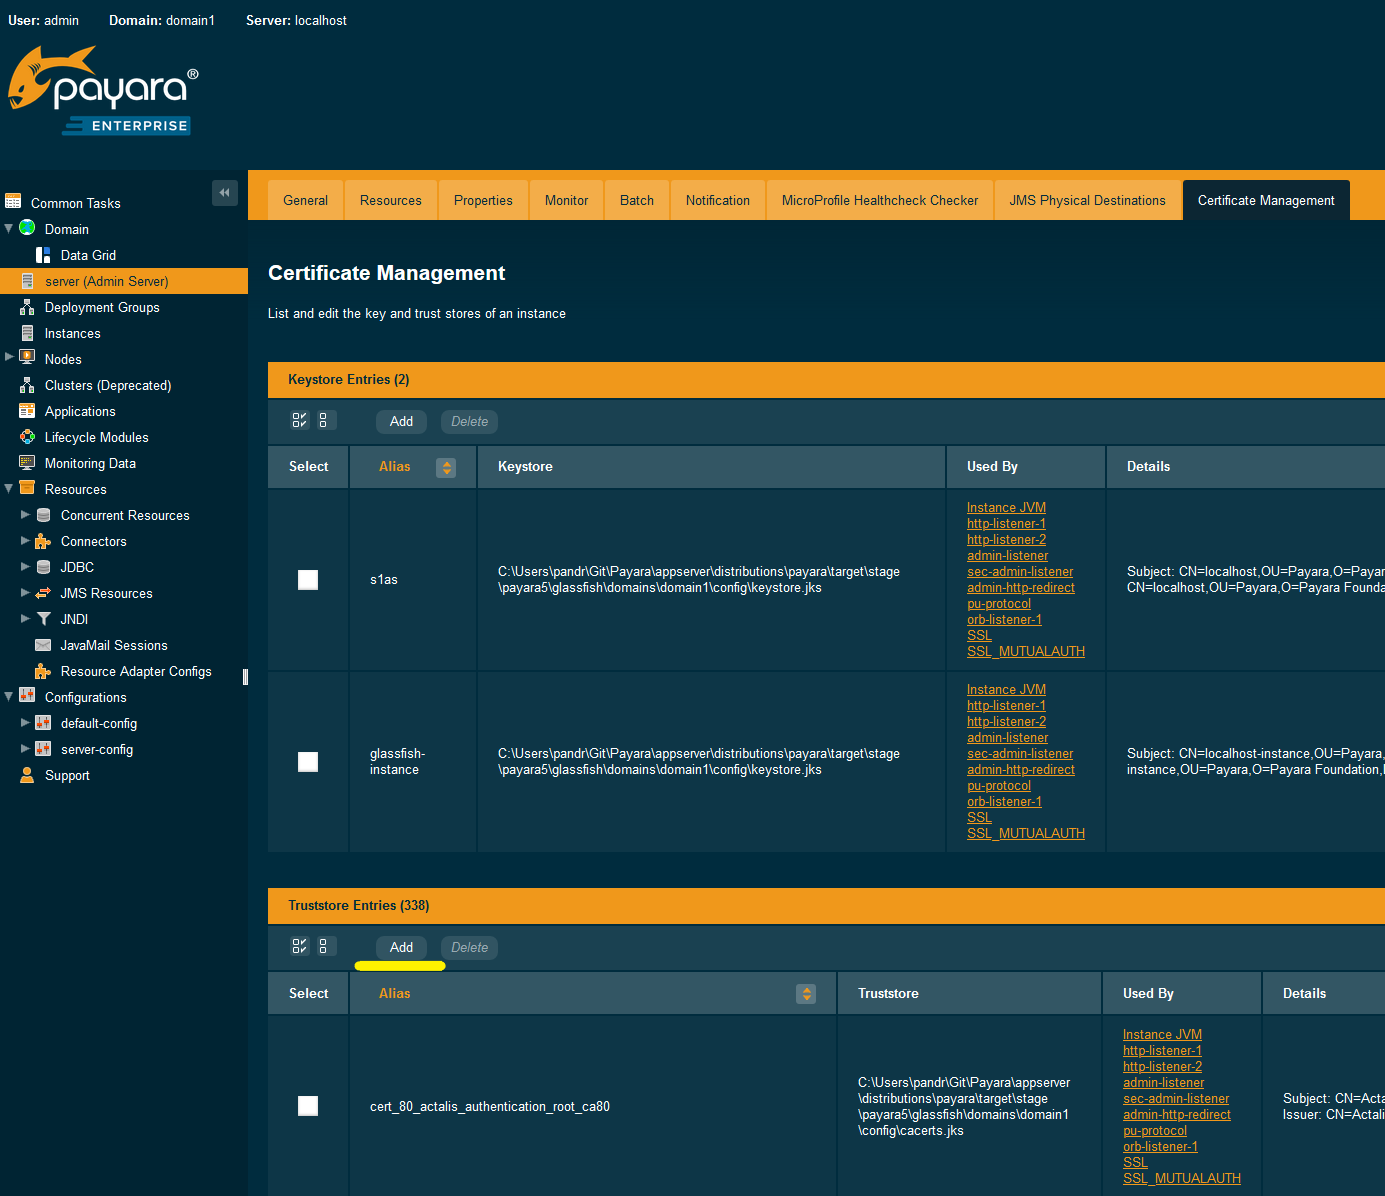
You can also remove individual or groups of certificates using the admin console Certificate Management tab (Instances > $instanceName > Certificate Management). Select the desired certificates from the key or trust store entries table (not both), and click on the Delete button.