Creating new Payara Micro Maven Application
-
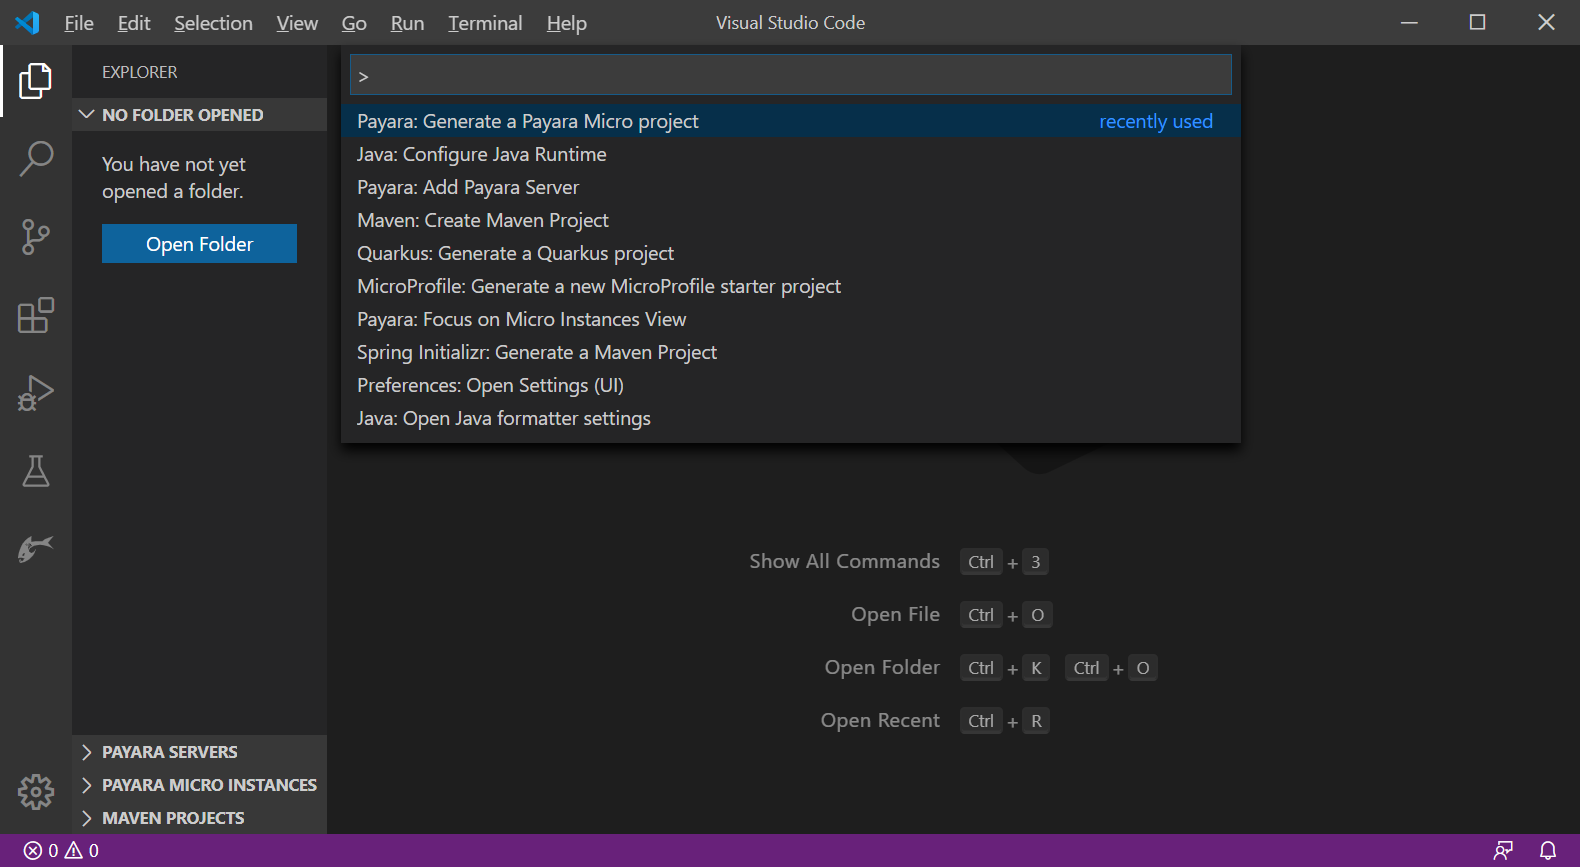
Simply start up the Visual Studio Code and then Open the command pallet using �Ctrl + Shift + P.
-
Type Payara Micro and select the Generate a Payara Micro Project option:
-
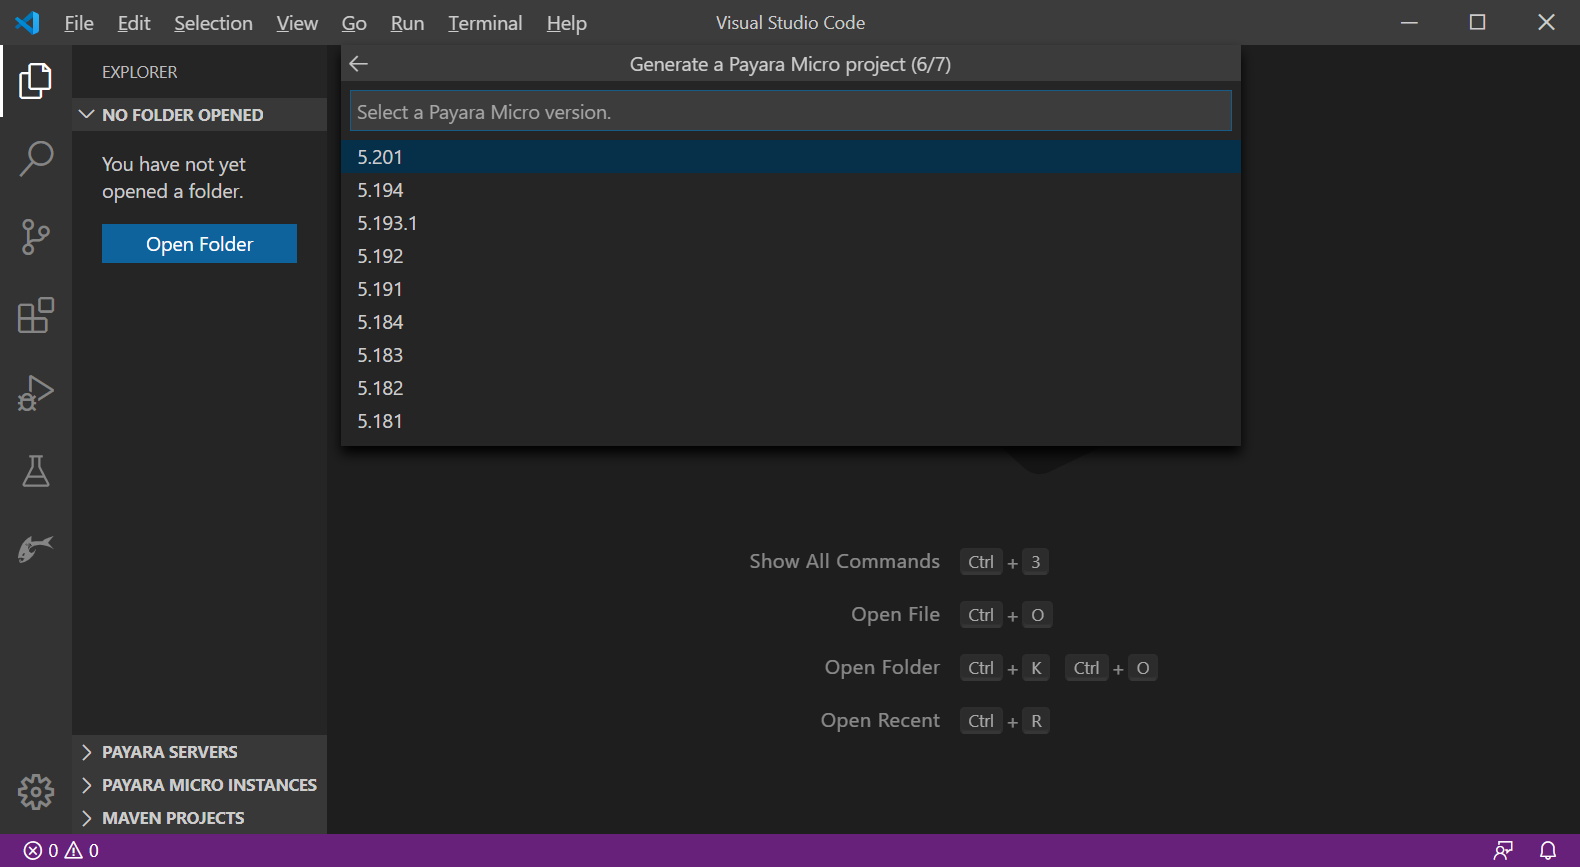
Answer the prompts (groupId, artifactId, version, etc) to setup the project.

-
Select the Payara Micro version and the destination folder, where the project will be generated:
-
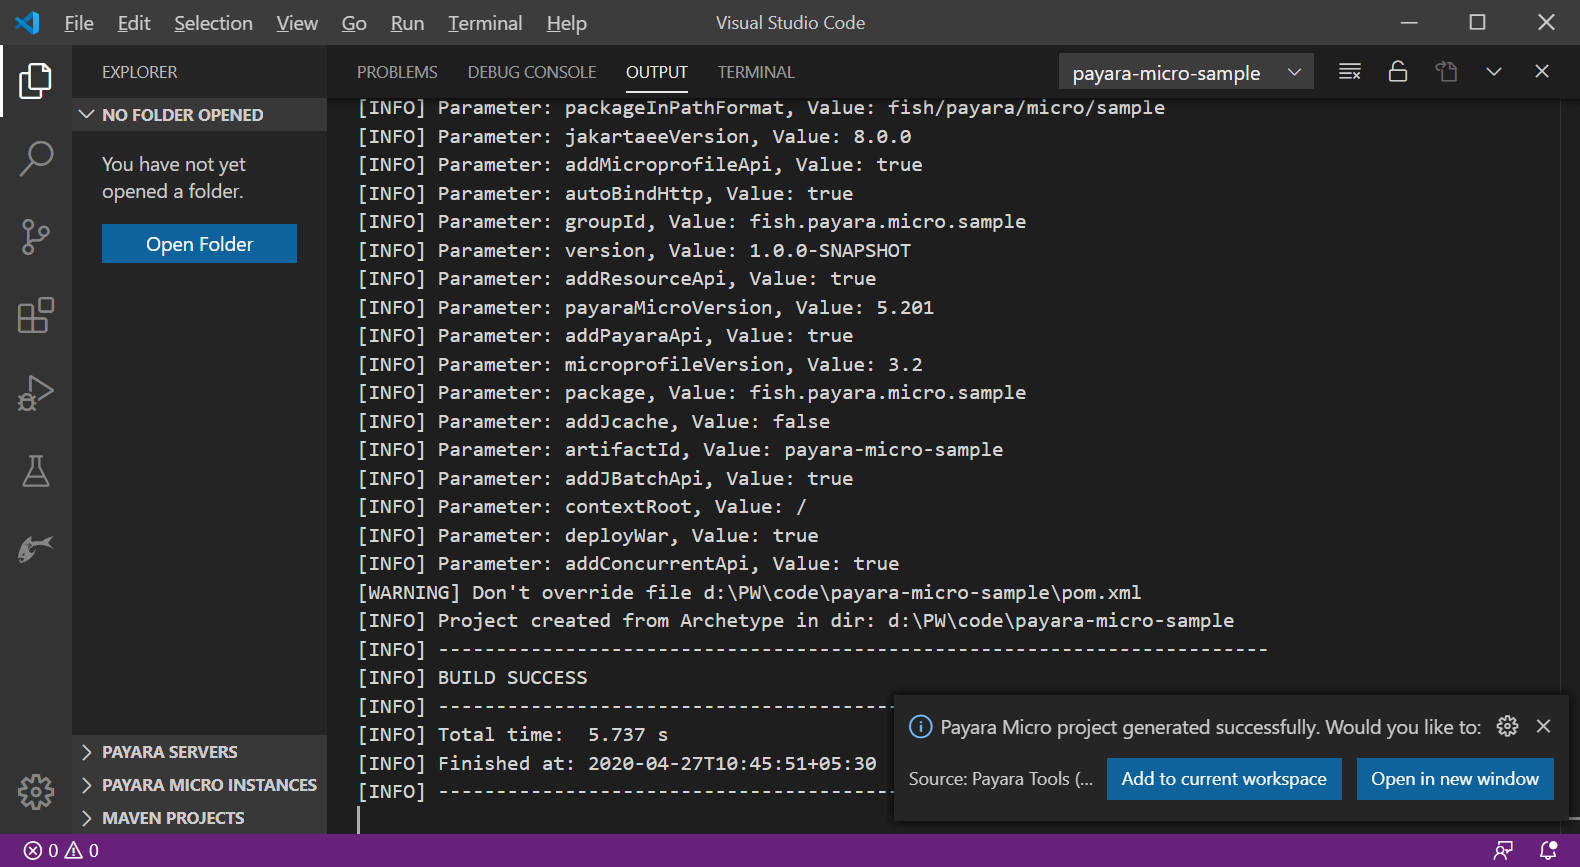
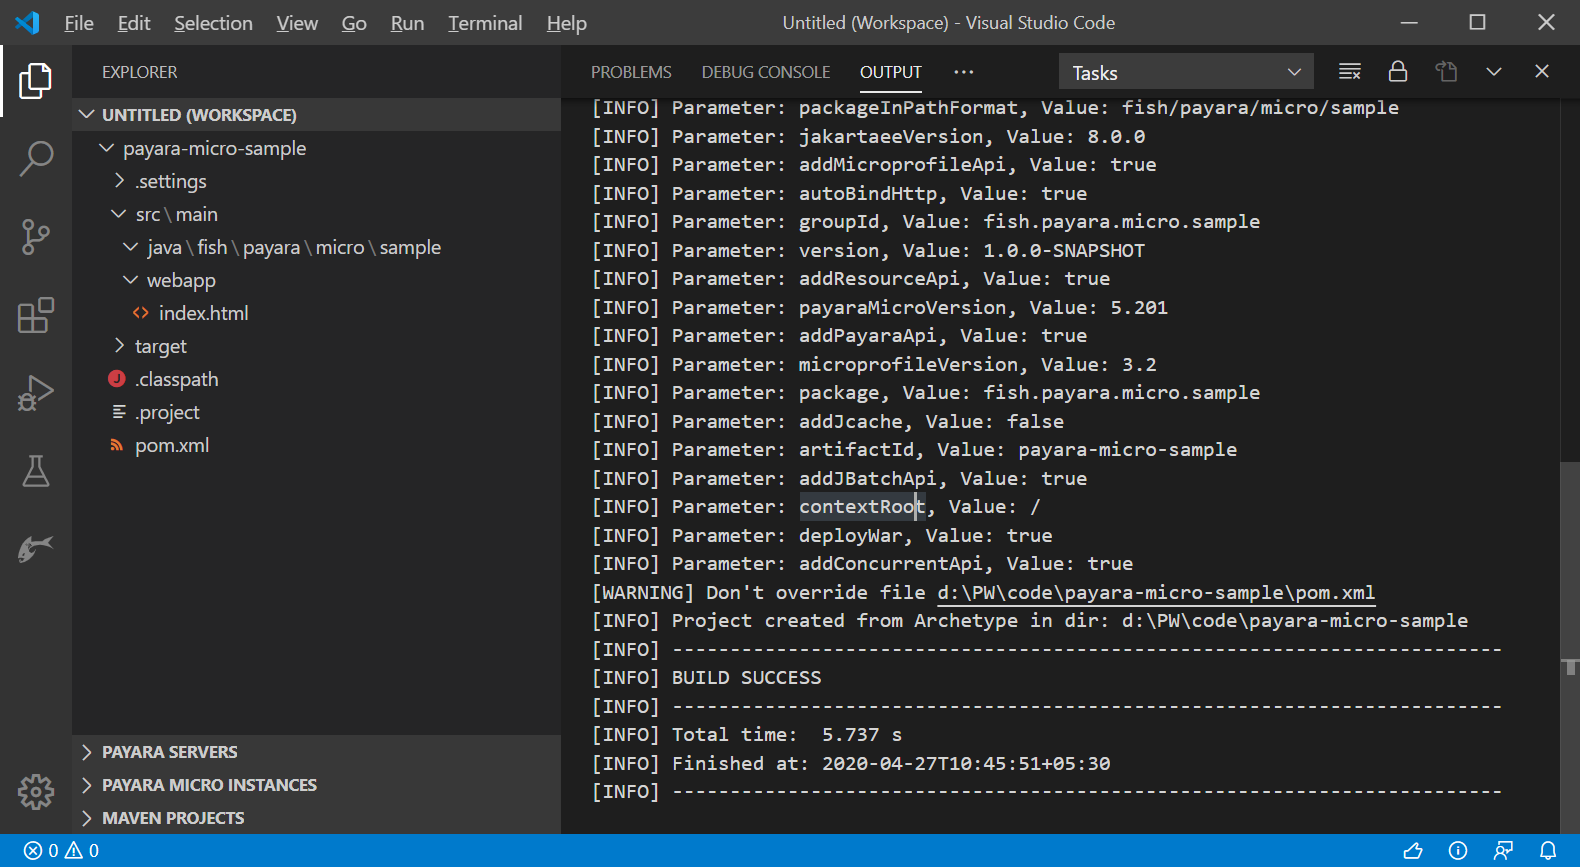
When you fill the required project details, the IDE creates the following projects from the Payara Micro maven archetype. You may add the generated project to the current workspace or open in the new window:
Run Payara Micro Application
-
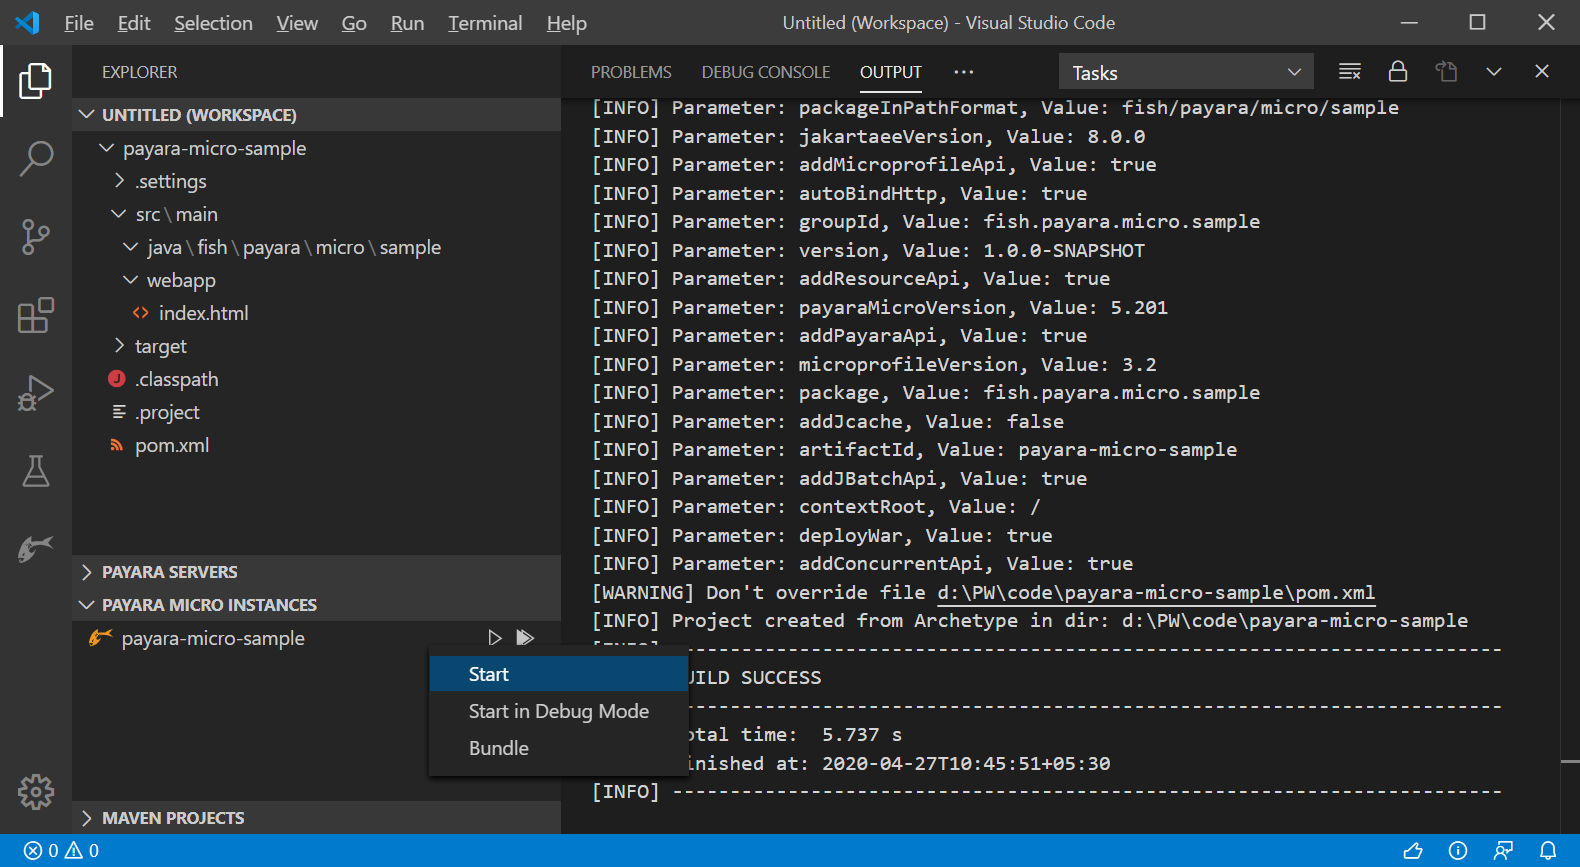
Now to simply run the Payara Micro Application, Go to the explorer sidebar (or Payara activity bar), expand Payara Micro Instances, right-click on the listed Payara Micro instance and select Start:
-
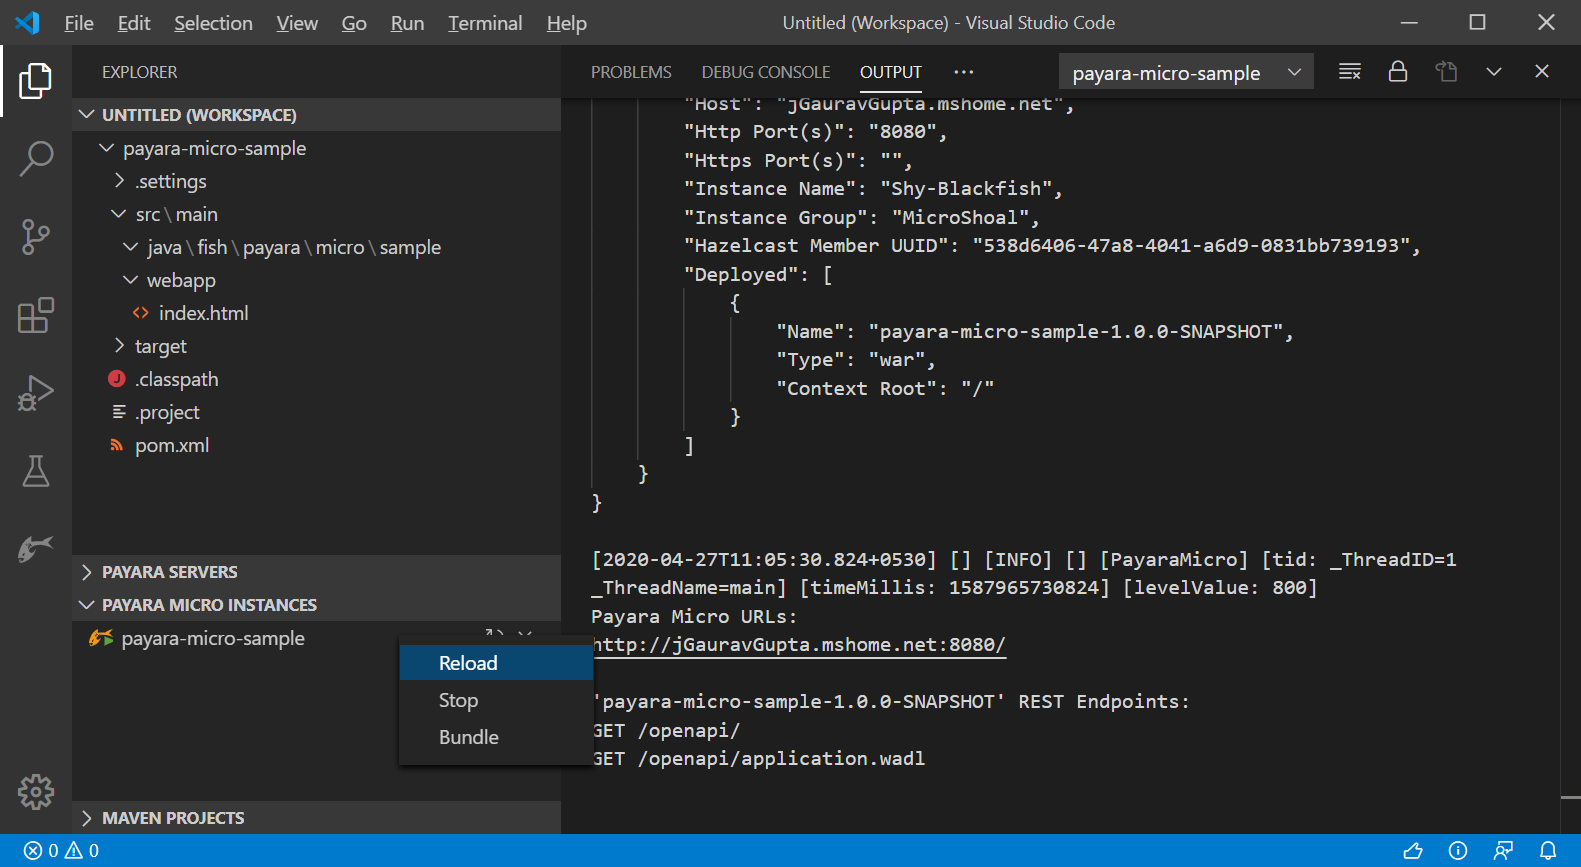
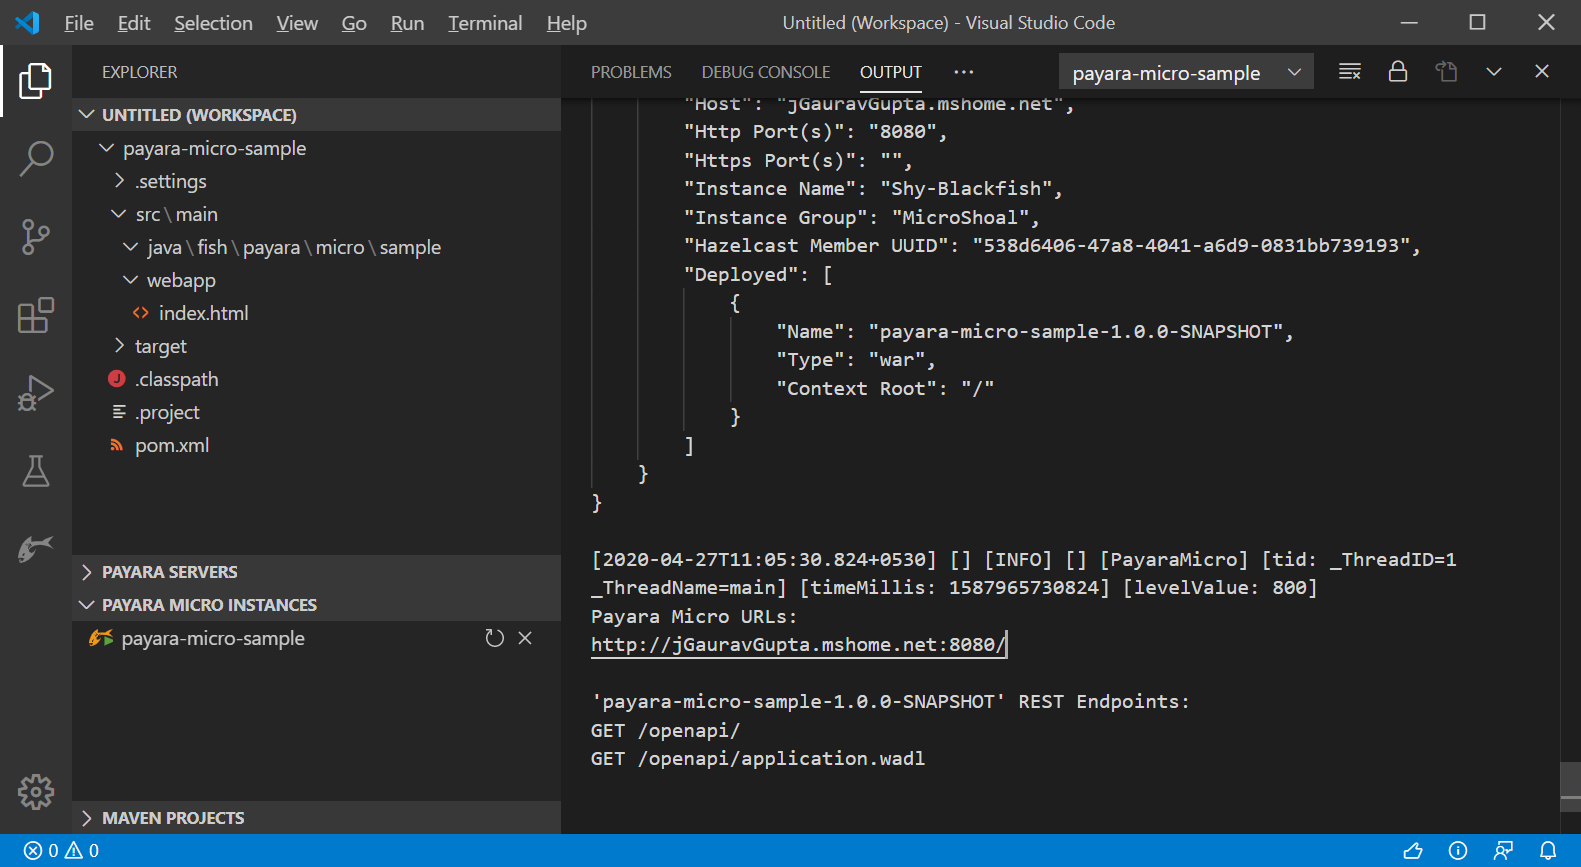
After starting the Micro instance, you may see the log in the OUTPUT window:
-
Payara Micro Application supports auto-deploy feature which redeploys the new application on every save action. To manually redeploy the application, �right-click�on the listed Payara Micro instance and select Redeploy: