The Extensible Messaging and Presence Protocol is a communication protocol based on XML notation, focused through the exchange of structured messages across services and devices on multiple network arrangements and targeted towards Message Oriented Middleware. Formerly known as Jabber, XMPP is an open standard, which means that anyone can implement toolsets used to send and receive messages across its implementations.
XMPP Server Configuration
XMPP works using a client-server architecture, akin to other messaging solutions like Hipchat, Slack or IRC for example. Unlike those, XMPP is decentralized, which means that any person or organization can run its own server using a proprietary domain (which can be public or private depending of the user needs). There are multiple server implementations in the market, with both open source and commercial licensing models like the following:
-
Apache Vysper (Open Source)
-
Oracle Communications Instant Messaging Server (Commercial)
-
OpenFire (Open Source)
-
CommuniGate Pro (Commercial)
-
Jabberd 2 (Open Source)
No matter what XMPP server you or your organization is using, the Payara XMPP Notifier Service will be able to communicate with it and push notifications to a specific chat room hosted on the server.
Requirements
The following are the requirements needed to be fulfilled by the XMPP server:
-
Configure the XMPP server with a valid domain name/FQDN
-
If considering secure communication, the XMPP server must have a valid SSL certificate configured for its FQDN
-
Configure the service for text-based conferencing (this service is usually named conference and is a subdomain of the server)
-
Create room that will be used to receive the notifications sent by Payara Server.
-
Create a user that is allowed to access the room created and push notification messages.
We will use OpenFire to illustrate how to correctly configure these requirements and the notifier. If you are using a different server, check its documentation and follow its instructions based on what’s being done here.
OpenFire Configuration
-
Proceed to download and install the OpenFire server by following the instructions detailed here. Once the server is installed, start the OpenFire service and head to the server’s admin console located at
http://{FQDN}:9090/ -
Since the server was recently installed it will prepare a bootstrapping wizard. First, select the language that will be used by the administration interface:

-
Now, proceed to configure the domain name and FQDN of your server. You can also alter the ports for the admin console and configure secure access using property encryption if necessary:

-
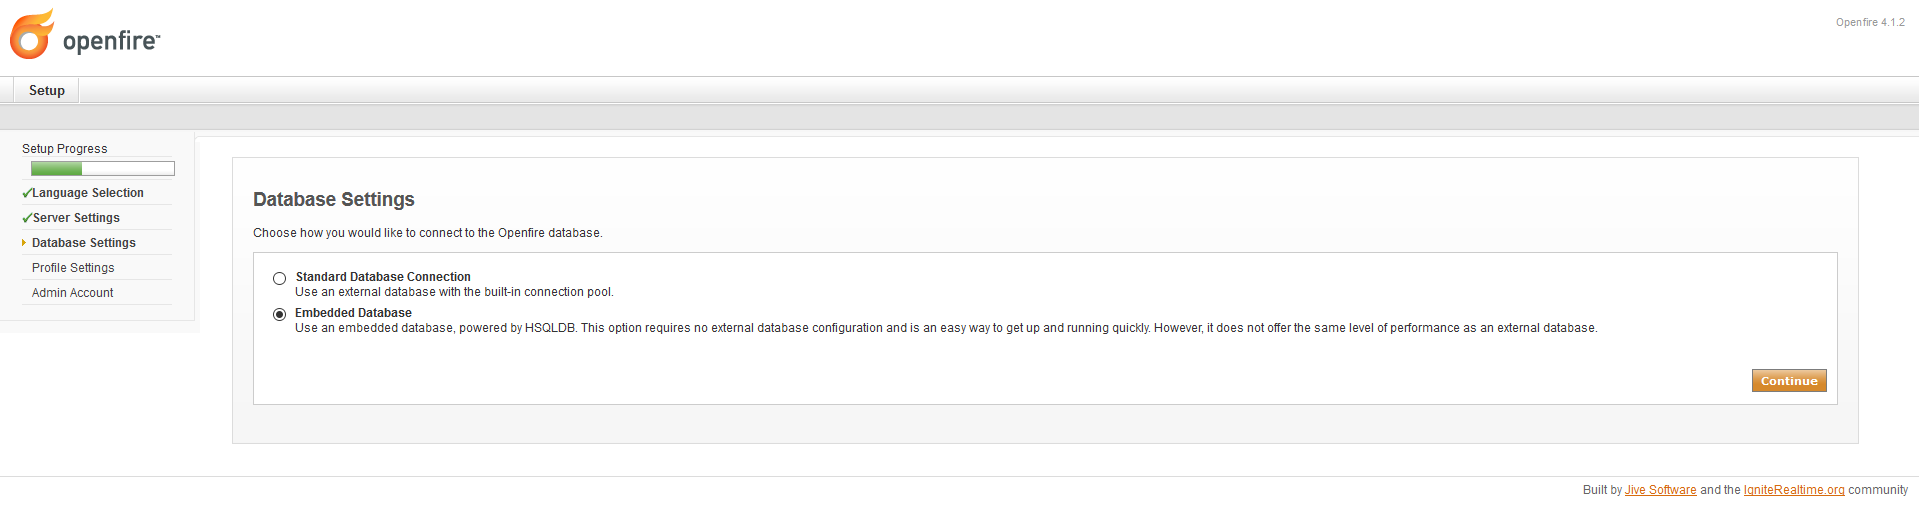
To use OpenFire on production environments, its recommended to install an external database used to store its configuration and data. For the sake of simplicity, we will use the embedded option instead:
-
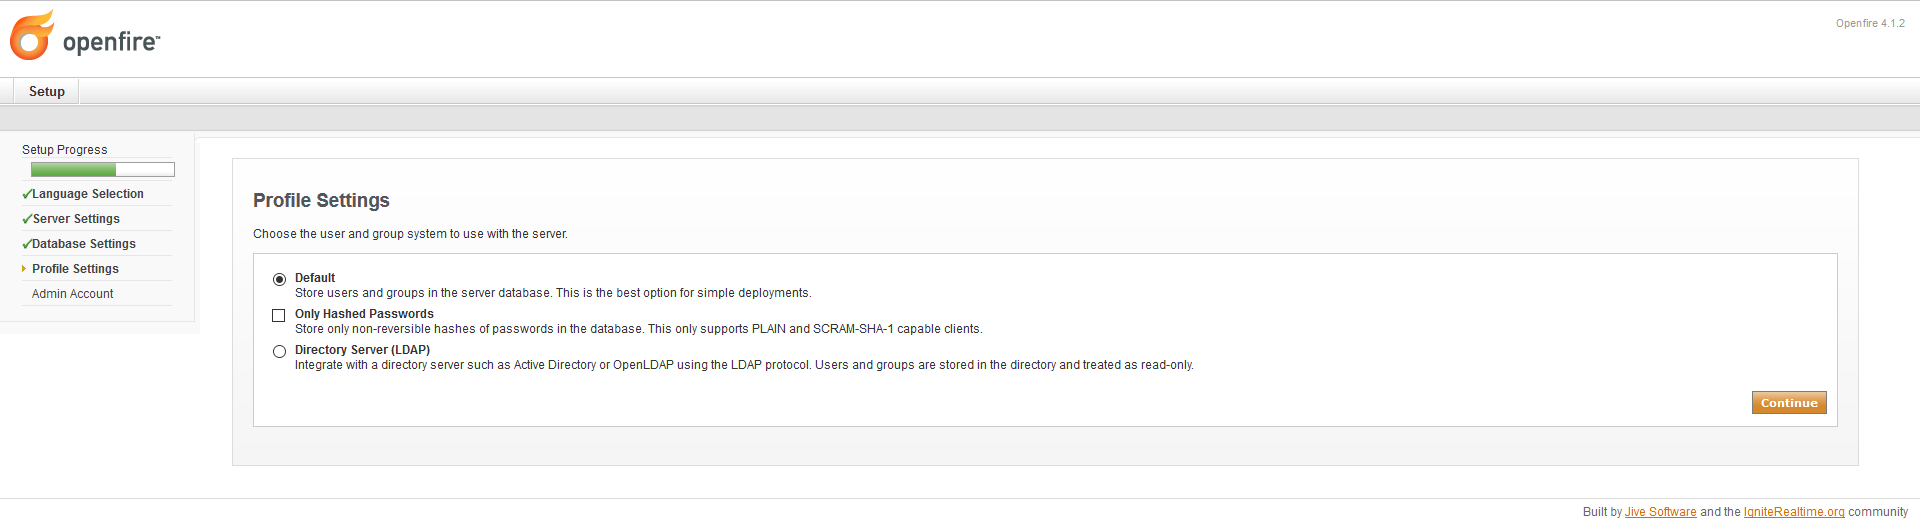
Next, we have to configure the user data store that will back the server’s authentication. Generally speaking, is not uncommon that an organization uses a LDAP directory to store profiles so that option is recommended on production environments. As with the previous configuration we will use the simpler option:
-
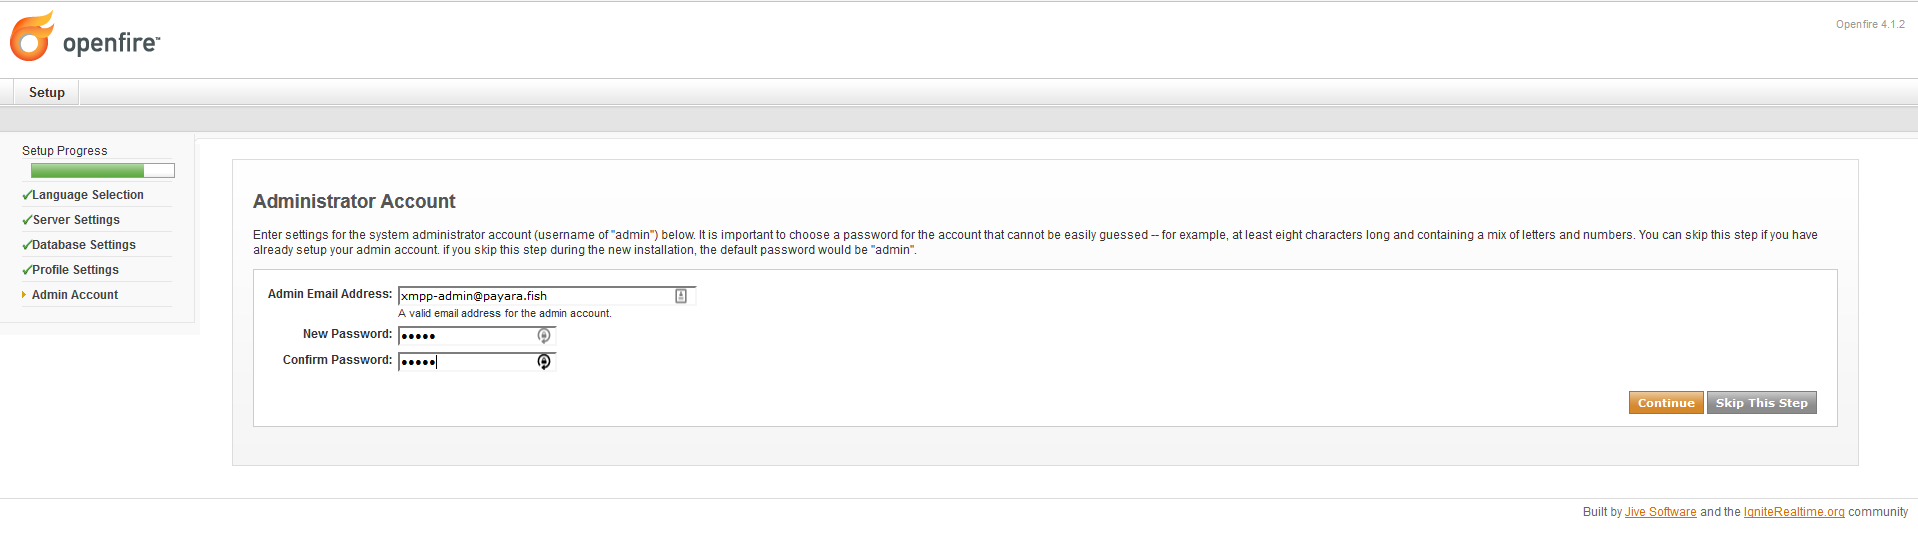
Finally, configure the credentials for the admin user:
-
With the server installation complete, login to the admin console with the credentials of the administrator user:

-
Now we need to create the user that will be used to push notifications on the service’s room. Select the User/Groups option in the top menu:
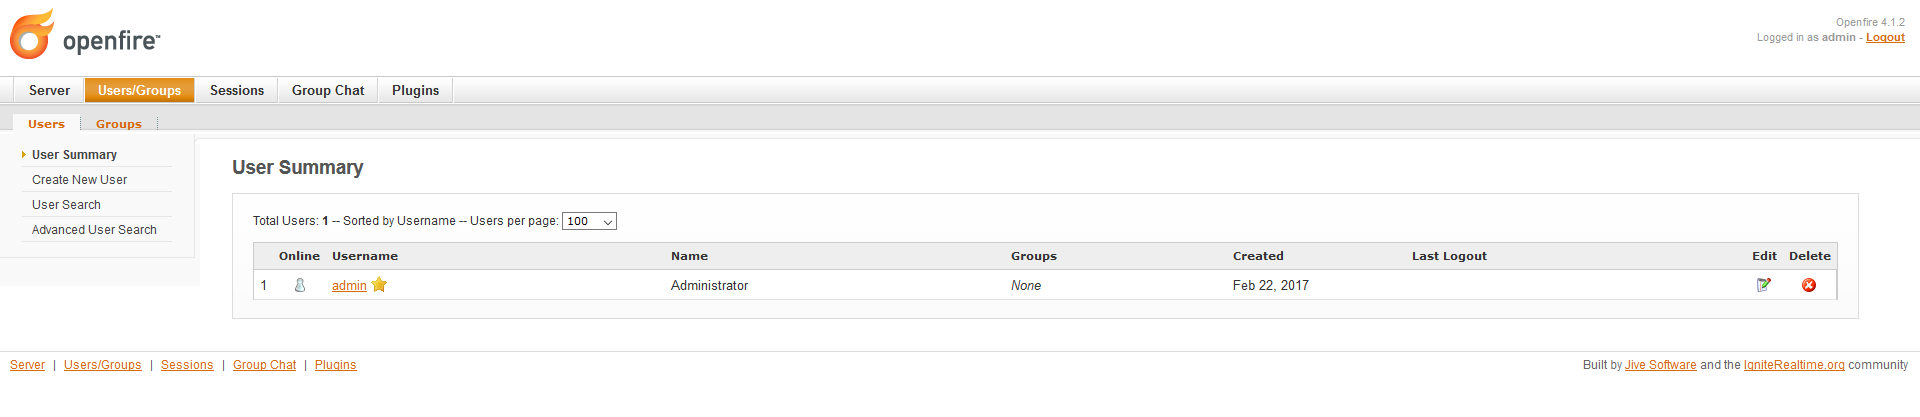
-
Click on the Create New User option in the sidebar. Input the information for this new user (Username, Name and Password are required):
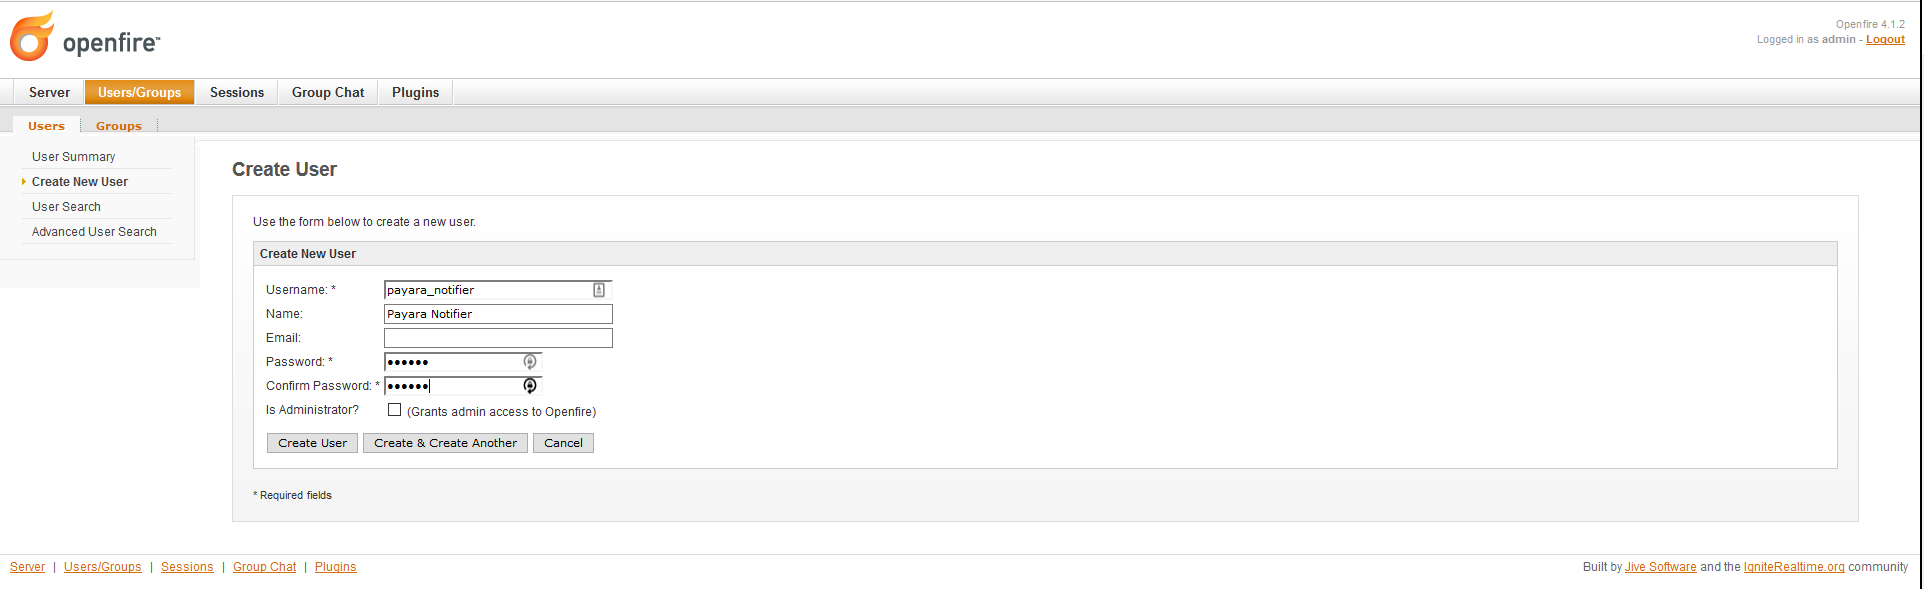
-
With the user created, we will proceed to create the room used to display notifications. Select the Group Chat option in the top menu:
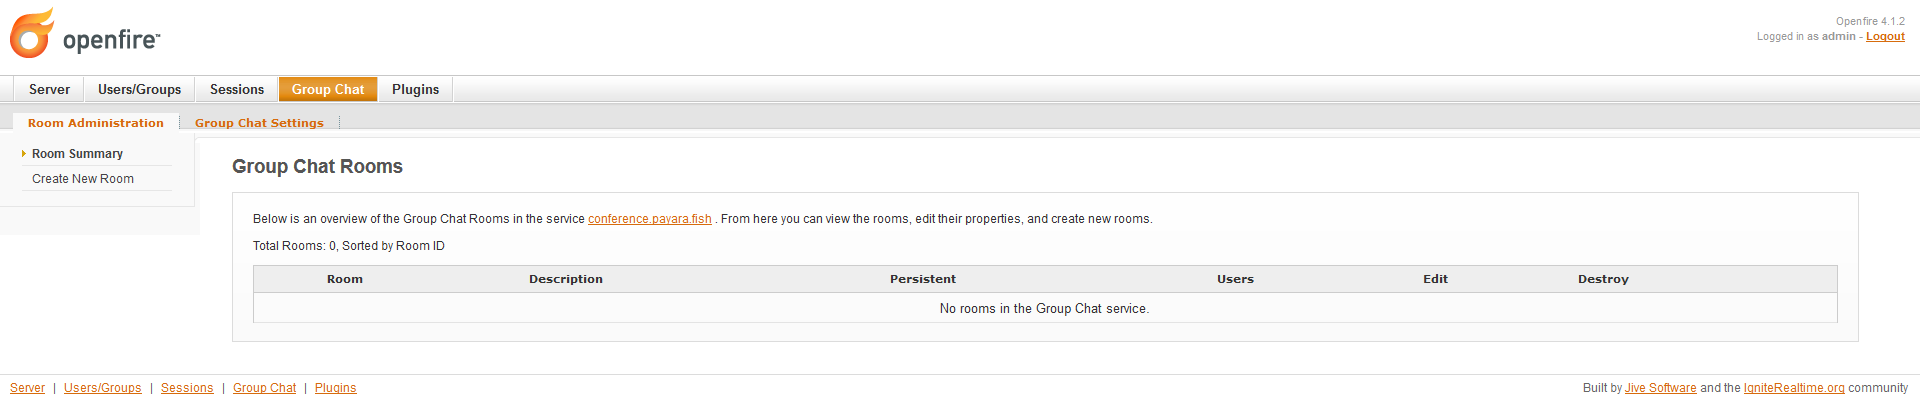
-
Now, click on the Create New Room option in the sidebar. Be sure to input the room’s ID, Name and Description as requested:
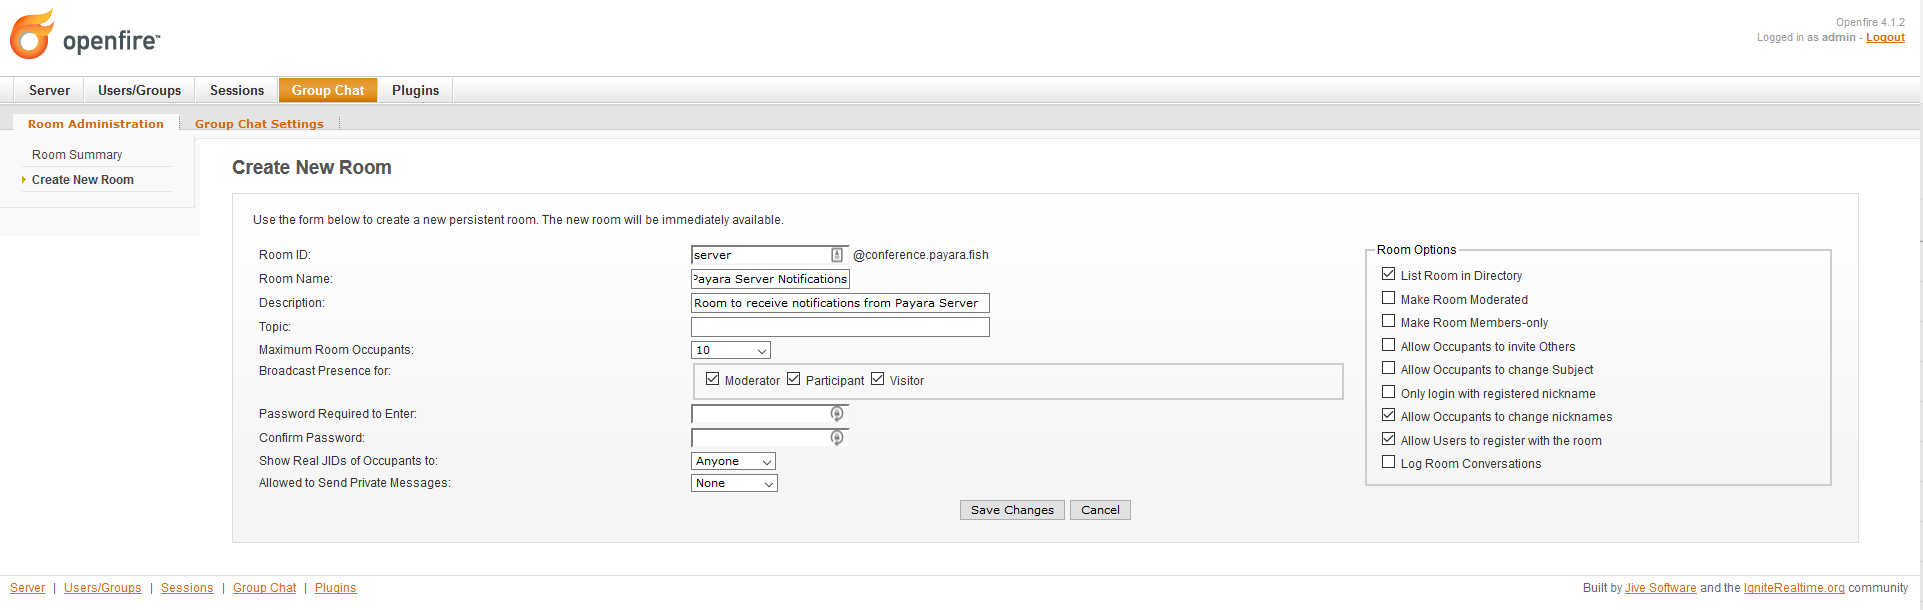
-
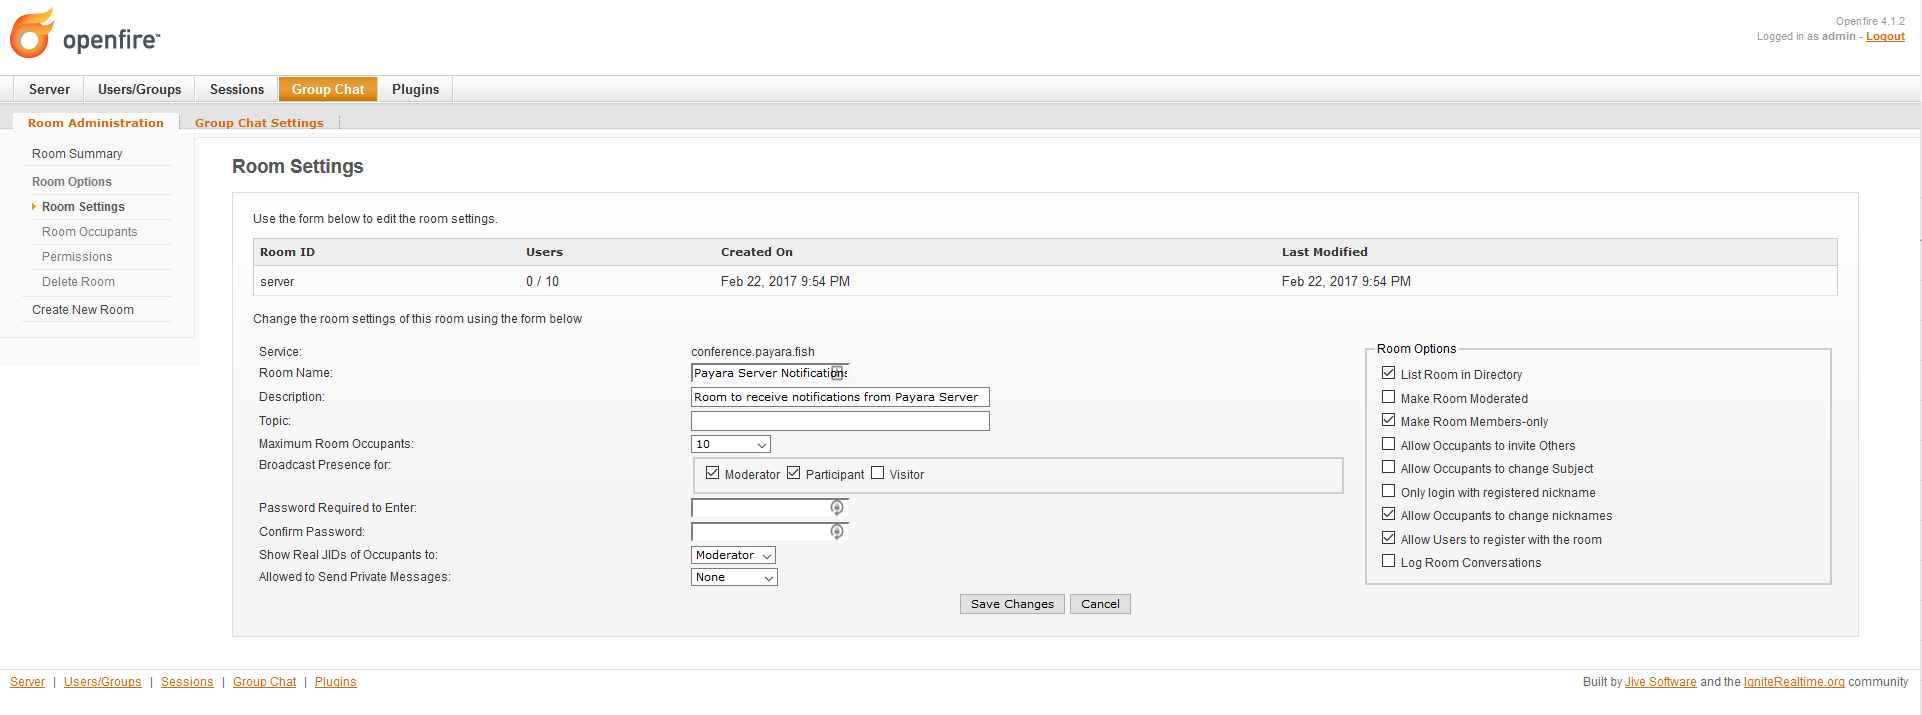
Check that the room was created successfully. Click on the room’s link to enter its details. Take special note of the Service Name, which will be used to configure the notifier later:
-
Finally, select the Permissions option in the sidebar and add the user we created earlier in the Room Occupants section. You can do this by searching using its username in the search box:

With this, the XMPP server configuration is completed.
Payara Server Configuration
With the XMPP server properly configured, now it’s time to setup the Notification Service in the domain’s configuration. As usual you can do this using the administration web console, from the command line or editing the domain.xml configuration file directly.
The configuration settings required by the service are the following:
- Server’s Location
-
Hostname and Port where the XMPP is listening for requests. The hostname is required, the port defaults to *5222* if not provided.
- Service name
-
Used by the XMPP server to manage group chat sessions, always required.
- Room ID
-
The ID of the room that will be used to host the notification events, always required.
- Credentials
-
The Username and Password of the user that will post notification events in the room.
You can also configure an option whether or not to disable security
transport (SSL) when establishing communication to the server. The
default value for this setting is false. It’s not recommended to
disable secure access on production environments, so use it with
discretion.
|
Using the Administration Web Console
To configure the Notification Service in the Administration Console, go to Configuration → [instance-configuration (like server-config)] → Notification Service and click on the XMPP tab:
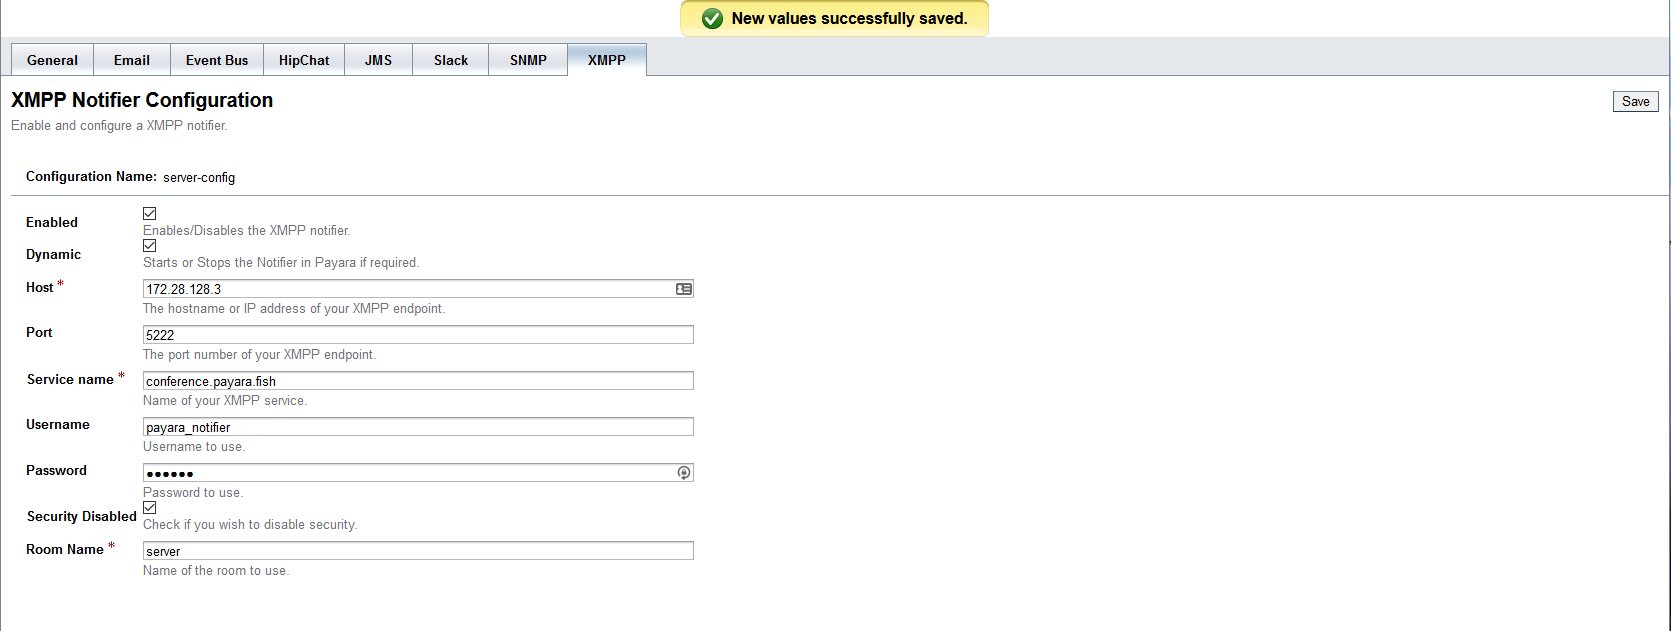
Check the Enabled box (and the Dynamic box too if you don’t want to restart the domain) and input the required information.
Hit the Save button to preserve the changes.
From the Command Line
To configure the Notification Service from the command line, use the
notification-xmpp-configure asadmin command, specifying the
configuration options like this:
asadmin > notification-xmpp-configure --enabled=true --dynamic=true --hostname="172.28.128.3" --port=5222 --username="payara_notifier" --password="******" --securityDisabled=false --roomid=serverYou can use the --enabled and --dynamic options to enable or disable
the XMPP notifier on demand.
Also, you can retrieve the current configuration for the XMPP notifier
using the get-xmpp-notifier-configuration asadmin command like this:
asadmin > get-xmpp-notifier-configuration

Enabled  Host          Port  Service Name            Username         Password  Security Disabled  Room ID
true     172.28.128.3  5222  conference.payara.fish  payara_notifier  payara    true               server
On the domain.xml configuration file
To configure the Notification Service in the domain.xml configuration file,
locate the notification-service-configuration element in the tree and insert
the xmpp-notifier-configuration with the respective configuration attributes
like this:
<notification-service-configuration enabled="true">
    <xmpp-notifier-configuration room-id="server" service-name="conference.payara.fish" password="******" security-disabled="true" host="172.28.128.3" username="payara_notifier"></xmpp-notifier-configuration>
</notification-service-configuration>| Modifying the domain.xml configuration is not a supported configuration method, so be careful when considering this option. |
Troubleshooting
When you have correctly configured the XMPP notifier, it can be used to push notifications to your configured server. You can visualize the messages in a XMPP client of your choice. If you do not see any notification event messages in the client, check the following:
-
Is the XMPP notifier enabled?
-
Is the Notification Service itself enabled?
-
Is there a service configured to use the notifier? (e.g. the HealthCheck service)
-
Is the service configured to send notifications frequently enough to observe?
-
Have you enabled the service after configuring it?
-
Is the XMPP server correctly configured?
-
Is there a firewall between both servers that is correctly configured to allow sending messages in the respective port?
-
Are the room permissions configured correctly?
-
If using secure transport, is the server configured with a valid SSL certificate for its FQDN?
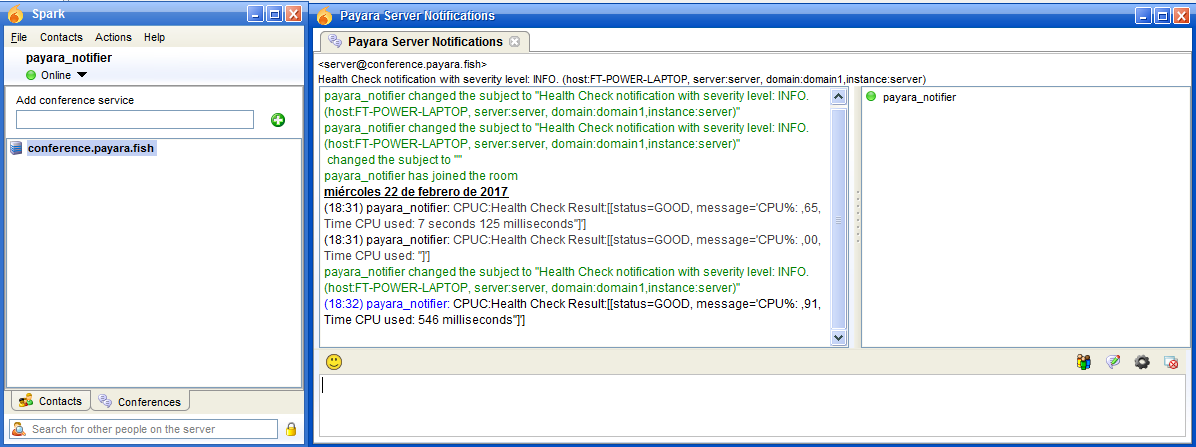
Here’s a sample of how the notifications are visualized on a chat room using the Spark XMPP client: