This section lists additional available enhancements to the CDI implementation shipped in the Payara Platform.
Concurrent CDI Bean Loading
It is possible to concurrently load CDI beans and potentially speed up an application’s load time by enabling Weld’s Multi-Threaded Bean Loading feature.
| By default, this feature is disabled for all applications on Payara Server, and enabled for all applications on Payara Micro. |
Enable Concurrent CDI Bean Loading
Concurrent CDI bean loading is configured on a per-configuration basis using the set on the cdi-service.enable-concurrent-deployment property like this:
asadmin set configs.config.server-config.cdi-service.enable-concurrent-deployment=trueIt is possible to configure the number of pre-loader threads like this:
asadmin set configs.config.server-config.cdi-service.pre-loader-thread-pool-size=4When configuring the number of the pre-loader threads, use a sensible value that is consistent with the number of CPU cores available for the server instance, otherwise this setting may introduce performance degradation on the deployment times.
| Concurrent deployment of CDI Beans is enabled by default with 2 pre-loader threads in Payara Micro. |
| There are no equivalent configuration views for these commands in the Web admin console. They’ll be reserved for a future release. |
CDI Development Mode
CDI Development Mode enables some CDI related tools and features that help when developing and inspecting applications that contain CDI beans.
This mode also provides a CDI Probe, which allows to inspect and monitor CDI beans of deployed applications at runtime.
It’s possible to enable CDI Development Mode for each application separately or enable it for all applications globally. In both cases, each application is assigned a separate CDI Probe instance.
CDI Development Mode can be enabled in the following ways:
-
The application defines a context parameter in web.xml (always enabled for the application)
-
At deploy time (enabled only for individual application)
-
Via a system property (always enabled for all deployed applications)
| If CDI Development Mode is enabled by one of the options above, it can’t be disabled by any other option. |
| CDI Development Mode will be enabled only if the deployed application contains any valid CDI bean definitions. |
Once CDI Development mode is enabled you should be able to see a message similar to this one in the server’s log output:
Weld Development Mode: ENABLEDEnabling CDI Development Mode
The CDI Development Mode can be enabled using the following mechanisms:
Via asadmin CLI
Using the asadmin CLI it is possible to enable development mode for a single application or for ALL deployed applications.
Enabling for a single application
The CDI Development Mode can be enabled for a single application with the deploy command. Add the cdiDevModeEnabled=true property to the --properties argument’s value of the deploy command.
Here’s an example of enabling development mode for an application named application.war:
asadmin> deploy --properties cdiDevModeEnabled=true myapplication.war
It’s also possible to use the same cdiDevModeEnabled property with the redeploy command to enable/disable development mode when redeploying an application.
|
Enabling for all applications
The CDI Development Mode can be enabled for all applications by setting the org.jboss.weld.development system property to true with the create-system-properties asadmin command:
asadmin> create-system-properties org.jboss.weld.development=true| All applications deployed AFTER this setting is applied will have CDI Development Mode enabled. |
To enable it for already deployed applications, it’s necessary to redeploy them or disable and then enable them. The latter can be done with the disable and enable asadmin commands:
asadmin> disable myapplication
asadmin> enable myapplication
Using Admin Console
Using the admin web console it is possible to enable development mode for a single application or for ALL deployed applications.
Enabling for a single application
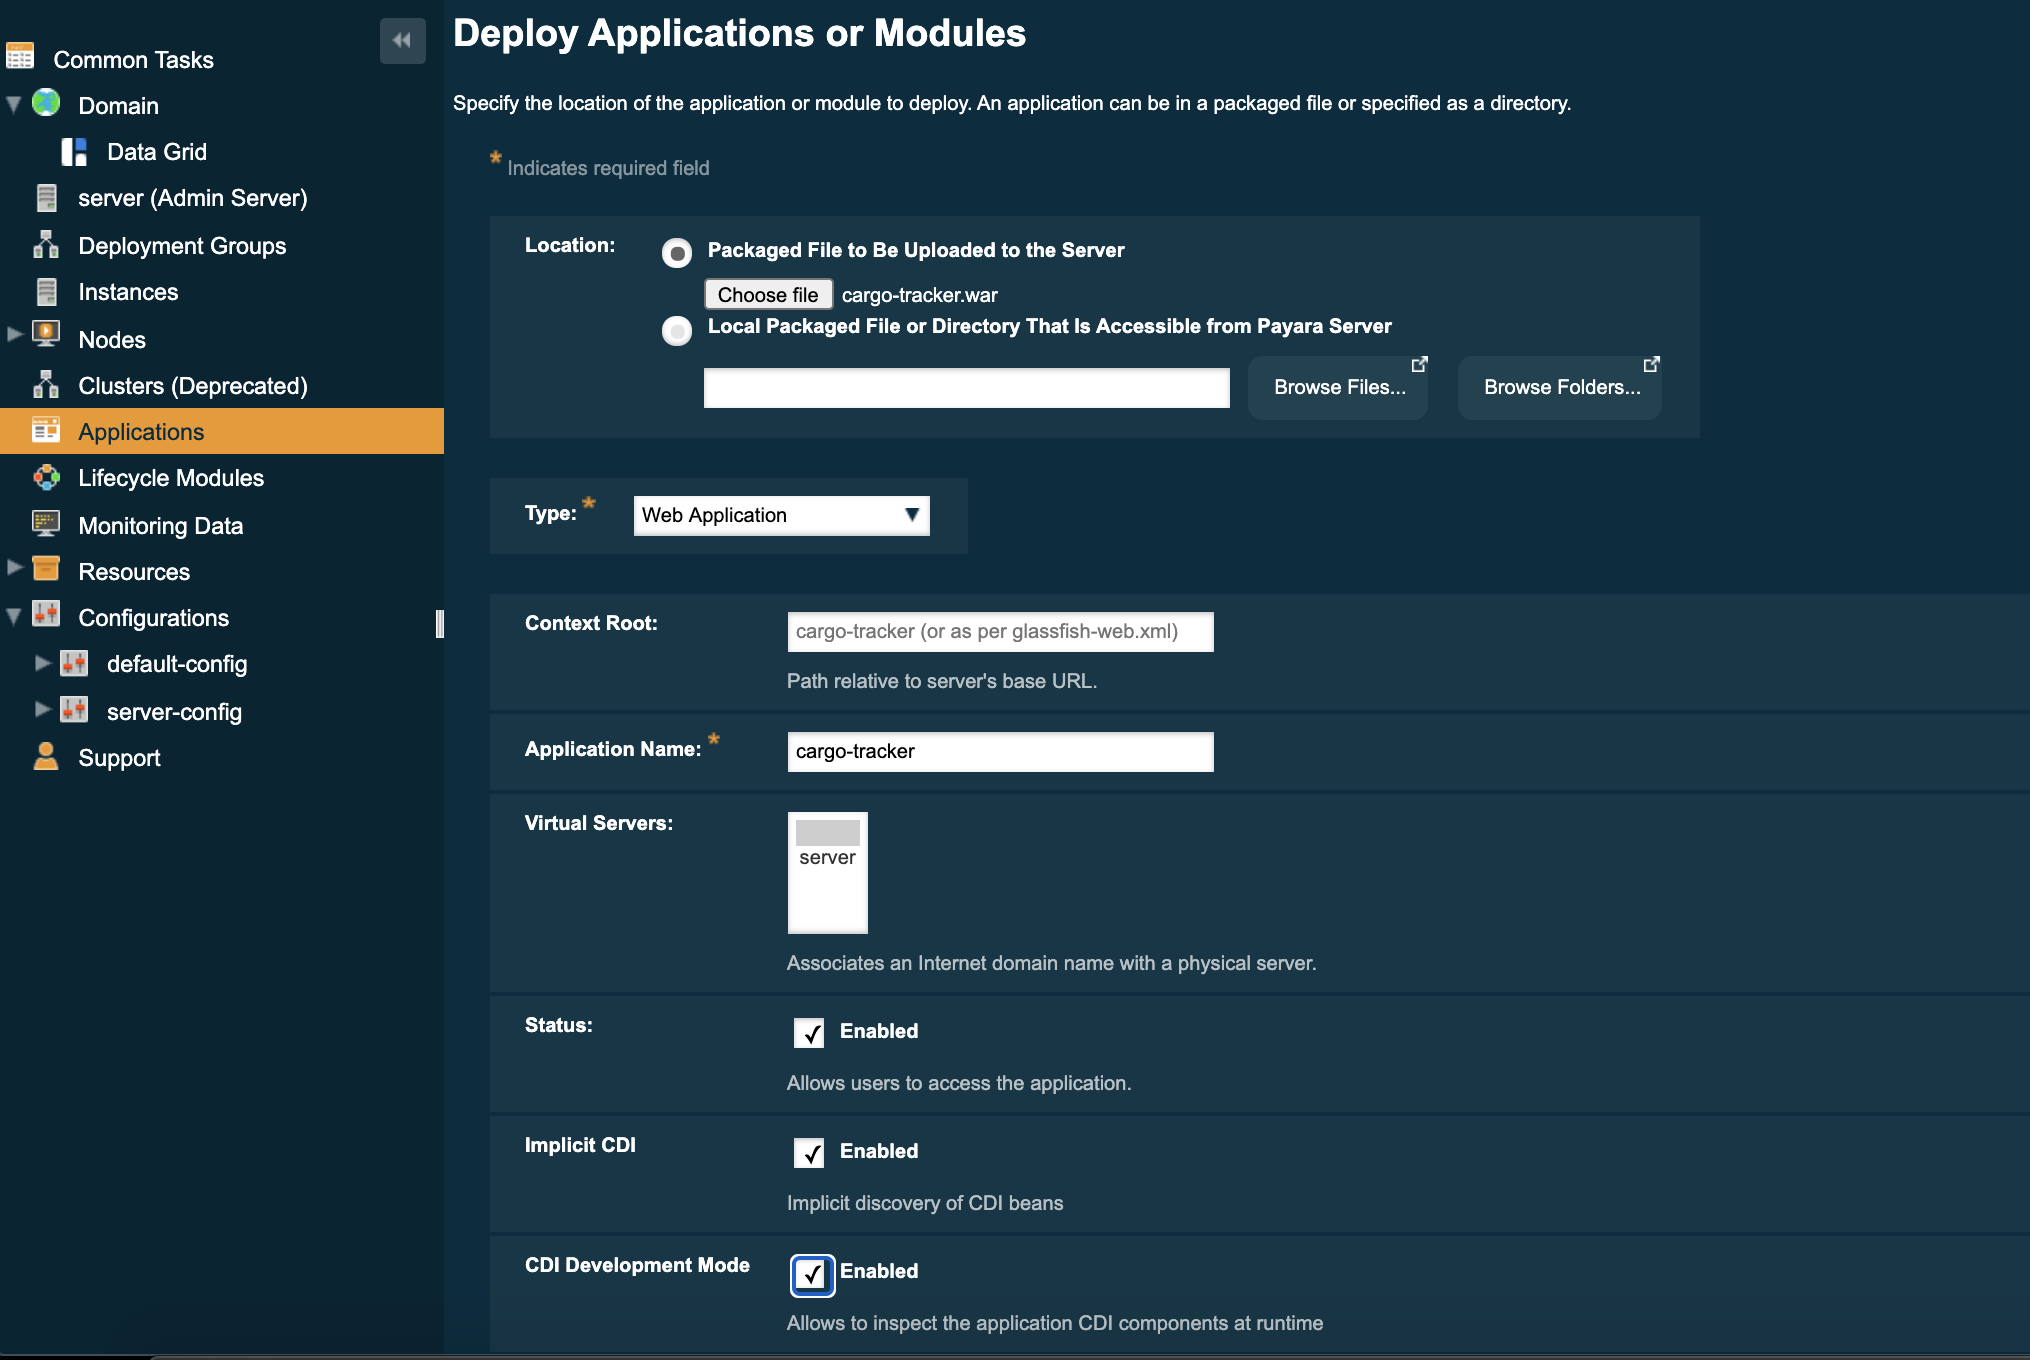
The CDI Development Mode can be enabled for a single application during deployment. The Deploy Application page provides a checkbox to enable the CDI Development Mode for the application. If the checkbox is clicked, the CDI development mode is enabled:
In the Edit Application page, you can see that the CDI Development Mode checkbox is checked:
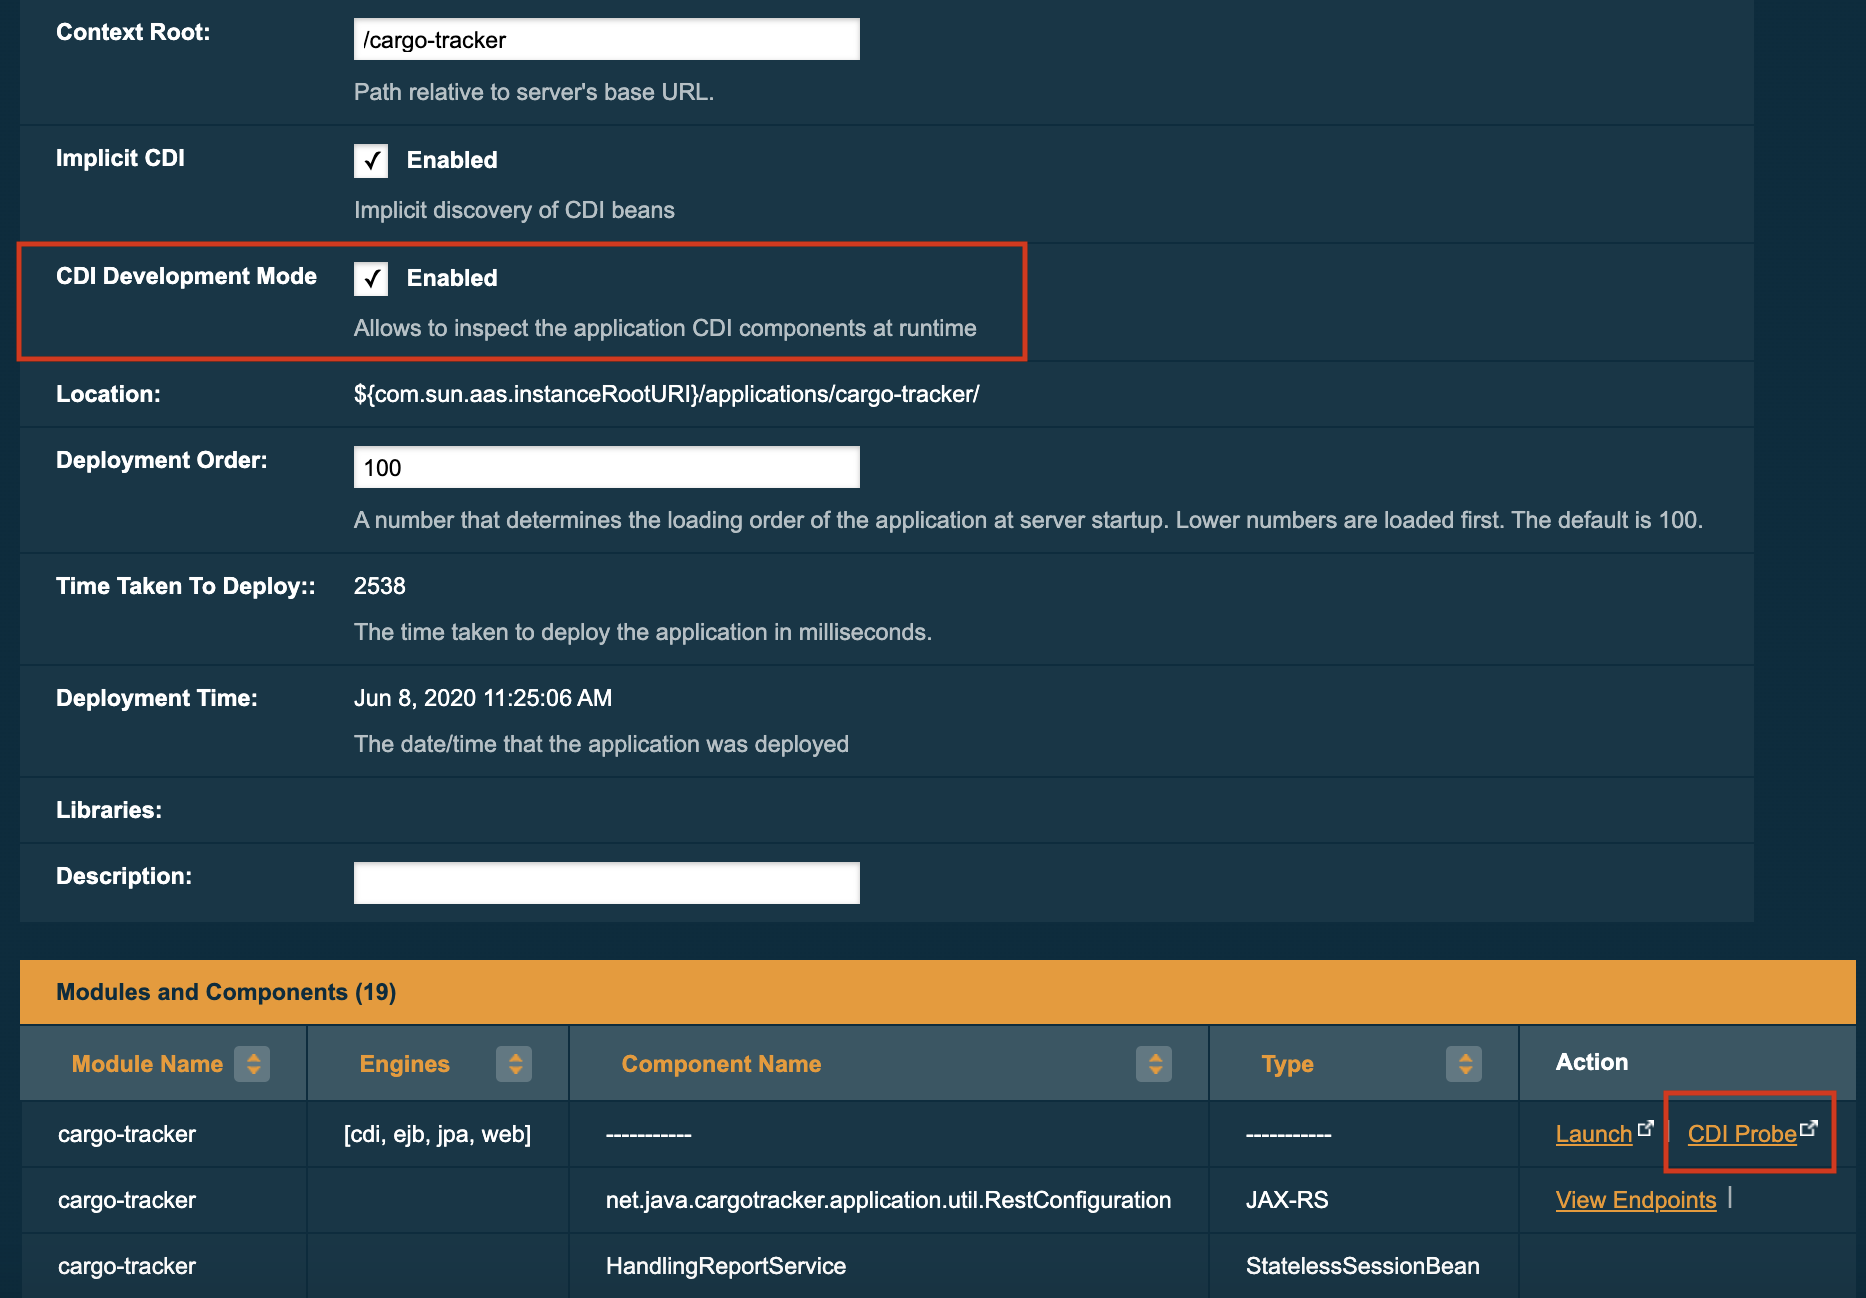
In this page, it’s also possible to enable/disable the CDI Development Mode after an application is deployed. Changing the value of the CDI Development Mode checkbox will trigger redeployment of the application to take effect immediately.
Enabling for all applications
The CDI Development Mode can be enabled for all applications by setting the org.jboss.weld.development system property to true in the server configuration or by specifying it as a JVM startup option.
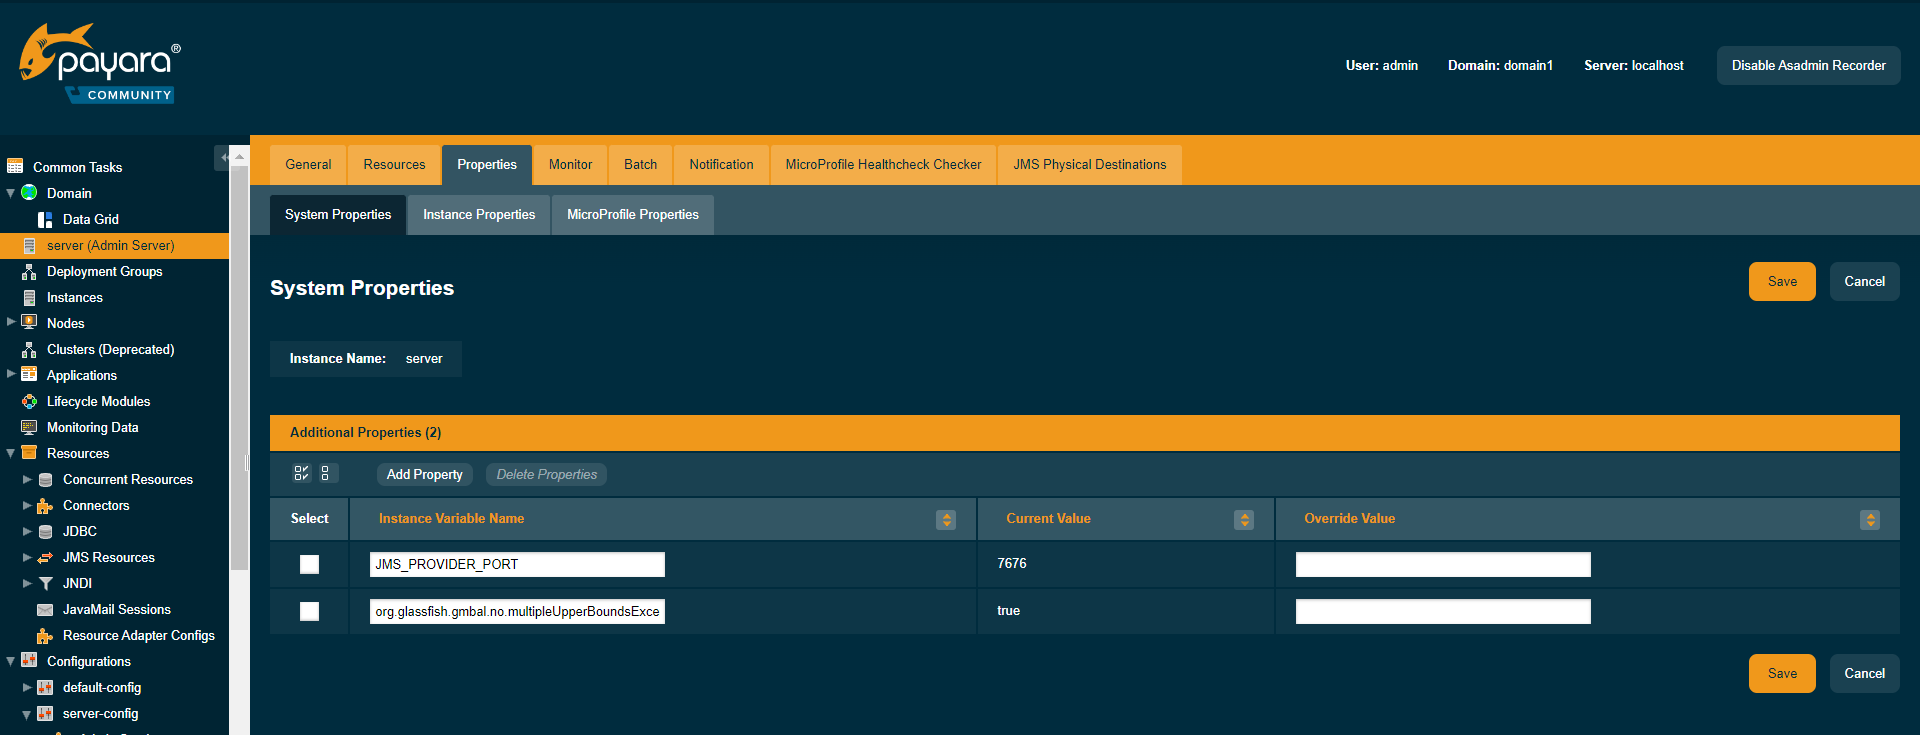
To set the system property for the server globally, click on server (Admin Server) in the sidebar on the left. Then click on the Properties tab. In the System Properties page, add property with variable name org.jboss.weld.development and override value set to true, and press Save:
| All applications deployed AFTER this setting is applied will have CDI Development Mode enabled. |
To enable it for already deployed applications, it’s necessary to redeploy each application or disable then enable it.
Using web.xml deployment descriptor
To enable CDI Development Mode in a WAR application archive, add the following context parameter to the web.xml deployment descriptor:
<web-app>
    <context-param>
        <param-name>org.jboss.weld.development</param-name>
        <param-value>true</param-value>
    </context-param>
</web-app>
This configuration will automatically enable CDI Development Mode for the application once is deployed.
Currently, it’s not possible to override this option and disable CDI Development Mode in application server configuration without providing an alternative web.xml deployment descriptor during deployment.
|
CDI Probe
Once CDI Development Mode is enabled, the web admin console will provide access to the CDI Probe tool which allows users to inspect and monitor CDI beans of deployed applications at runtime.
The CDI Probe supplies the following interfaces for consuming data in real time:
-
A REST API
-
An HTML-based application accessible via a web browser
-
Multiple JMX beans with monitoring metrics
Accessing the CDI Probe via REST API
The CDI Probe exposes a REST API at the context root of the application suffixed by path /weld-probe, followed by path to the REST resource.
The REST interface is documented in the official Weld CDI Probe documentation
Using CDI Probe Web Application
An instance of the CDI Probe is attached to each application in CDI Development Mode and is available at the context root of the application suffixed by the path /weld-probe. For example, http://localhost:8080/cargo-tracker/weld-probe.
Access from Admin Console
Once CDI Development Mode is enabled for an application, the Edit Application page in the Admin Console provides a link to open the CDI Probe web application for quick reference.
You can find the link called CDI Probe in the Modules and Components table, in the Action column:

The CDI Probe link won’t be visible if the CDI Development Mode checkbox on this page isn’t selected. If the development mode is enabled by other means, the CDI Probe will still be accessible. Either check the CDI Development Mode checkbox and press Save or access CDI Probe directly by adding /weld-probe to the URL of your application.
|
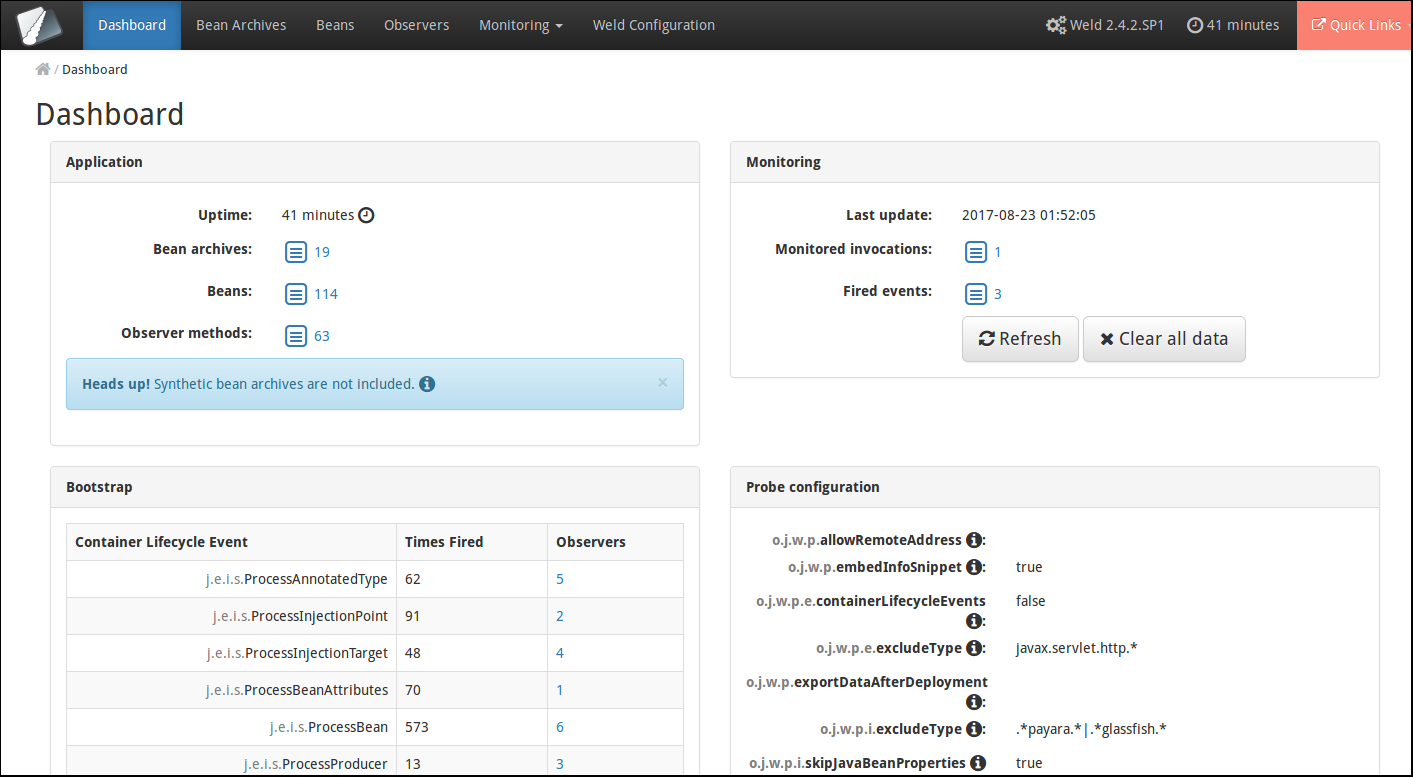
The CDI Probe link will open the web application in a new browser window:
Access from an application’s web pages
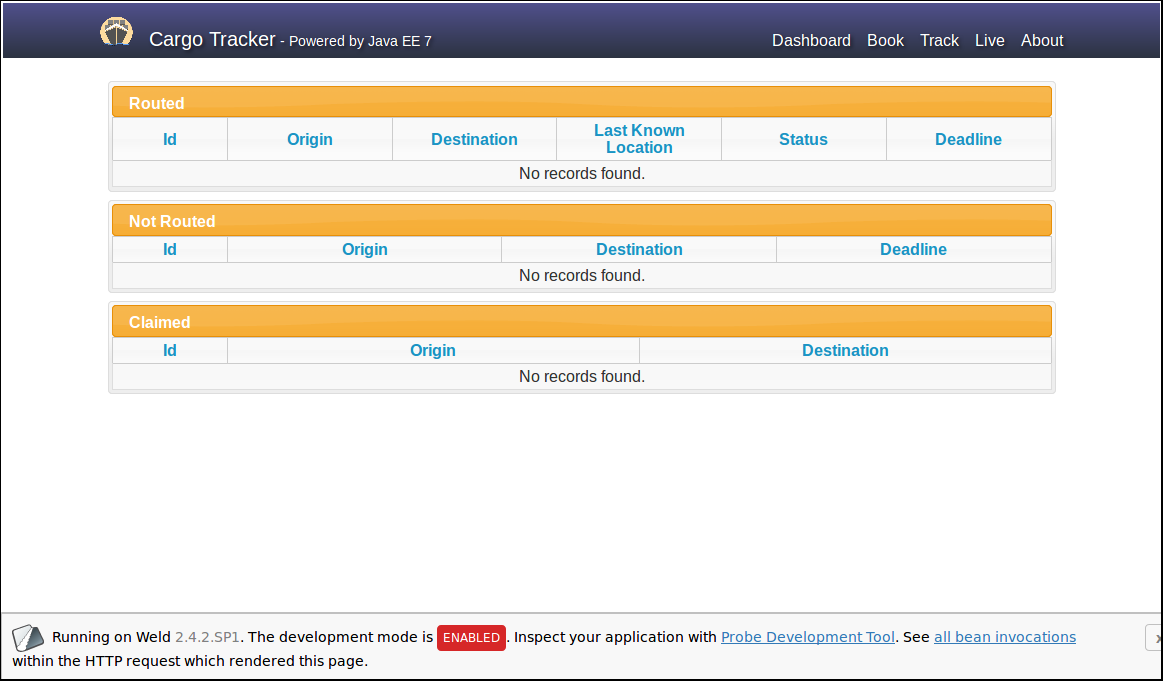
If your application serves web pages, you can also access the CDI Probe web application from the toolbar that is added by the CDI Development Mode at the bottom of every web page. Below is an example on how the toolbar looks like in a sample application named "Cargo Tracker":
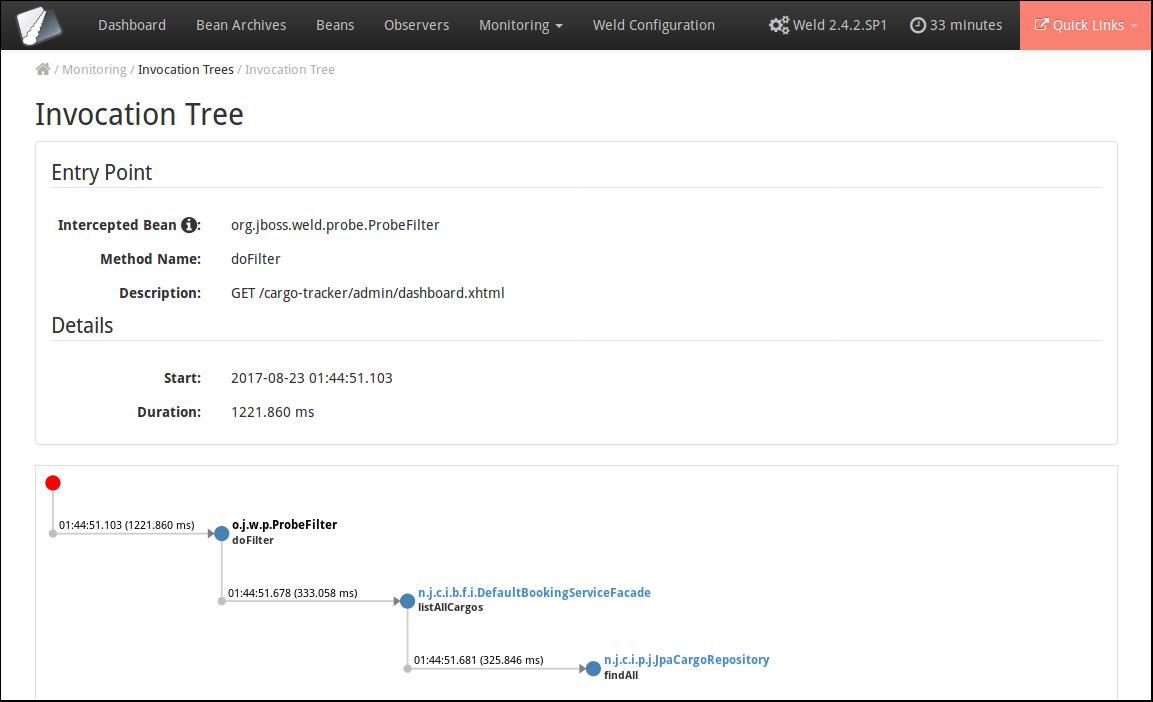
If the application uses CDI beans to process the HTTP request used to serve the webpage in question, the toolbar will also contain a link to see all bean invocations as a tree of events, which may look like this:
Legacy mode of empty beans.xml
Starting with CDI 4.0, bean archives with empty beans.xml have discovery mode annotated. It is possible to activate the legacy mode option to switch this back to all discovery mode.
Enable legacy mode of empty beans.xml
The legacy mode of empty beans.xml can be enabled using the following mechanisms:
Via asadmin CLI
Using the asadmin CLI it is possible to enable legacy mode for a single application or for ALL deployed applications.
Enabling for a single application
The legacy mode can be enabled for a single application with the deploy command. Add the emptyBeansXmlModeALL=true property to the --properties argument’s value of the deploy command.
Here’s an example of enabling development mode for an application named application.war:
asadmin deploy --properties emptyBeansXmlModeALL=true myapplication.warLegacy mode is configured on a per-configuration basis using the create-system-properties on the fish.payara.deployment.emptyBeansXmlModeALL property like this:
asadmin create-system-properties fish.payara.deployment.emptyBeansXmlModeALL=true| The legacy mode is enabled by default for any transformed Jakarta EE 8 applications that are converted via the Eclipse Transformer. |
