Azure Cloud Config Source
The Azure cloud config source takes configuration properties from Azure Key Vault Secrets.
Register Azure AD Application and Create Service Principle
If you haven’t already, you will need to register an Azure Active Directory (Azure AD) application and create a service principal, so that the Microsoft identity platform can provide authentication and authorisation services. You can use the Azure portal to register your application and create a service principle.
-
Once you have signed in to your Azure portal, search and select Azure Active Directory
-
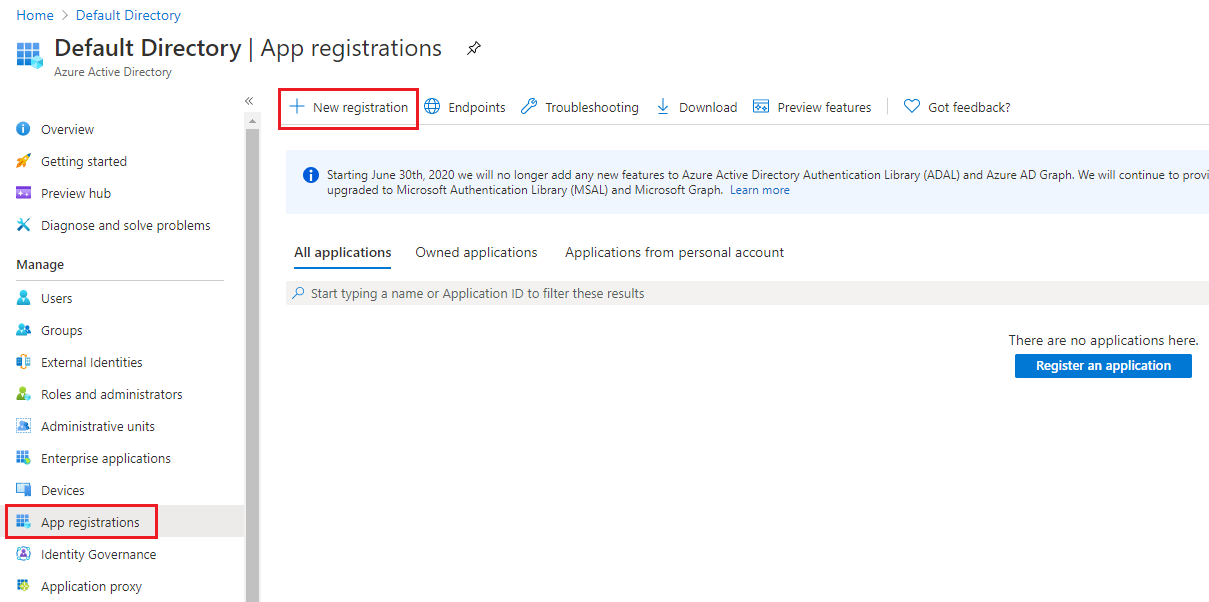
Select App registrations under the Manager section
-
Click New registration
| If you have access to multiple tenants and want to select a specific tenant to register with your application, use the Directory + subscription filter in the top menu. |
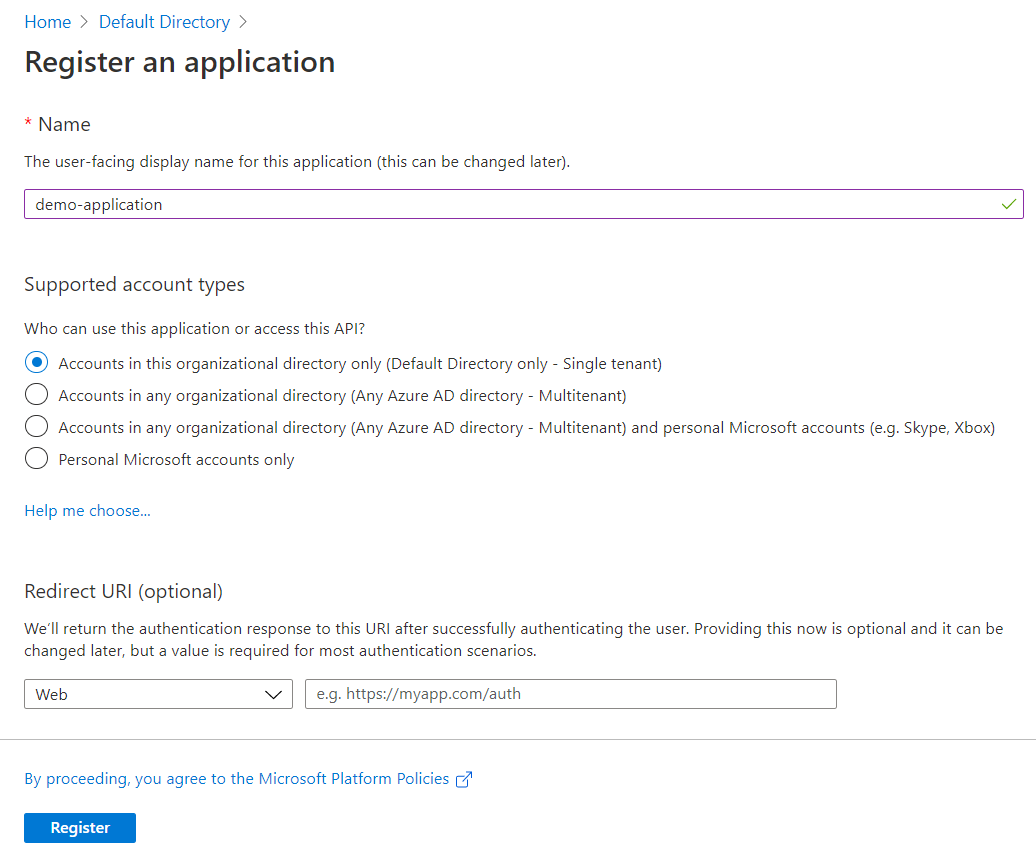
Then on the Register an application page:
-
Specify a name for your application
-
Select the appropriate account types
-
Click Register to complete your application registration
Once the application registration is completed, the service principal is automatically created in your home tenant.
Application API Permissions
You will need to allow your application full access to the Azure Key Vault service to enable it to retrieve secrets from the vault. To do this, you will need to configure your application’s API permissions.
You can learn more about permissions and consent here.
-
Select your application
-
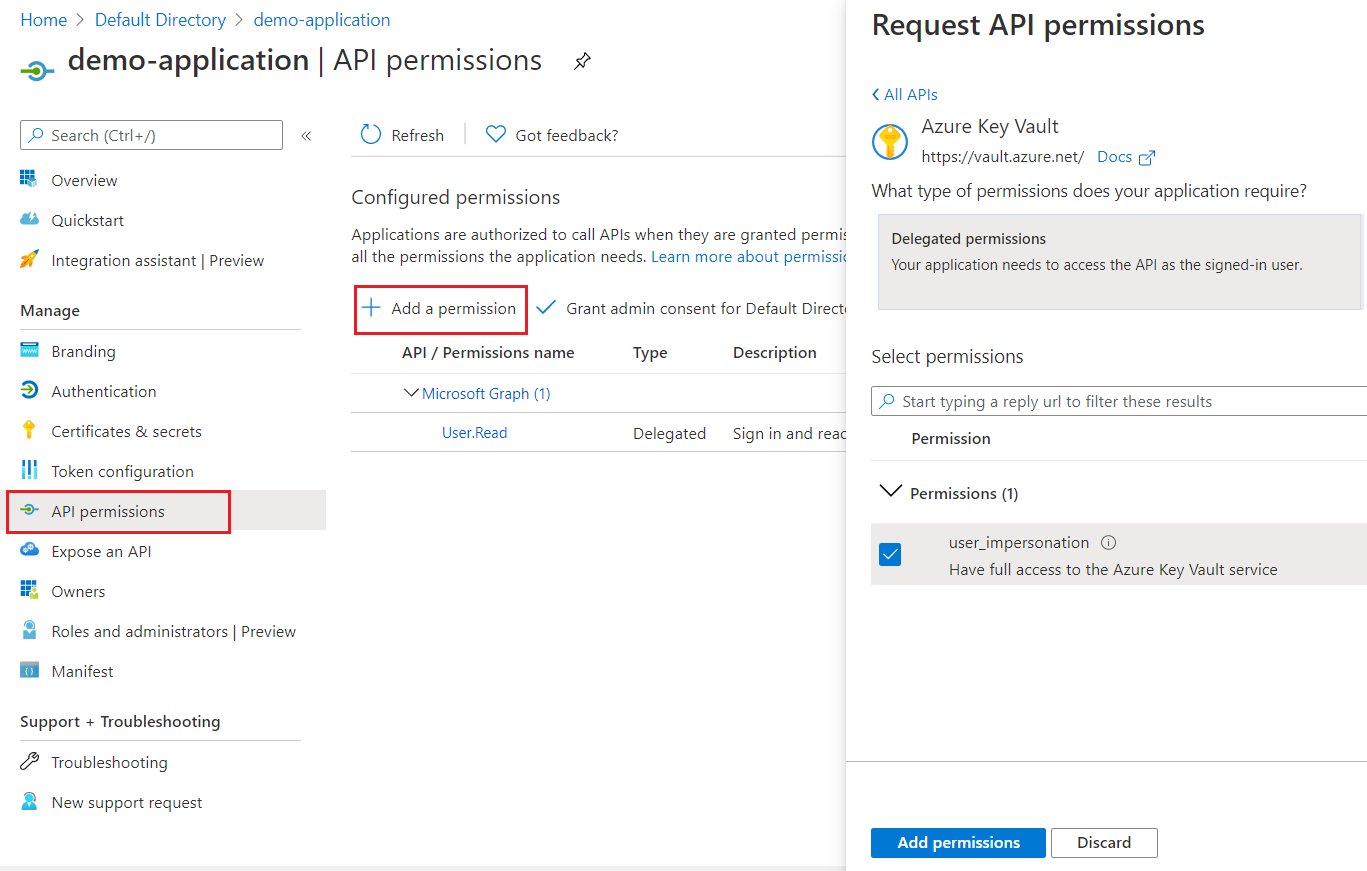
Select API permissions under the Manage section
-
Click Add a permission
-
Select Azure Key Vault for the list of Microsoft APIs
-
Under the types of permissions, select Delegated permissions
-
Tick the user_impersonation checkbox
-
Click Add permissions
Adding Credentials
Credentials allow your application to authenticate as itself. Azure supports two options as credentials: client secret (a string) and certificate (public key). Currently, Payara Platform only supports certificate as they provide a higher level of assurance than client secrets.
You can upload your certificate for authentication using the following steps:
-
Select your application
-
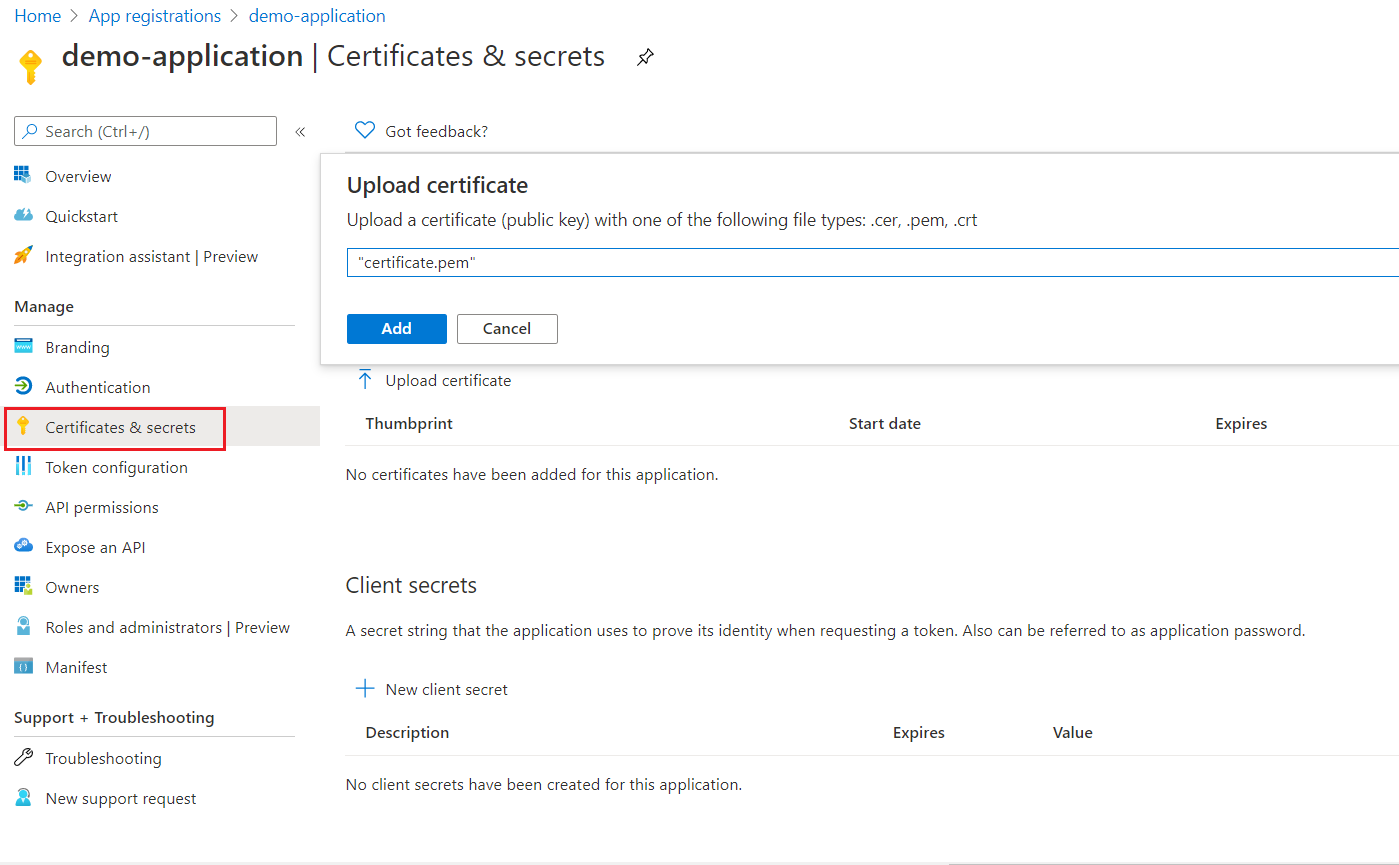
Select Certificates & Secrets under the Manage section
-
Click Upload certificate
-
Choose a certificate
-
Click Add
Once the certificate is successfully uploaded, it should generate a Thumbprint, which will be required when we configure the Azure Config Source.
Create a Key Vault
To store your secrets securely, you will need to create a key vault.
-
Search for key vaults and select it
-
Click Add
-
Provide relevant information on the Create key vault page
-
Click Review + create
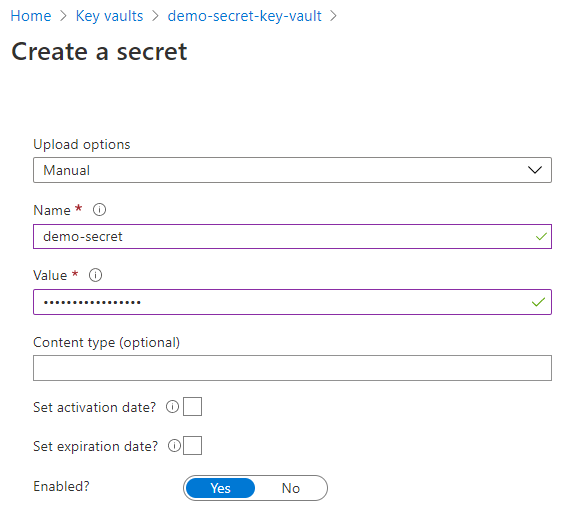
| Although key vault allows storing of keys, secrets, and certificates, Azure Config Source currently only support secrets. |
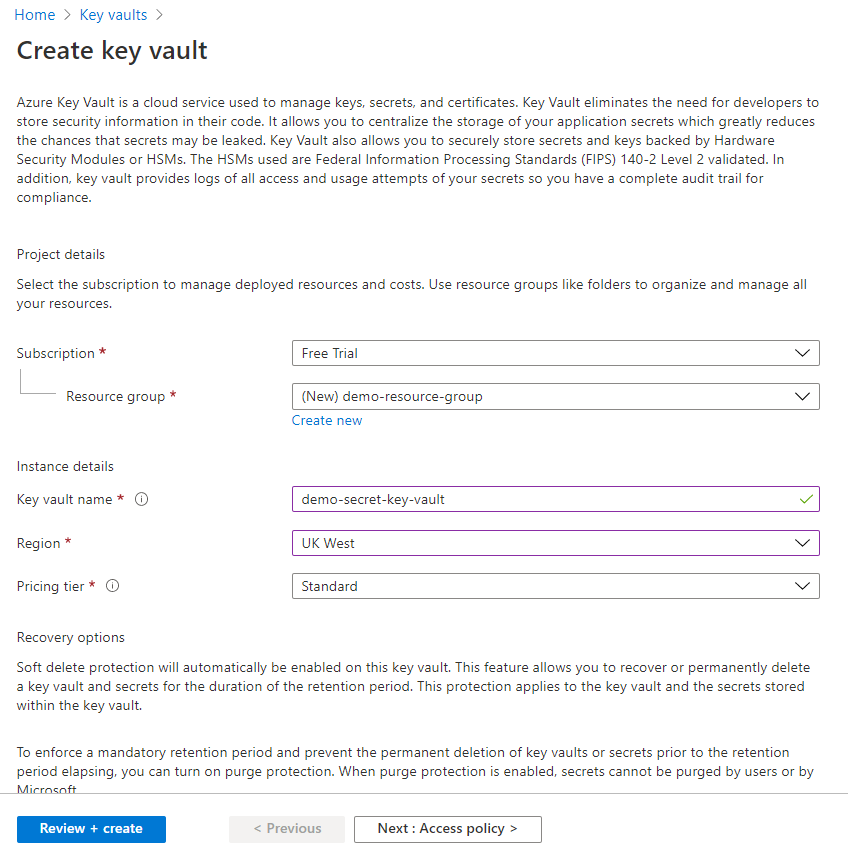
In the above diagram, the Basic section has been configured and the remaining sections have been left to their default settings. You can configure other sections, such as Access policy and Networking, to fit your requirements.
Configure access policies on Key Vault
To give your application access to the secrets in a key vault, you will need to add the application to the key vault’s access policies.
-
Navigate to your key vault
-
Select Access policies under the Settings section
-
Click Add Access Policy
-
Under Configure from template, select Secret Management, as we don’t require the other options
-
Select the service principal that you created previously
-
Click Add
-
Click Save to commit your changes

Configuration in Payara Server
You can configure Azure Secrets either via the admin console or the asadmin utility. You will need the name of your key vault, tenant ID and client ID of your application, your private key file and thumbprint generated by your application after you uploaded your certificate.
Your private key file will be copied into domain-dir/config.
|
From the Admin Console
To configure the config source from the admin console, go to Configs → your-config → MicroProfile → Config → Azure Secrets.
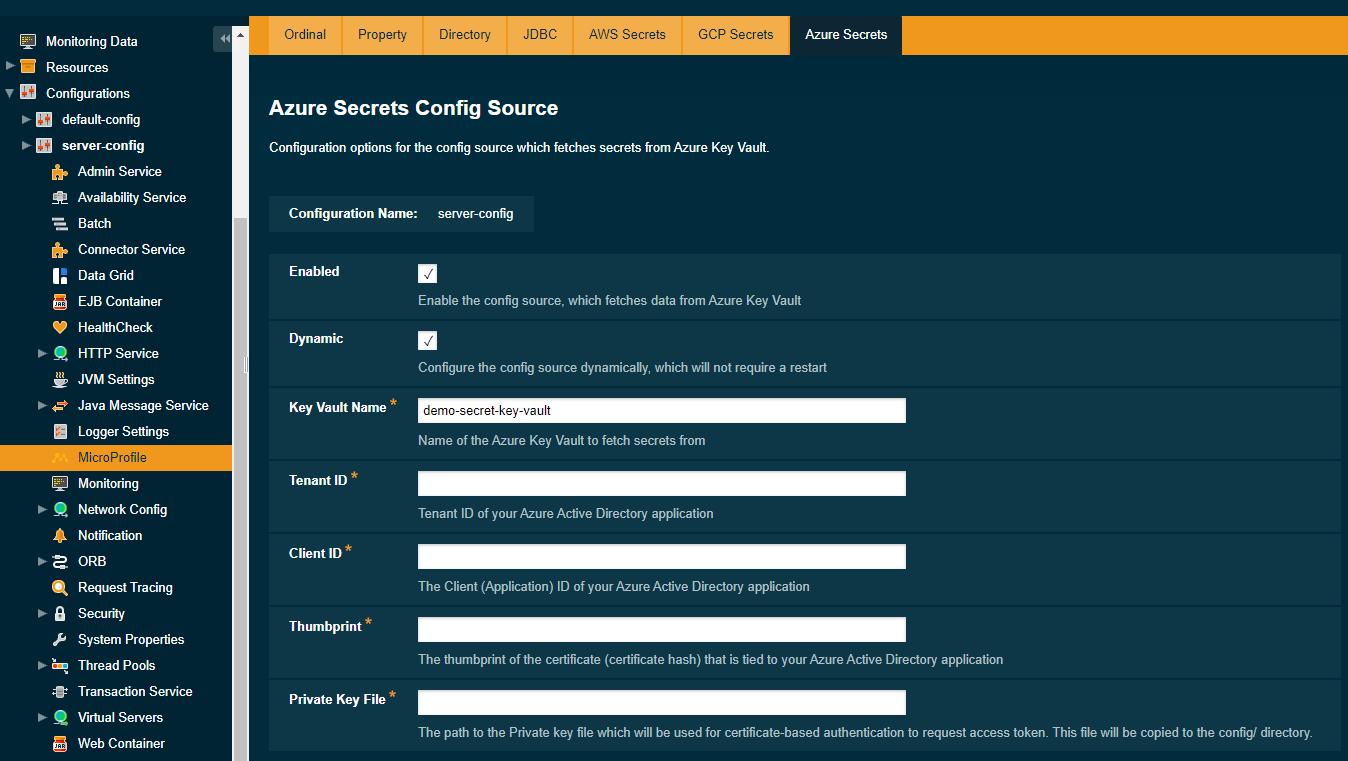
From here, you can pass the name of the key vault, tenant ID and client ID of the application, absolute path to the private key file and thumbprint of the certificate.
You can also decide whether to apply these changes dynamically or on the next server restart. If the config source is enabled or disabled dynamically, it will take effect across the server immediately.
Usage
Provided that all of the above sections are configured correctly, the secrets can be injected into any applicable MicroProfile Config injection point as with any other Config Source.
In Payara Server, these secrets can be fetched, created and deleted by using the asadmin utility.
To fetch a secret from a Key Vault:
asadmin get-config-property --source cloud --sourceName azure --propertyName demo-secret
demo-secret-value
To create or change a secret in a Key Vault:
asadmin set-config-property --source cloud --sourceName azure --propertyName mysecret --propertyValue secretvalueTo delete a secret from a Key Vault:
asadmin delete-config-property --source cloud --sourceName azure --propertyName mysecret