Introduction
Payara Starter is a web application and command line tool designed to accelerate Jakarta EE development by simplifying the creation of new application projects. It supports the creation of both Maven and Gradle projects, allowing developers to focus on coding their application components in a faster way as they don’t have to deal with the complexities of setting up their projects.
Key Features of Payara Starter
-
Build System Flexibility: Supports Maven and Gradle as Project Management tools for seamless integration with preferred build systems.
-
Customizable Project Details: Define crucial project specifics upfront, aligning with organizational naming conventions.
-
Java and Jakarta EE Version Control: Allows the selection of specific versions to ensure compatibility and leverage the latest features.
-
MicroProfile Integration: Includes options to integrate MicroProfile APIs for building resilient, scalable services.
-
Payara Platform Compatibility: Effortlessly works with the Payara Platform, ensuring readiness for deployment.
-
Docker Support: Facilitates Docker compatibility, streamlining containerization for agile deployment.
-
Unit Test Templates: Optionally includes test templates, encouraging best testing practices from project initiation.
-
Advanced Security Configuration: Optional advanced security setup for robust authentication via Jakarta Security, facilitating secure application development from the start.
Supported Jakarta EE Profiles
Payara Starter supports various Jakarta EE profiles:
-
Platform:
jakarta.platform:jakarta.jakartaee-api -
Web Profile:
jakarta.platform:jakarta.jakartaee-web-api -
Core Profile:
jakarta.platform:jakarta.jakartaee-core-api
Generating a New App using Payara Starter
You can generate a new application using Payara Starter in two ways:
Command Line Using Archetype
To generate a new application using the Payara Starter archetype from the command line, use the following Maven command:
mvn archetype:generate -DarchetypeGroupId=fish.payara.starter -DarchetypeArtifactId=payara-starter-archetype -DarchetypeVersion=1.0-beta4 <other options>This command generates a new application based on specified options. Adjust properties according to your project requirements.
Payara Starter Archetype Parameter
The Payara Starter Archetype has a robust set of parameters that allows the customization of various aspects during the application generation process. Below is a table detailing each parameter, its default value, and additional notes:
| Element | Default Value | Notes | ||
|---|---|---|---|---|
|
|
Specifies the preferred build system for the project. Options include: |
||
|
|
Specifies the Group ID for the generated project. |
||
|
|
Determines the Artifact ID for the generated project. |
||
|
|
Sets the version of the generated project. |
||
|
|
Defines the base package name for the project. |
||
|
|
Sets the Java version for the project. Available options:
|
||
|
|
Specifies the targeted Jakarta EE version. Valid options:
|
||
|
|
Specifies the Jakarta EE profile options: 'core', 'web', or 'full'. |
||
|
|
Specifies the target distribution where the application will be deployed Options include:
|
||
|
|
Sets the targeted Payara version. Retrieved from Maven Central. |
||
|
|
Includes support for the Concurrent API if |
||
|
|
Includes support for the Resource API if |
||
|
|
Includes support for the JBatch API if |
||
|
|
Includes support for the MicroProfile API if |
||
|
|
Includes support for the JCache if |
||
|
|
Includes support for the Payara Public API if |
||
|
|
Automatically deploys the WAR file if
|
||
|
|
Enables automatic HTTP binding.
|
||
|
|
Sets the web context root for the deployed artifact.
|
||
|
|
Includes a set of generated Unit tests if
|
||
|
|
Enables Docker compatibility. |
||
|
|
Enables support for the MicroProfile Config API. |
||
|
|
Enables support for MicroProfile OpenAPI. |
||
|
|
Enables support for MicroProfile Fault Tolerance. |
||
|
|
Enables support for MicroProfile Metrics. |
||
|
|
Specifies the authentication type for the application. Available choices:
|
Web application at start.payara.fish
Visit start.payara.fish to use the web application for generating applications via a graphical interface.
Using the Payara Starter Web Application
Payara Starter provides a convenient web application that allows you to generate Jakarta EE projects via a graphical interface.
Follow these steps to use the web application:
-
Access the web application:
-
Visit the Payara Starter web application at https://start.payara.fish.
-
-
Fill in the Project Details:
-
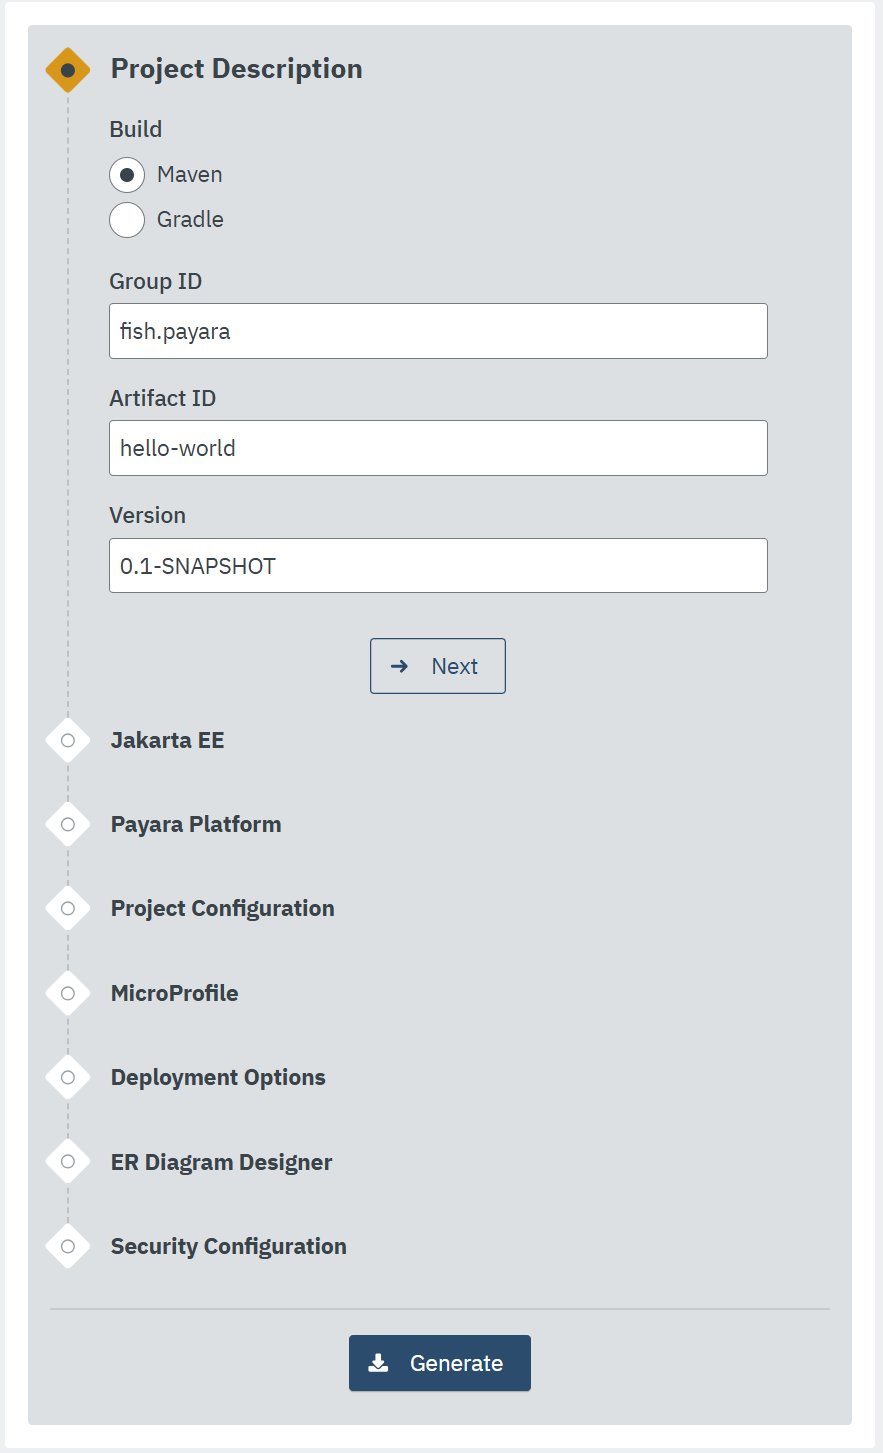
On the web application’s landing page, you’ll find a user-friendly interface to input project details.
-
Enter the required information, such as Group ID, Artifact ID, and other relevant details.
You can customize these based on your project requirements:
-
-
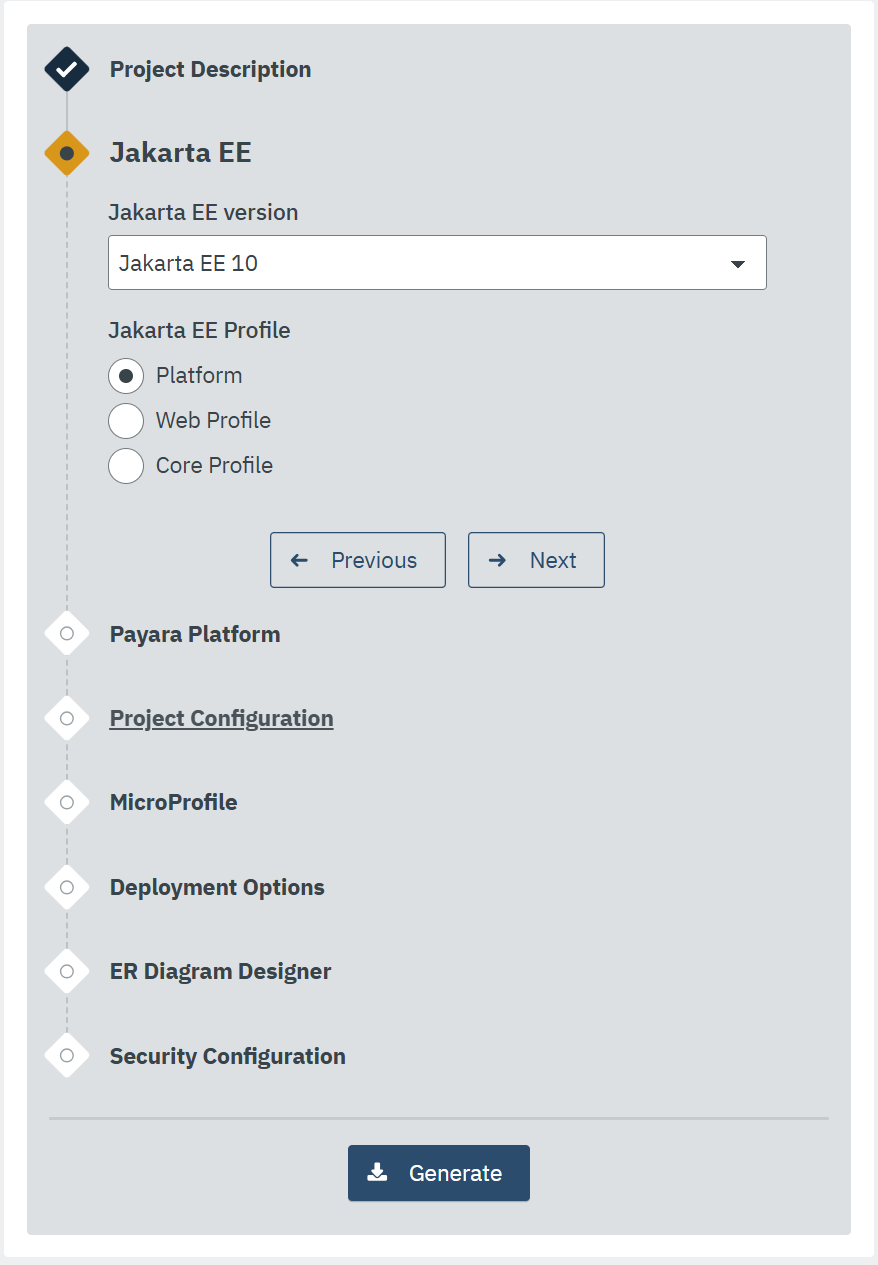
Choose the Build System and Jakarta EE Version:
-
Select your preferred build system (Maven or Gradle) from the provided options.
-
Choose the desired Jakarta EE version that aligns with your project’s compatibility requirements.
-
-
Configure any Additional Options:
-
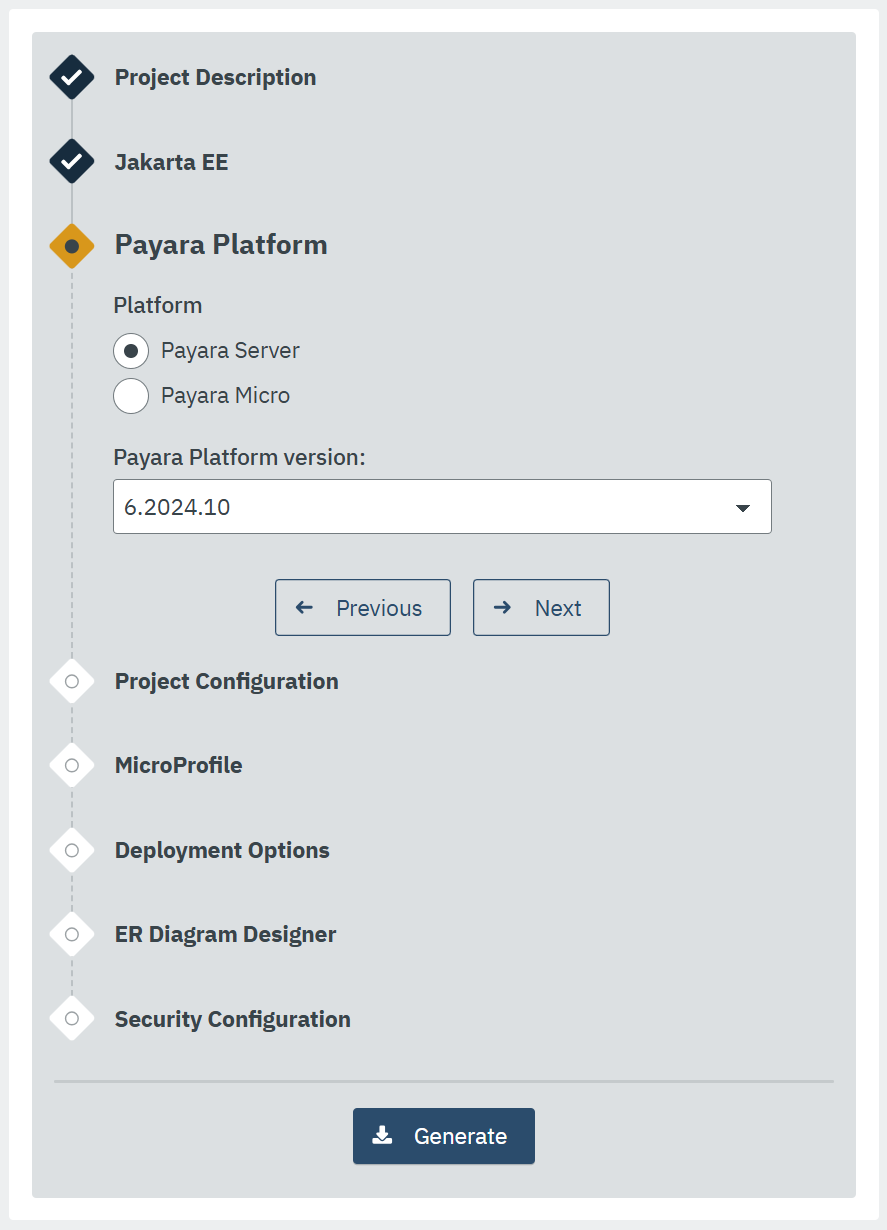
The web application allows you to configure additional options such as MicroProfile integration, Payara Platform version, and more.
-
Customize these options based on your project needs.
-
-
Review and Generate:
-
Review the summary of your selected options to ensure they match your project requirements.
-
Click the Generate button to initiate the project generation process.
-
-
Download the Generated Project:
-
Once the generation process is complete, the web application triggers the download of the generated project archive.
-
Download the project archive, and you can then proceed to import it into your preferred Integrated Development Environment (IDE).
-
|
The web application simplifies the project creation process but may not expose all configuration options available through the command-line archetype generation. If you need better control of how the application is generated, we recommend using the starter archetype instead. |
Sample Generated Jakarta REST Resource
Here’s an example of a generated Jakarta REST resource using Payara Starter:
package fish.payara.hello;

import jakarta.ws.rs.GET;
import jakarta.ws.rs.Path;
import jakarta.ws.rs.QueryParam;
import jakarta.ws.rs.core.Response;

@Path("hello")
public class HelloWorldResource {

    @GET
    public Response hello(@QueryParam("name") String name) {
        if ((name == null) || name.trim().isEmpty()) {
            name = "world";
        }
        return Response.ok(name).build();
    }
}
This sample demonstrates a simple REST endpoint named hello that accepts a query parameter name and responds with a greeting message.
Feel free to adjust archetype parameters to tailor the generated application to your project requirements.
ER Diagram Designer with Generative AI Support
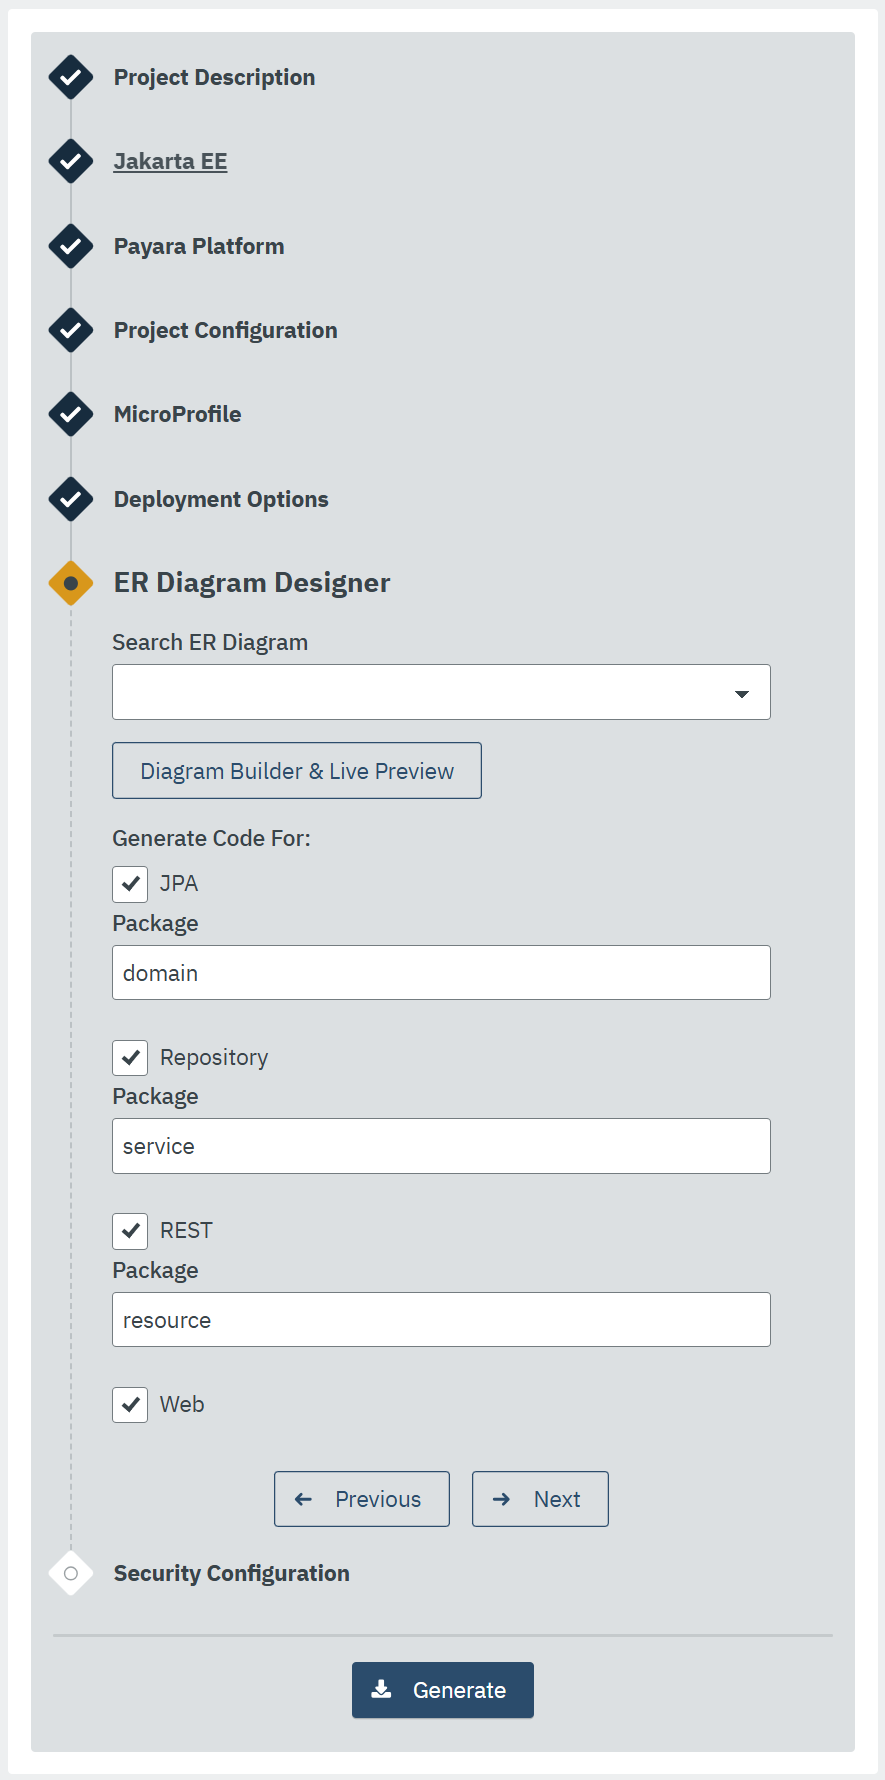
Payara Starter start.payara.fish enables developers to streamline the creation of full-stack applications by leveraging Entity-Relationship (ER) diagrams. Generative AI enhances this process by automating the generation and customization of diagrams based on inputs and requirements. Developers can visualize, interact, and modify these diagrams in real time, making Payara Starter a more powerful tool for application design and development.
Features of ER Diagram Designer
Default ER Diagrams
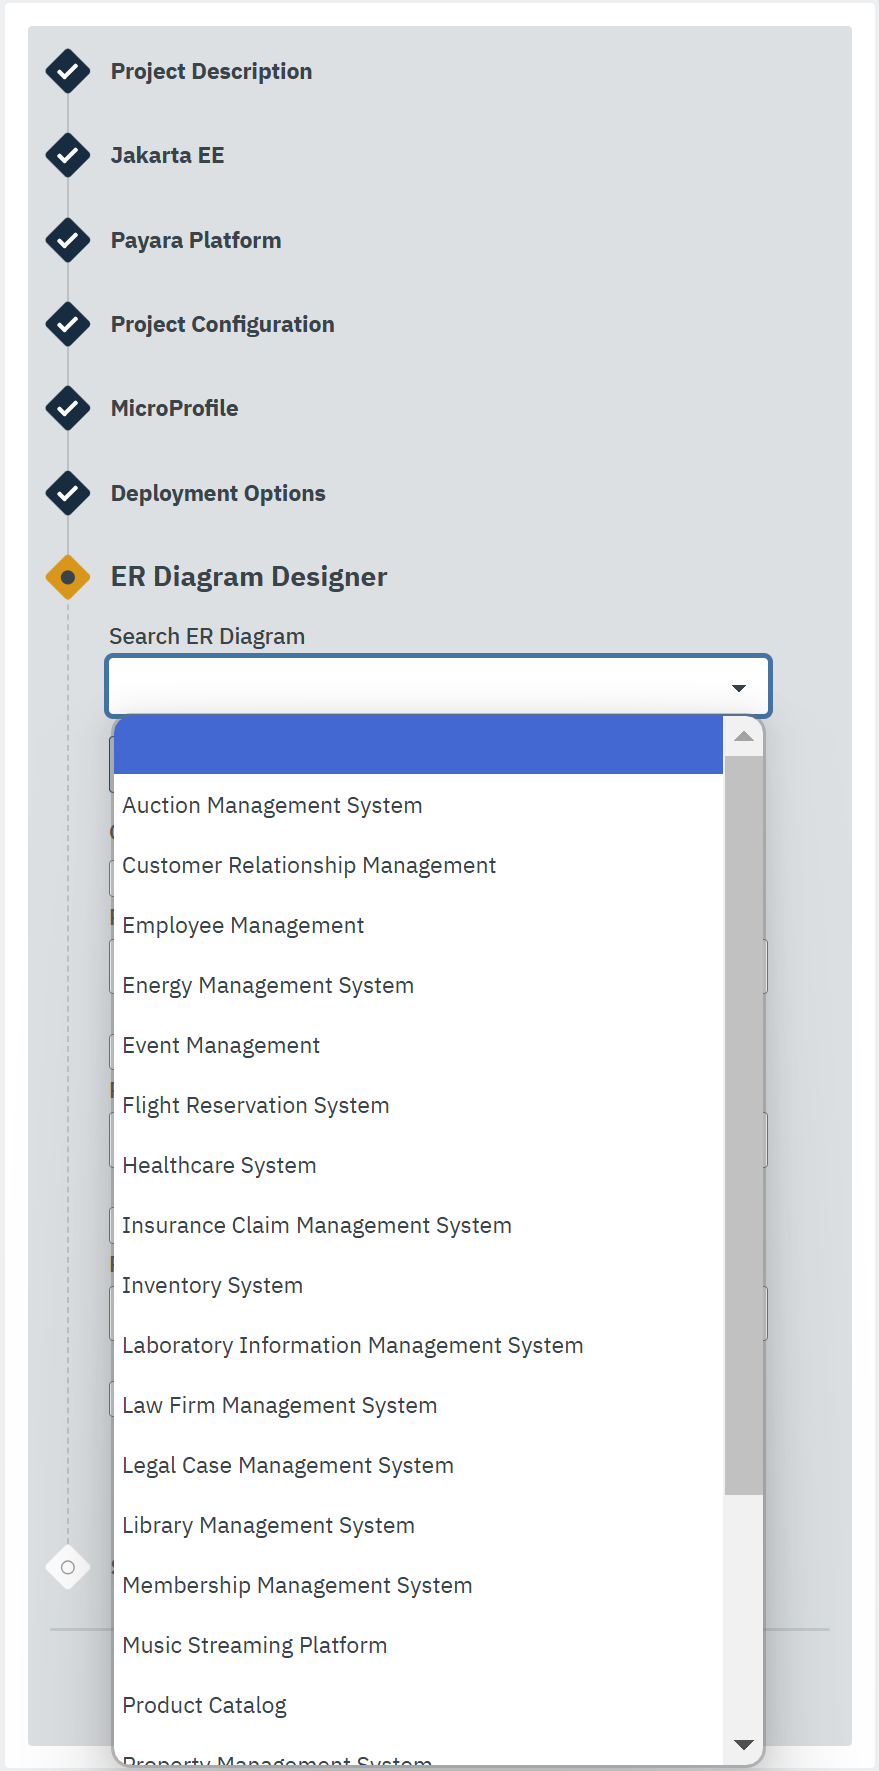
The Payara Starter website includes default ER diagrams, stored in Mermaid format, which users can modify as a starting point for their own designs.
Automated ER Diagram Generation
Payara Starter automates ER diagram generation by leveraging Generative AI based on user-provided descriptions. Users can create accurate and well-structured diagrams with minimal effort.
Real-time Diagram Design via Free-text Support
Through Real-time Diagram Design via Free-text Support, users can interact with Generative AI to refine and enlarge existing diagrams based on their specific requirements. This feature allows users to quickly modify or create new diagrams using free-form text commands.
|
Generative AI is a helpful assistant for designing diagrams, but it is not perfect. Not all instructions will be understood as intended, and some results may differ from user expectations. |
Instructions and Examples
To get the best results, users should provide clear, concise commands. Below are a few sample scenarios to illustrate how users can modify their diagrams.
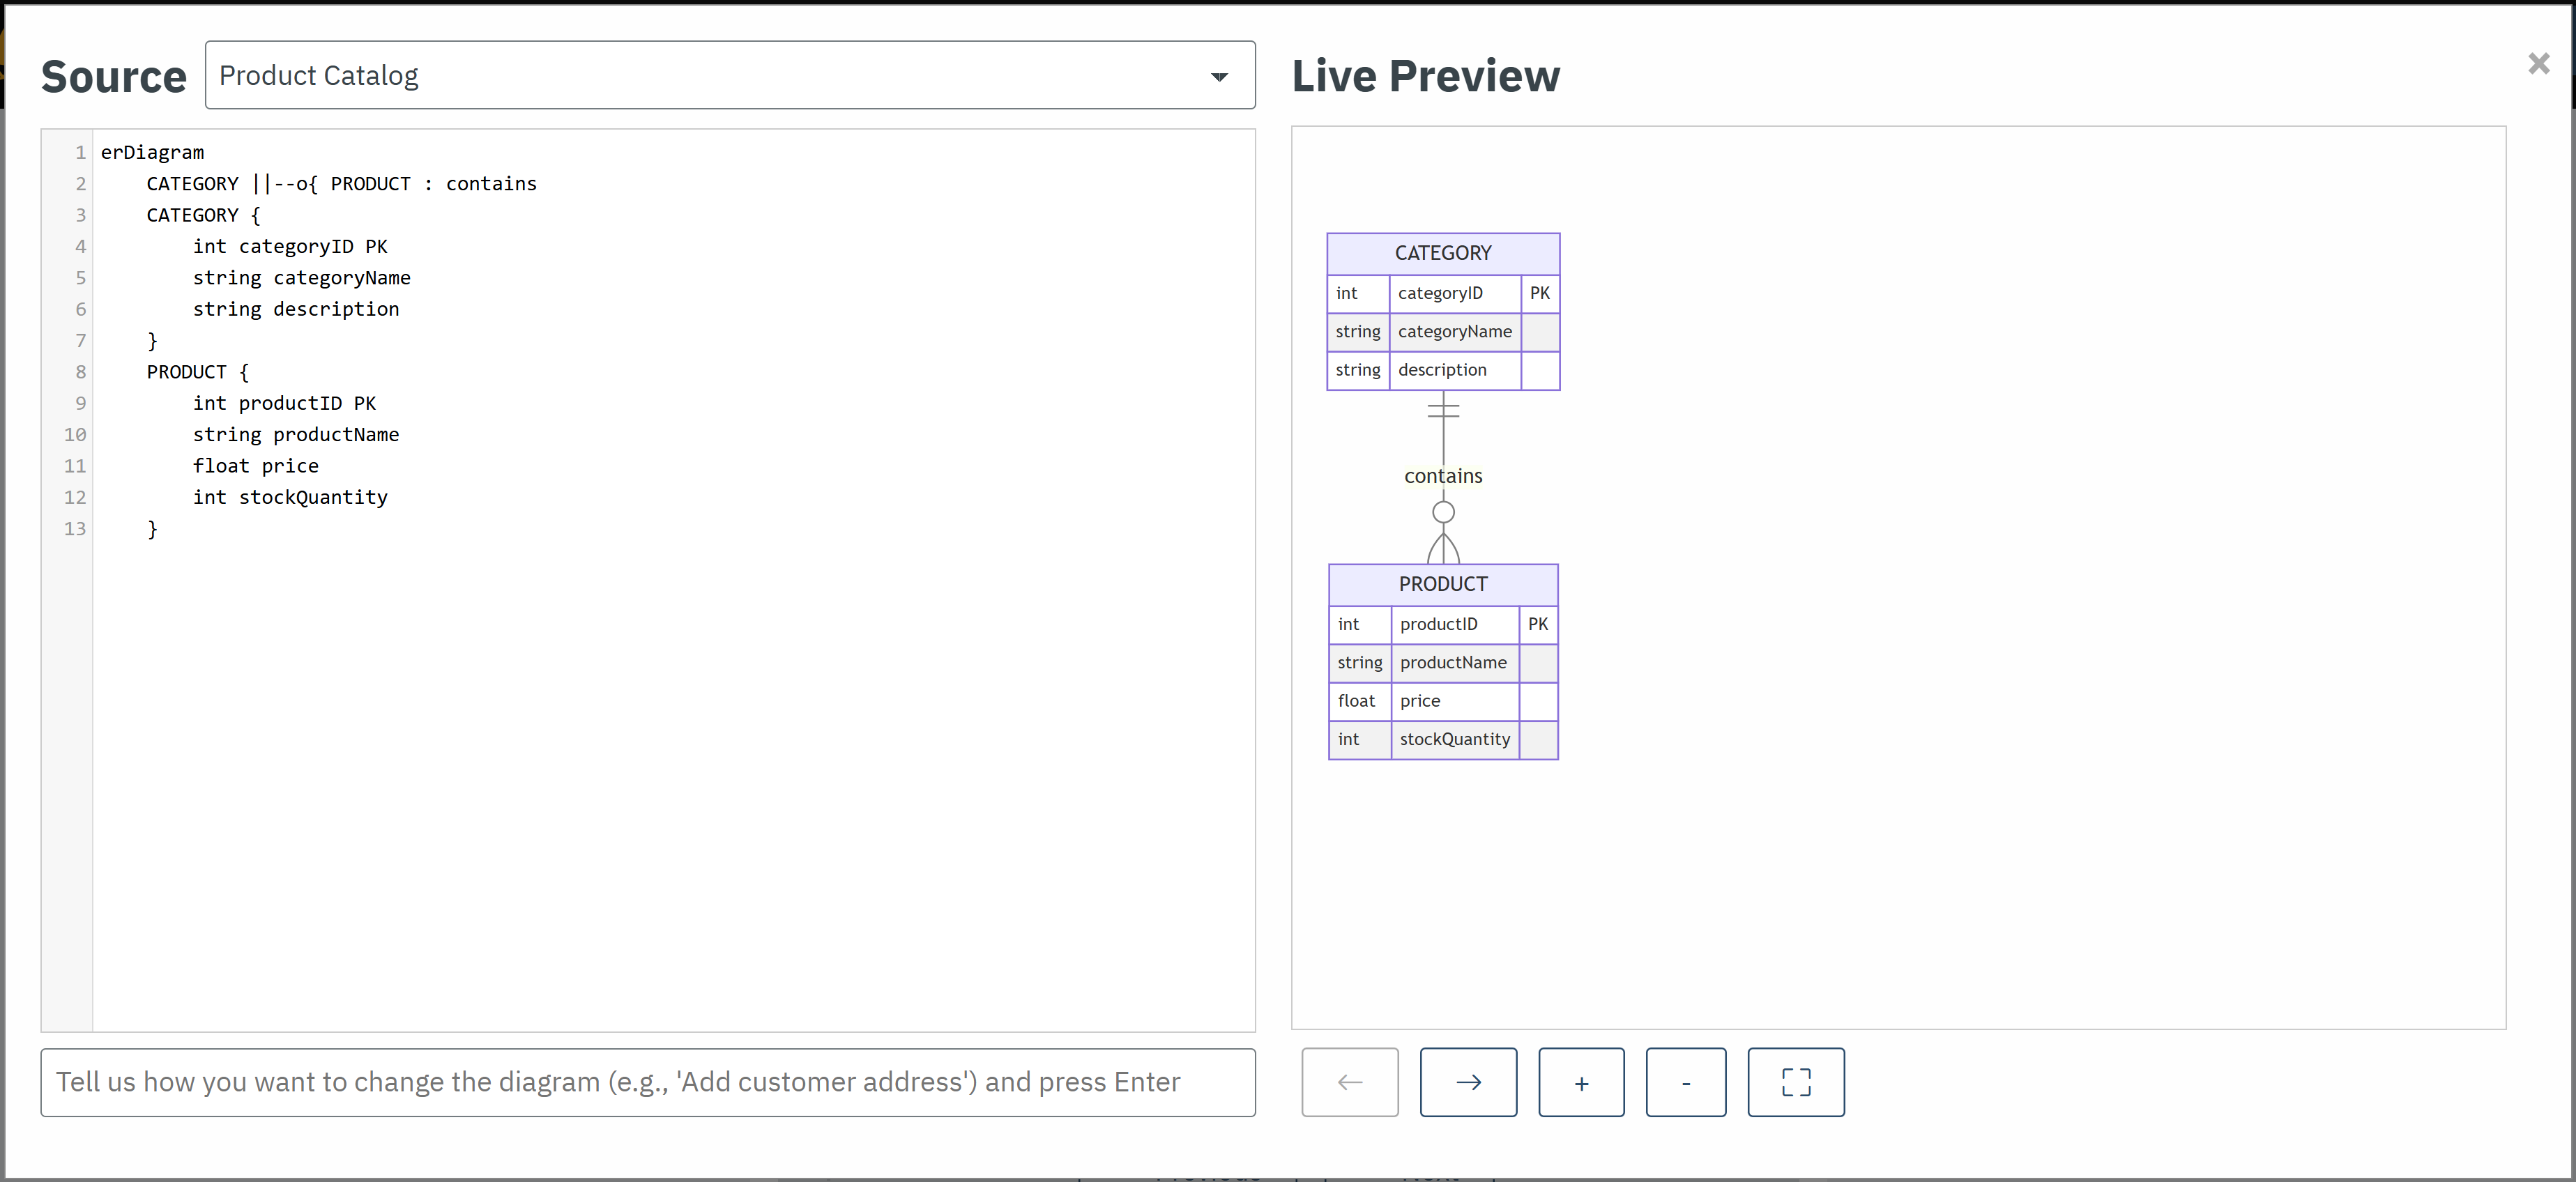
Starting from this default diagram:
-
Adding a new Field: The following command prompts the AI to include a new attribute named
expiryDatein the existingPRODUCTentity.Command: Add an Expiry Date field to the
PRODUCTentity.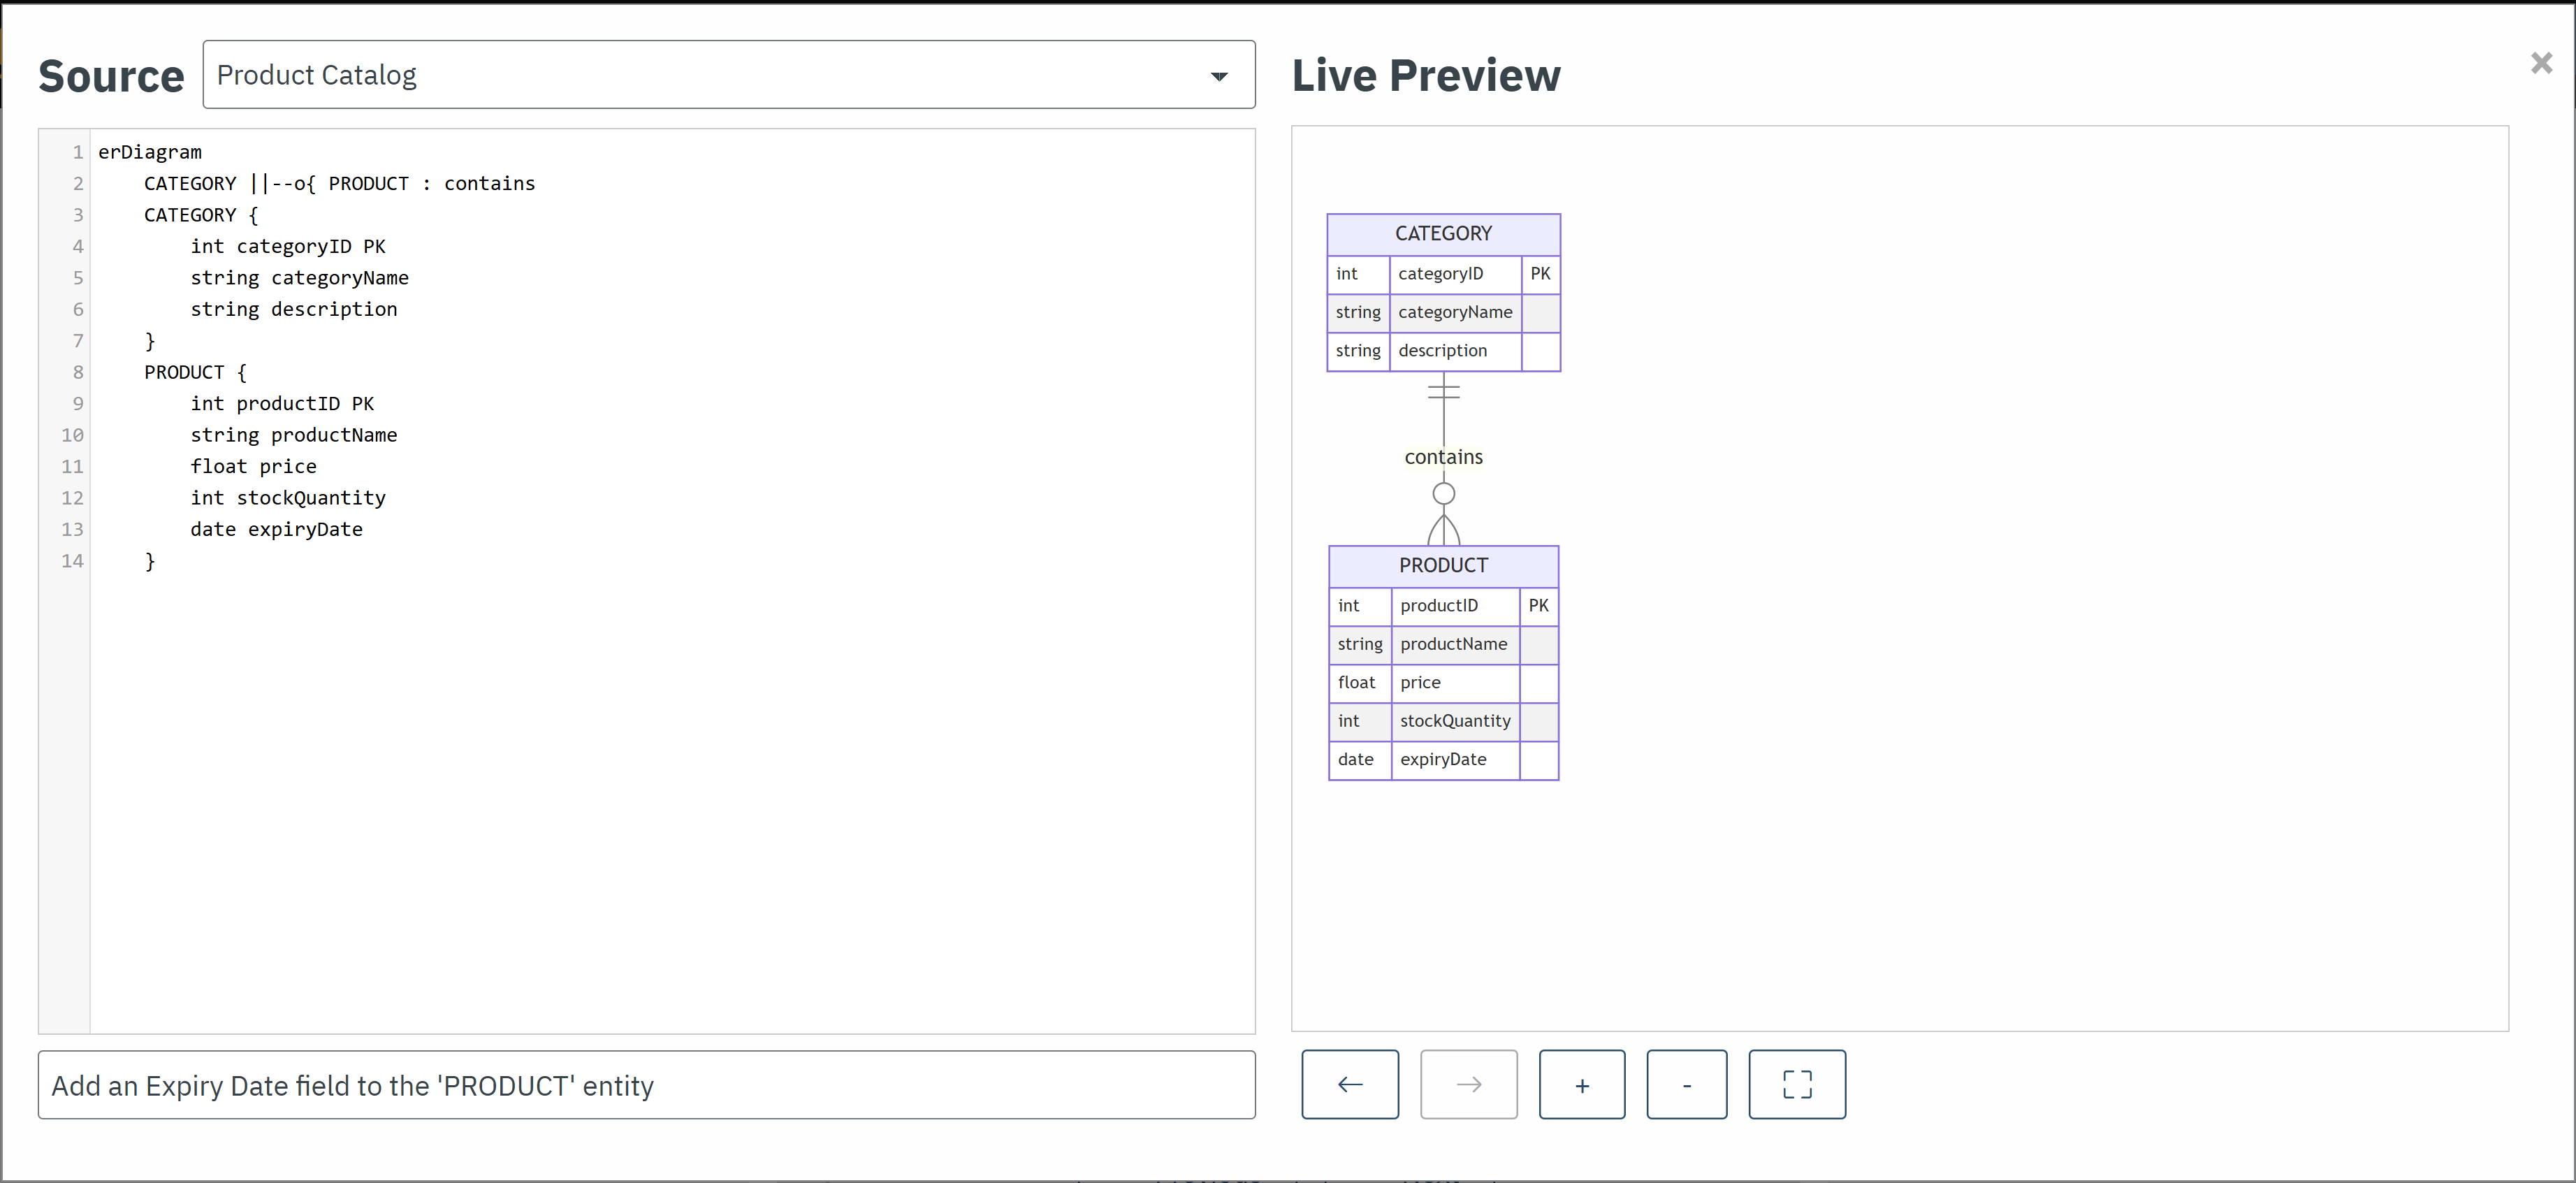
-
Change an Entity Name: The following command directs the AI to change the name of the
PRODUCTentity, allowing for a new designation that may better reflect its purpose or context within the application.Command: Rename the
PRODUCTentity to other alternate name.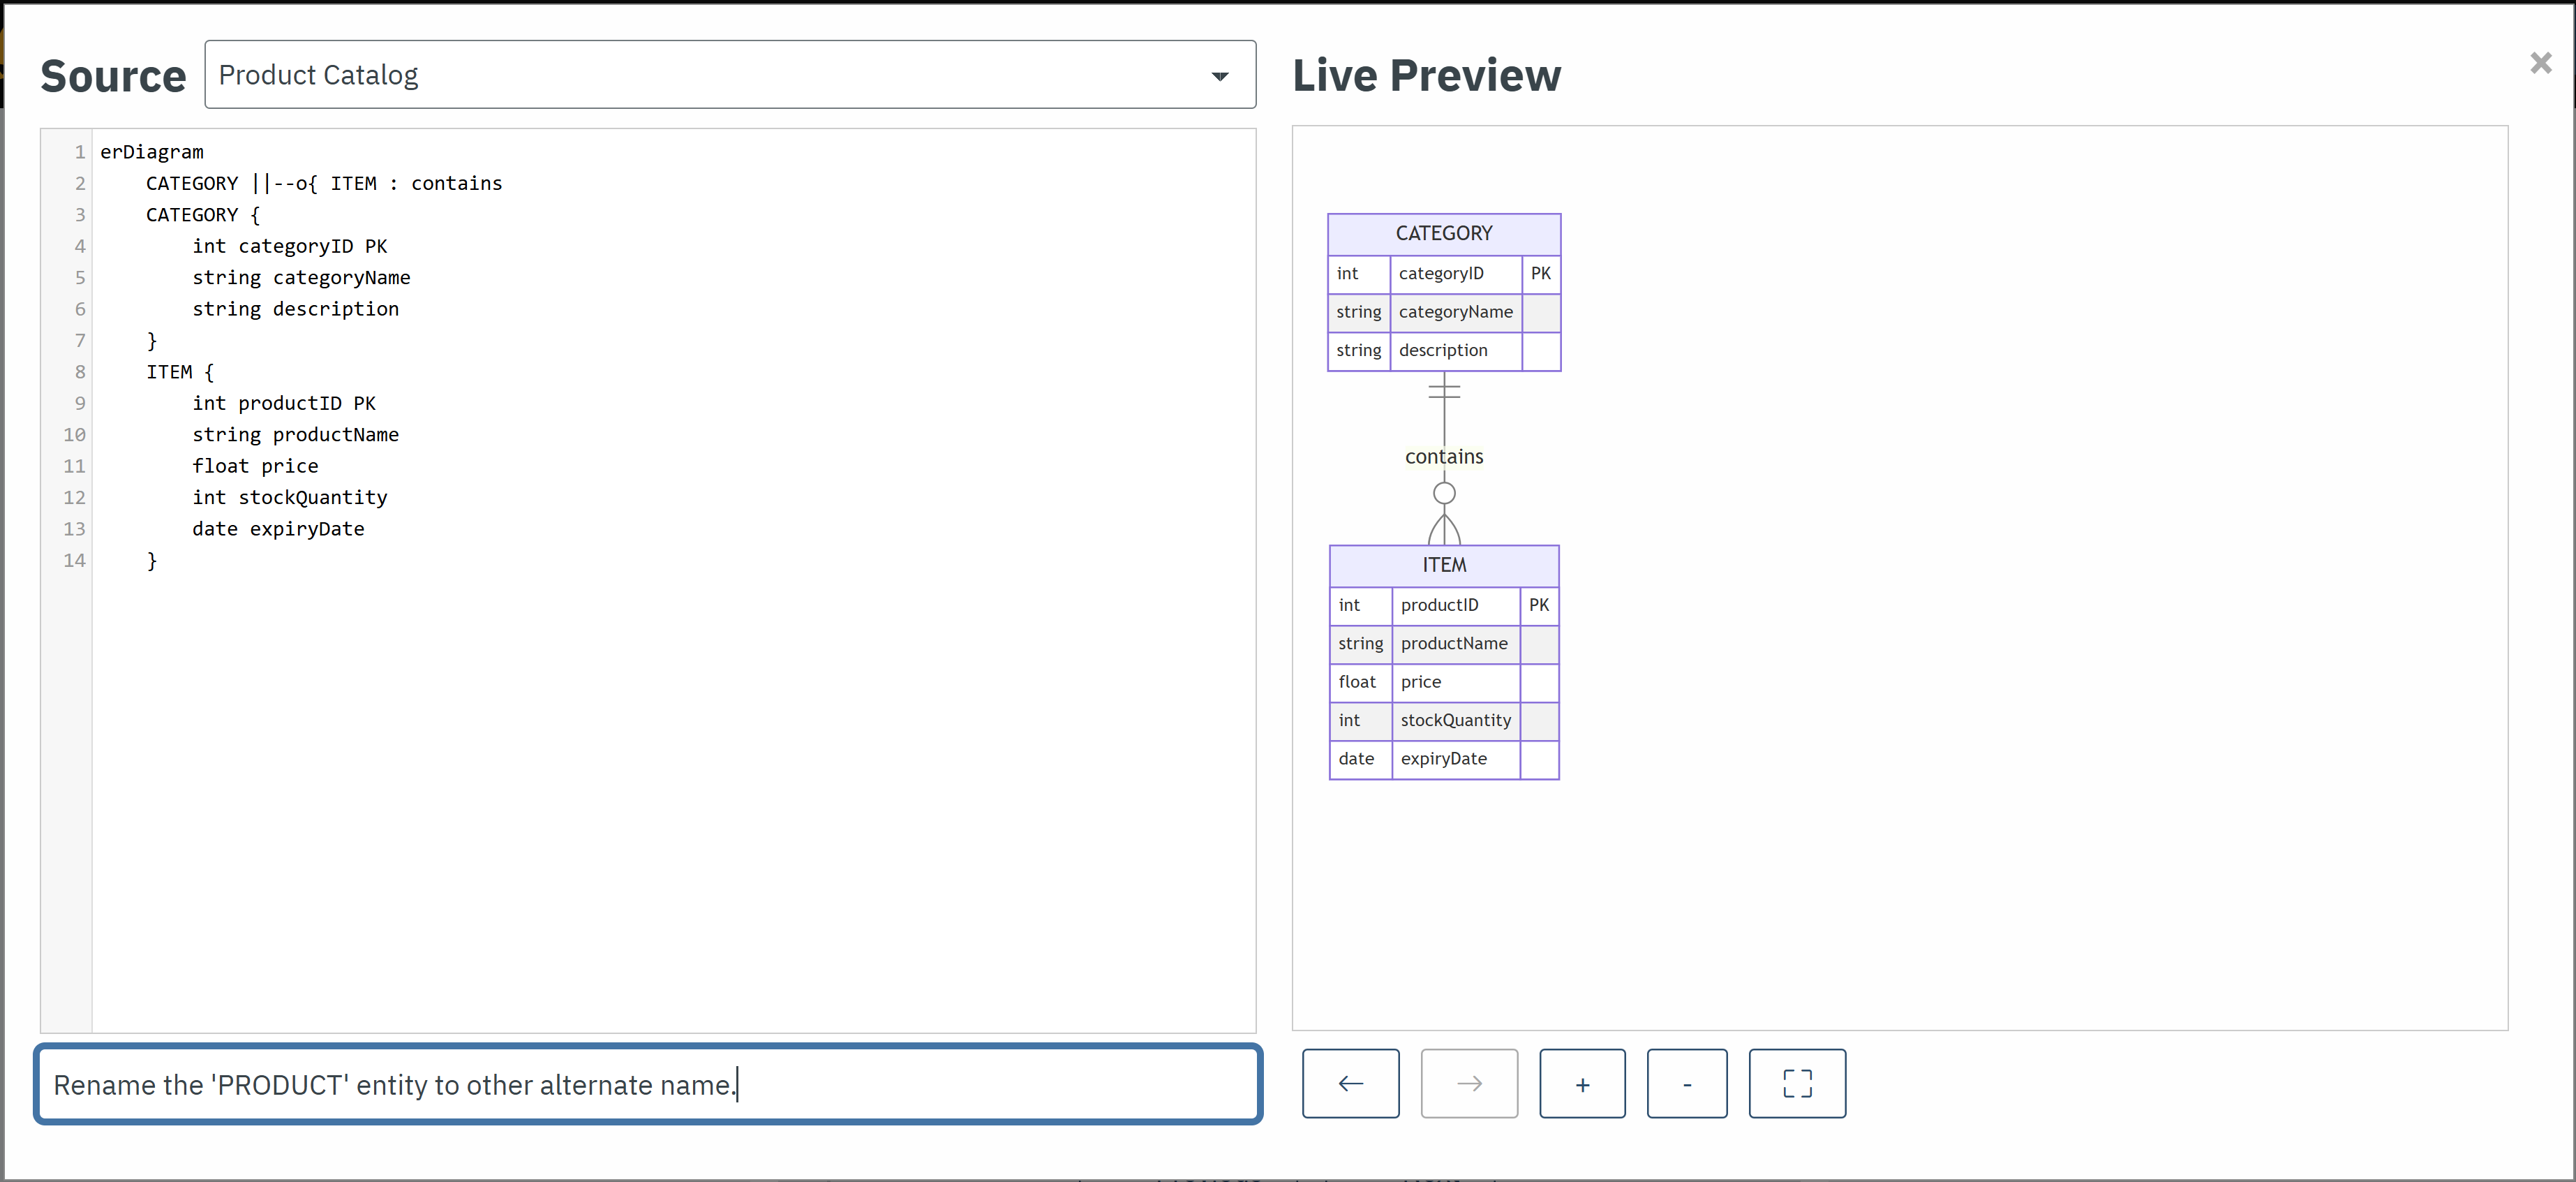
-
Modify a Field: The following command results in the AI updating the names of all fields that begin with
product, replacing that prefix withitem, thus standardizing or rebranding the fields for consistency.Command: Rename all the fields with
productprefix to `item`.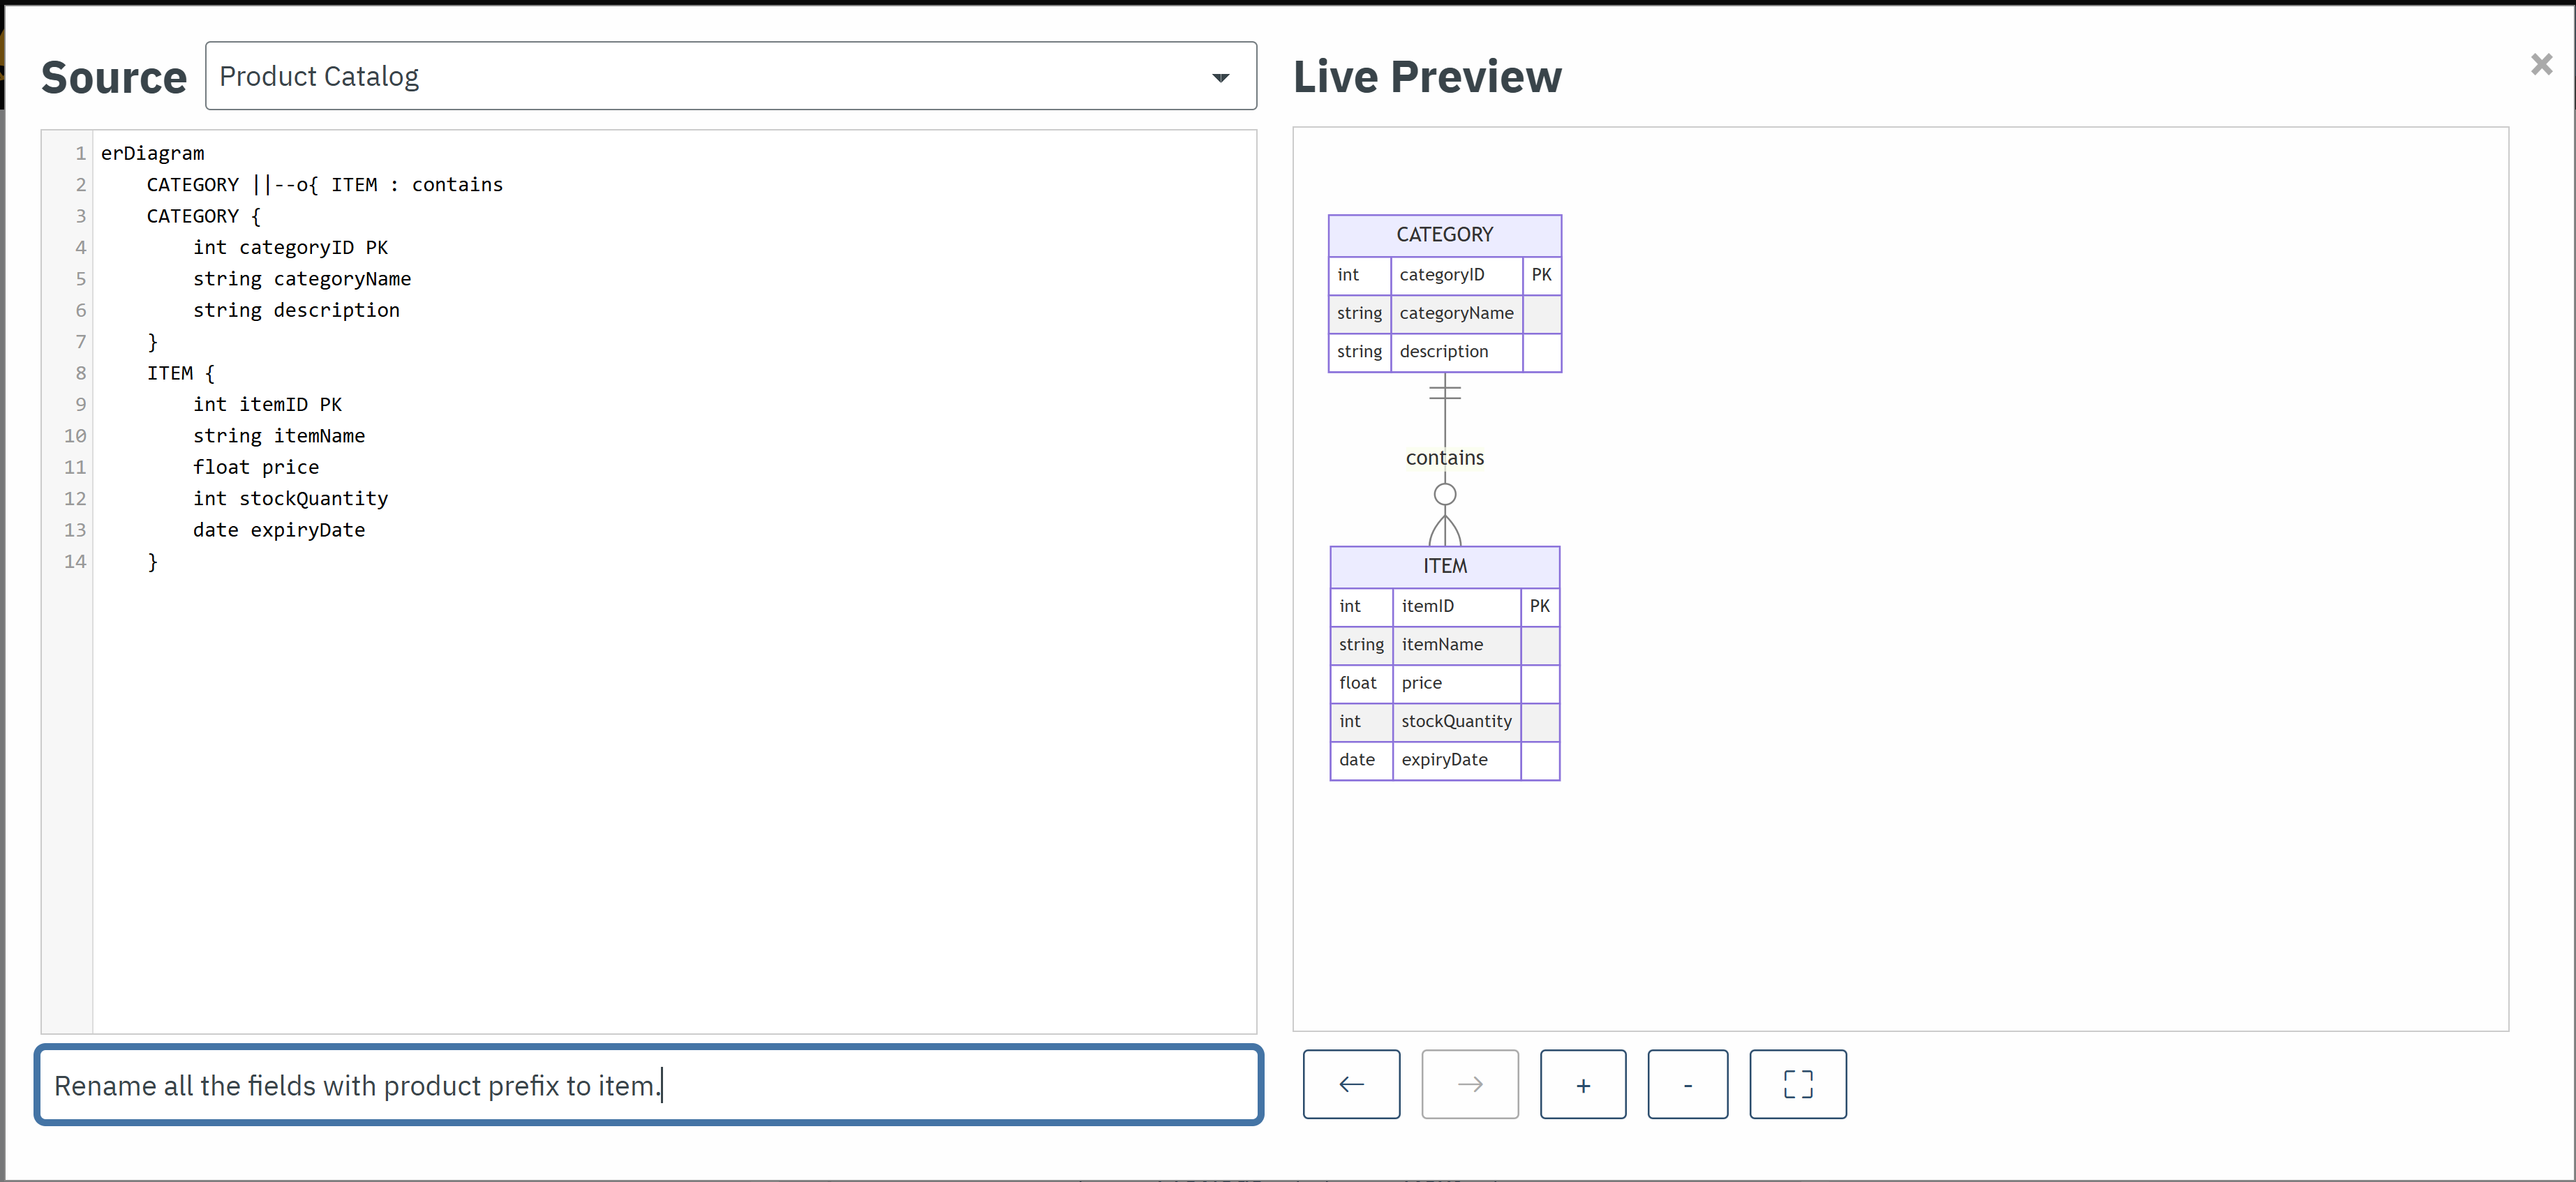
-
Enhance the diagram by adding more entities and relationship: The following command instructs the AI to enrich the diagram by introducing new entities (
Company,Brand,Customer,Purchase) and defining relationships between them, thus expanding the data model to cover more aspects of the application domain.Command: Add
Company,Branddetails of product and also addCustomer,Purchaseinfo.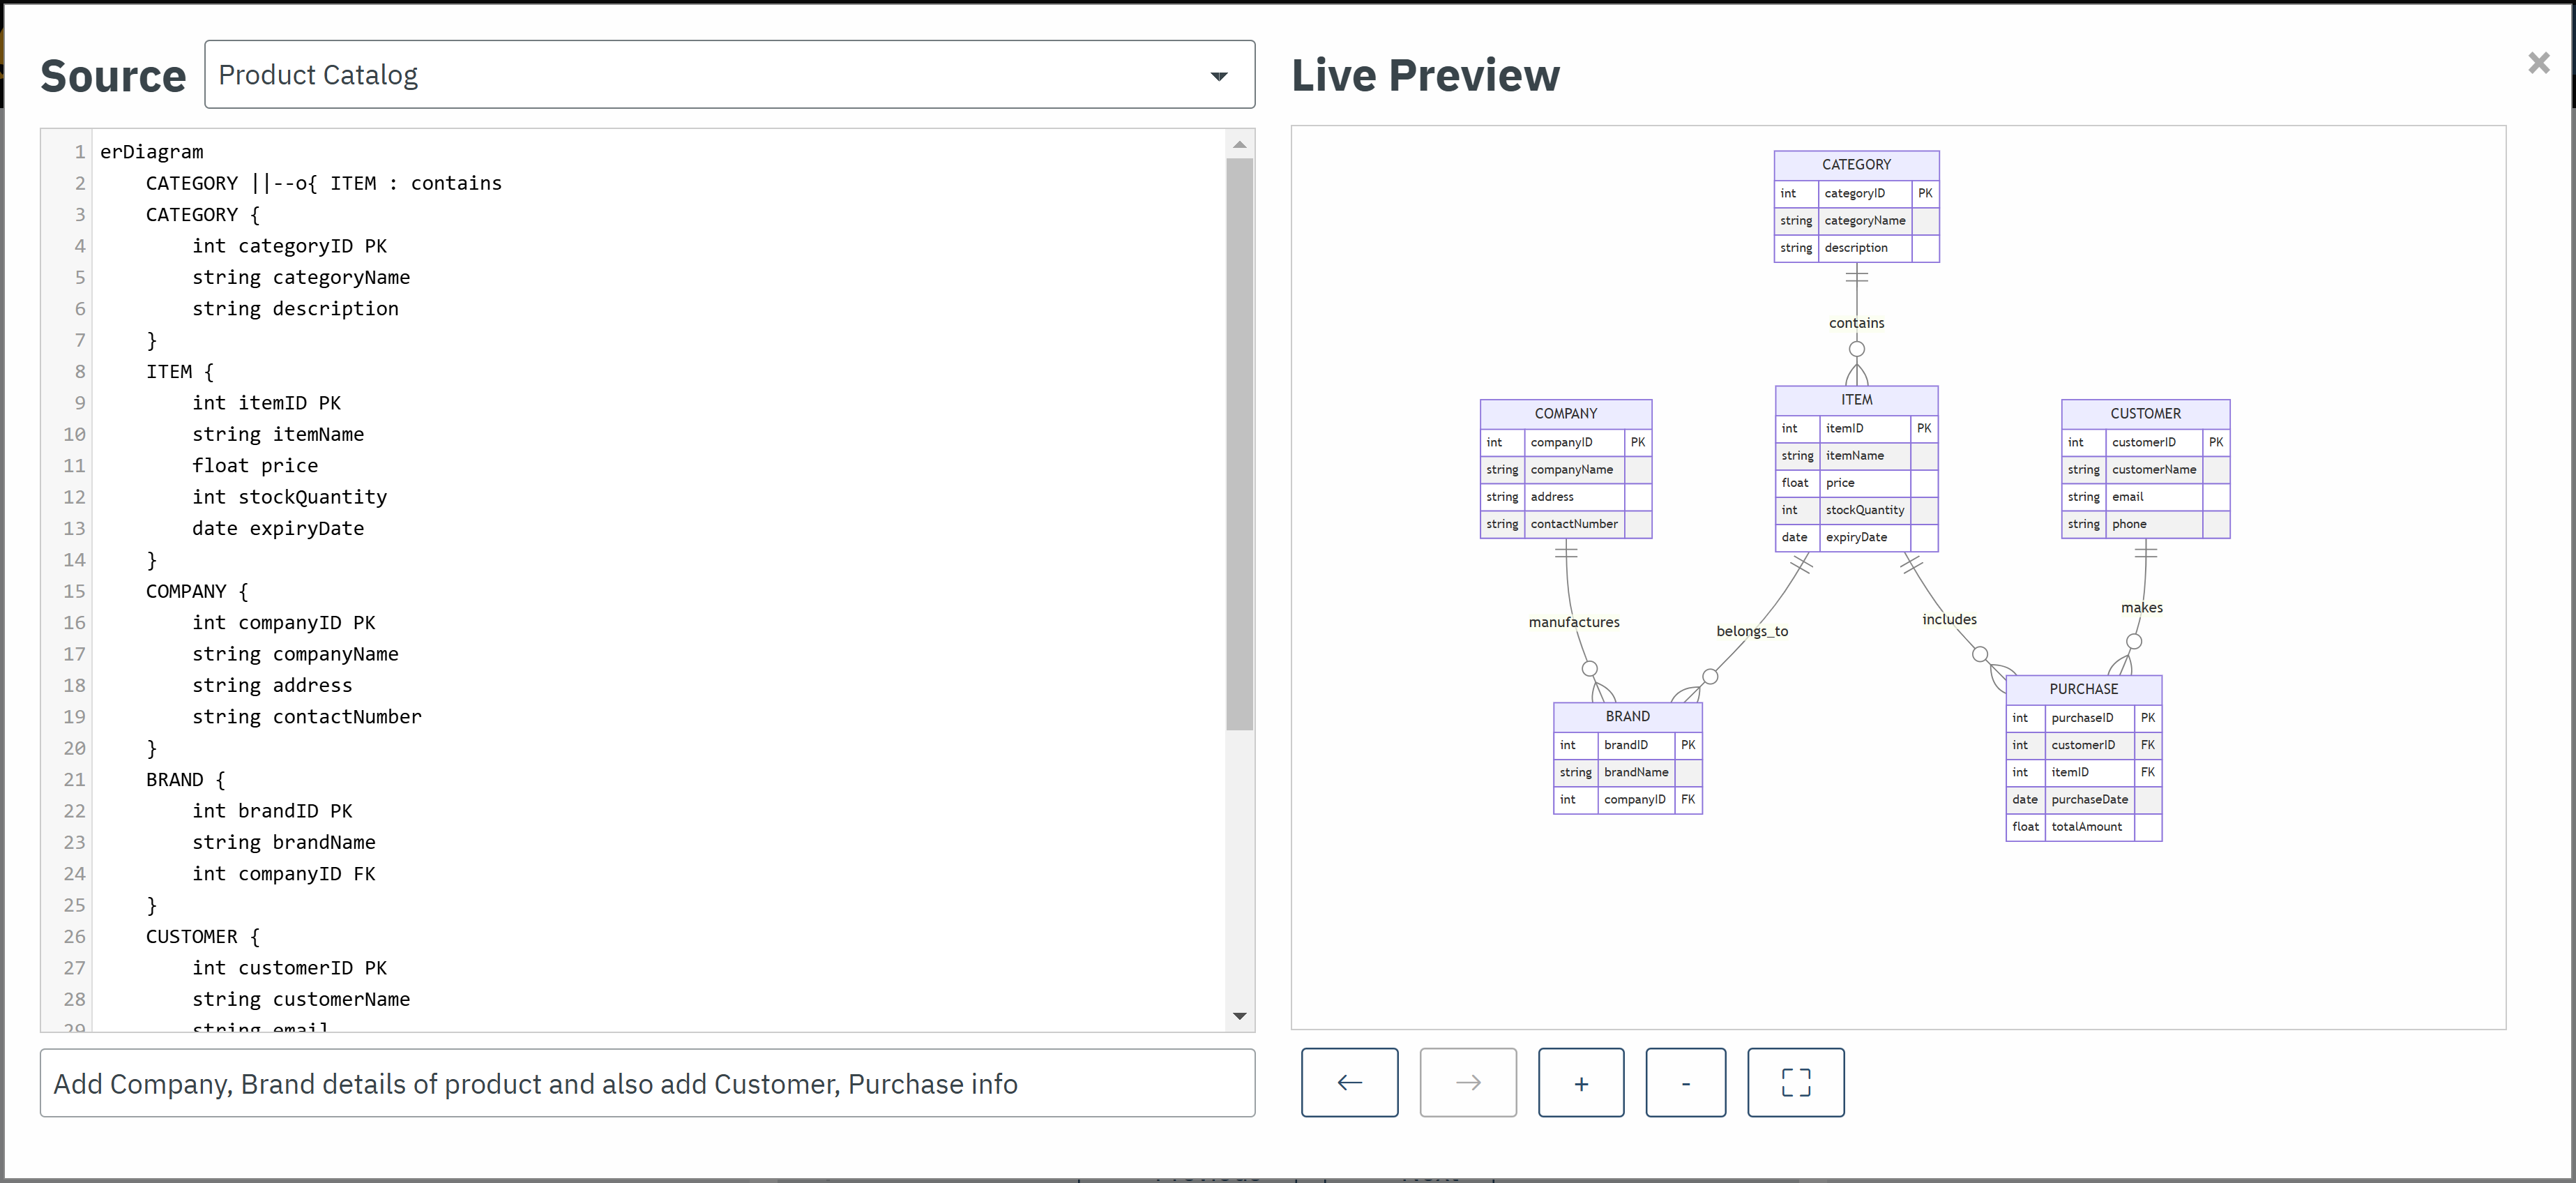
|
Users should review and modify the diagram after the AI-assisted prototype is generated. For more complex designs or detailed customizations, manual changes may be necessary to ensure the final entity relationship model meets all requirements. The AI is designed to speed up the process of generating diagram prototypes, but the user is responsible for creating the complete and accurate design of the application’s business mode in its source code. |
Interactive Auto-Pilot Mode
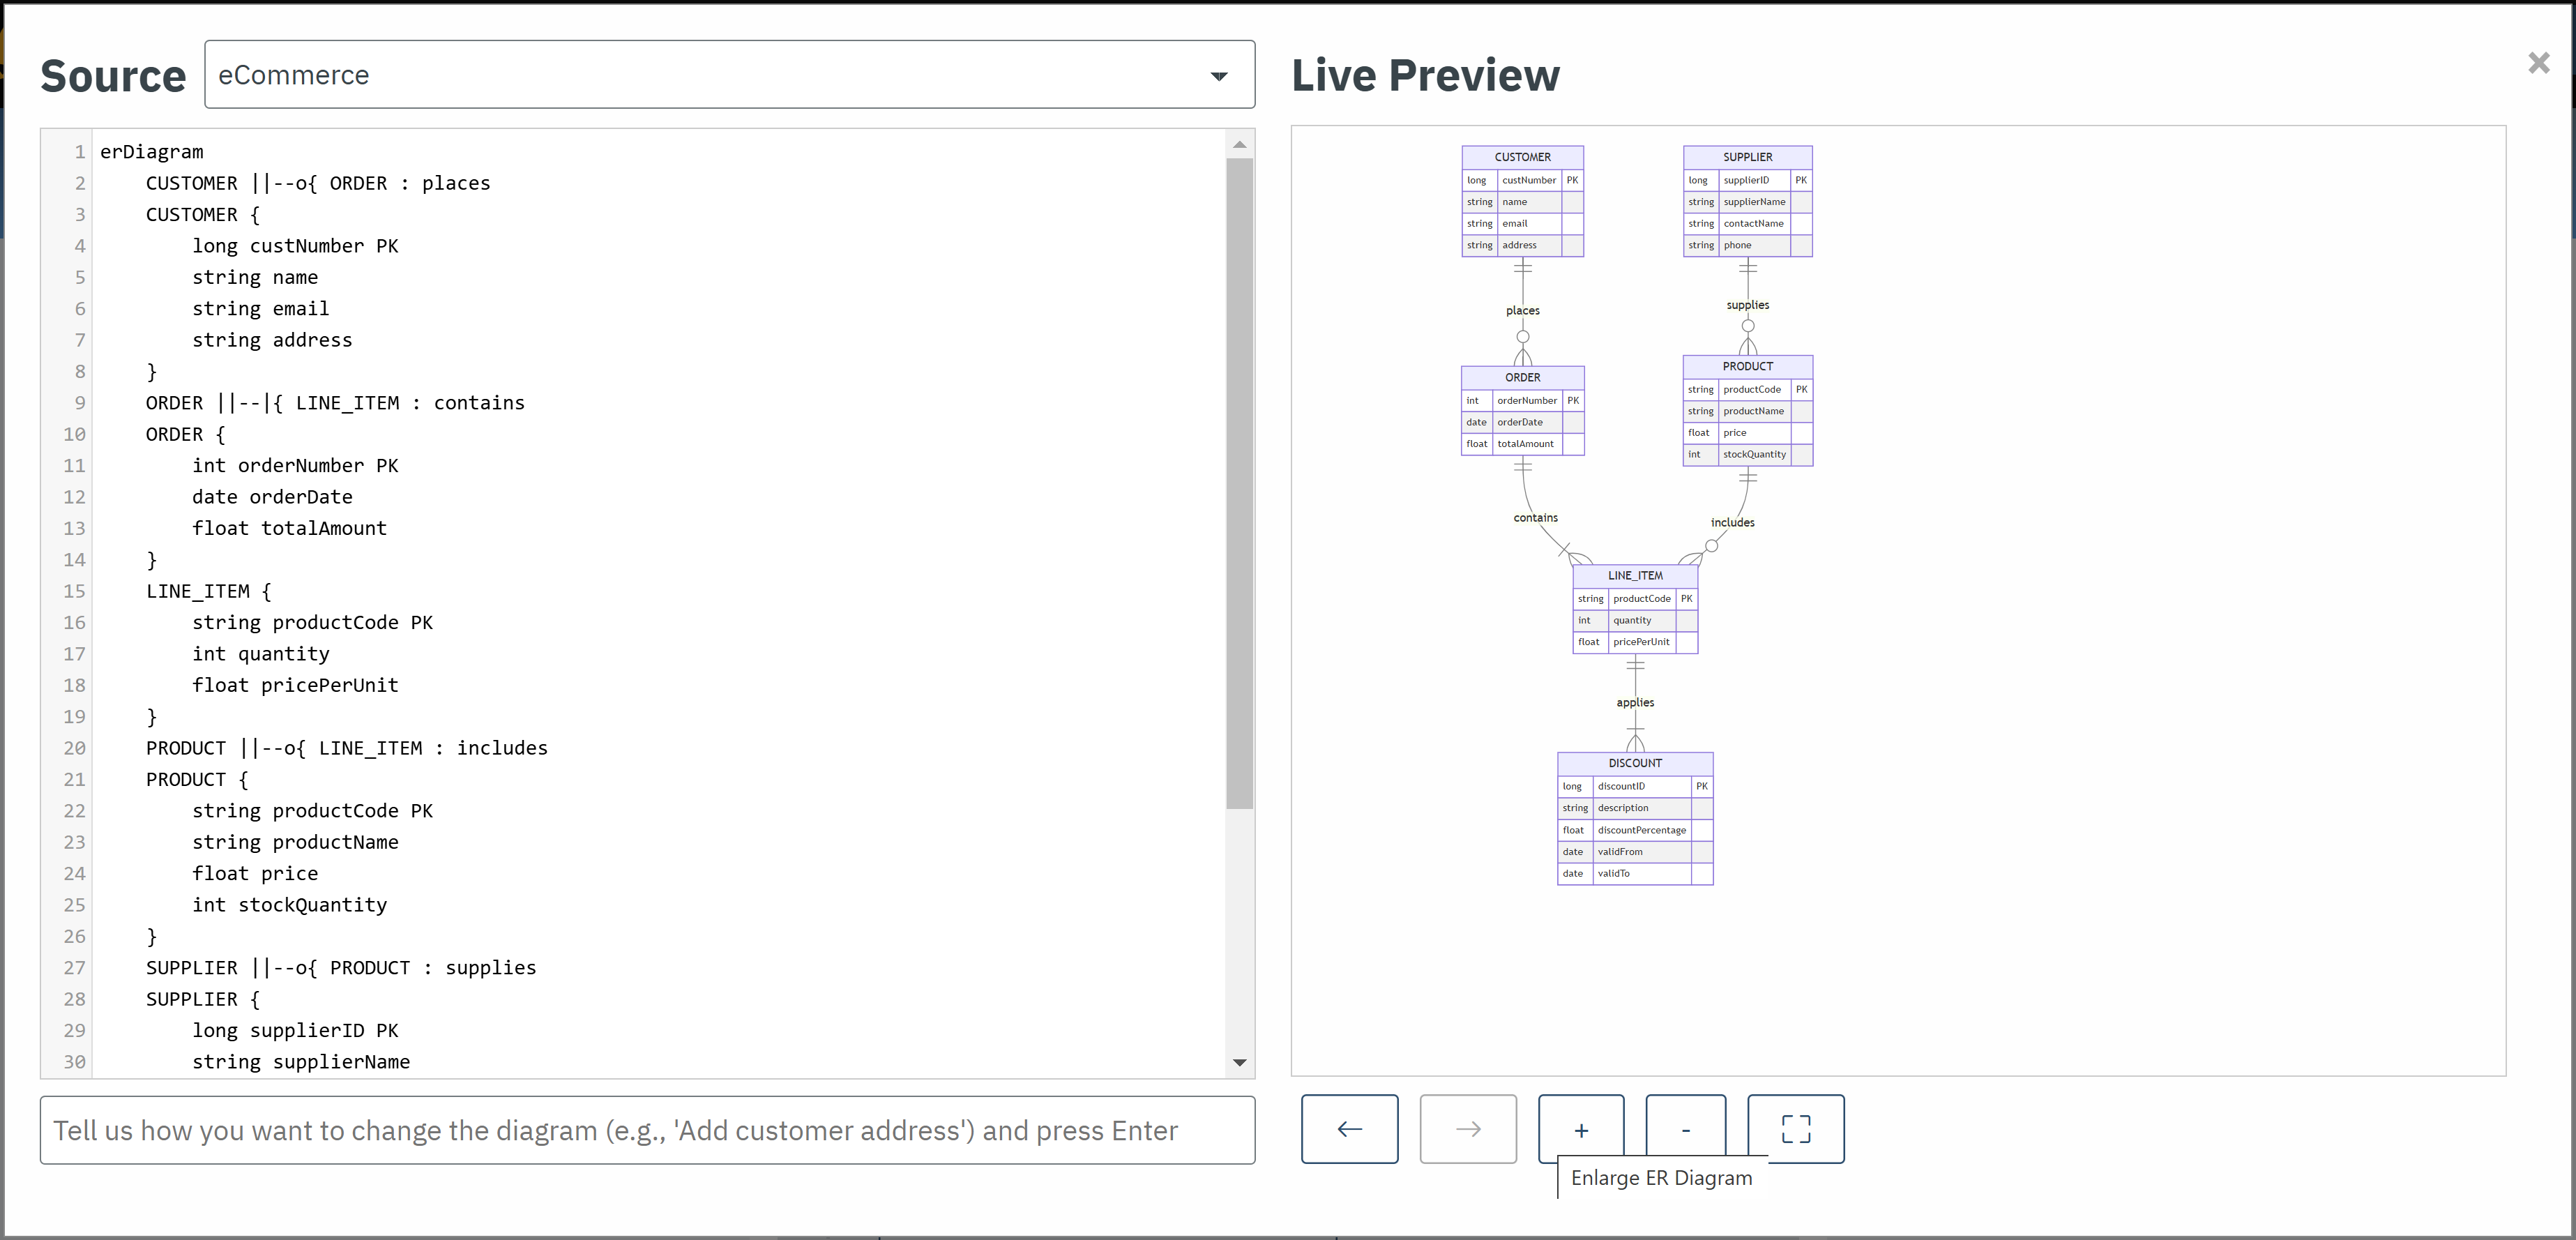
An innovative autopilot mode allows users to dynamically enlarge or shrink the number of entities in the ER diagram using (+/-) buttons, providing a quick way to modify complexity without detailed configuration.
- Enlarge (
+) -
Adds additional entities or relationships to the diagram based on the current context. For example, clicking the
+button might introduce a related table, such as anOrderentity linked to an existingCustomerentity, along with predefined attributes or relationships. - Shrink (
-) -
Removes entities or relationships from the diagram to simplify its structure. For instance, clicking the
-button could remove auxiliary entities that are not critical to the application’s initial design.
This feature helps users quickly prototype or refine their diagrams by adjusting the scope and complexity of the database structure, without requiring manual edits to every detail.
Live Diagram Panel
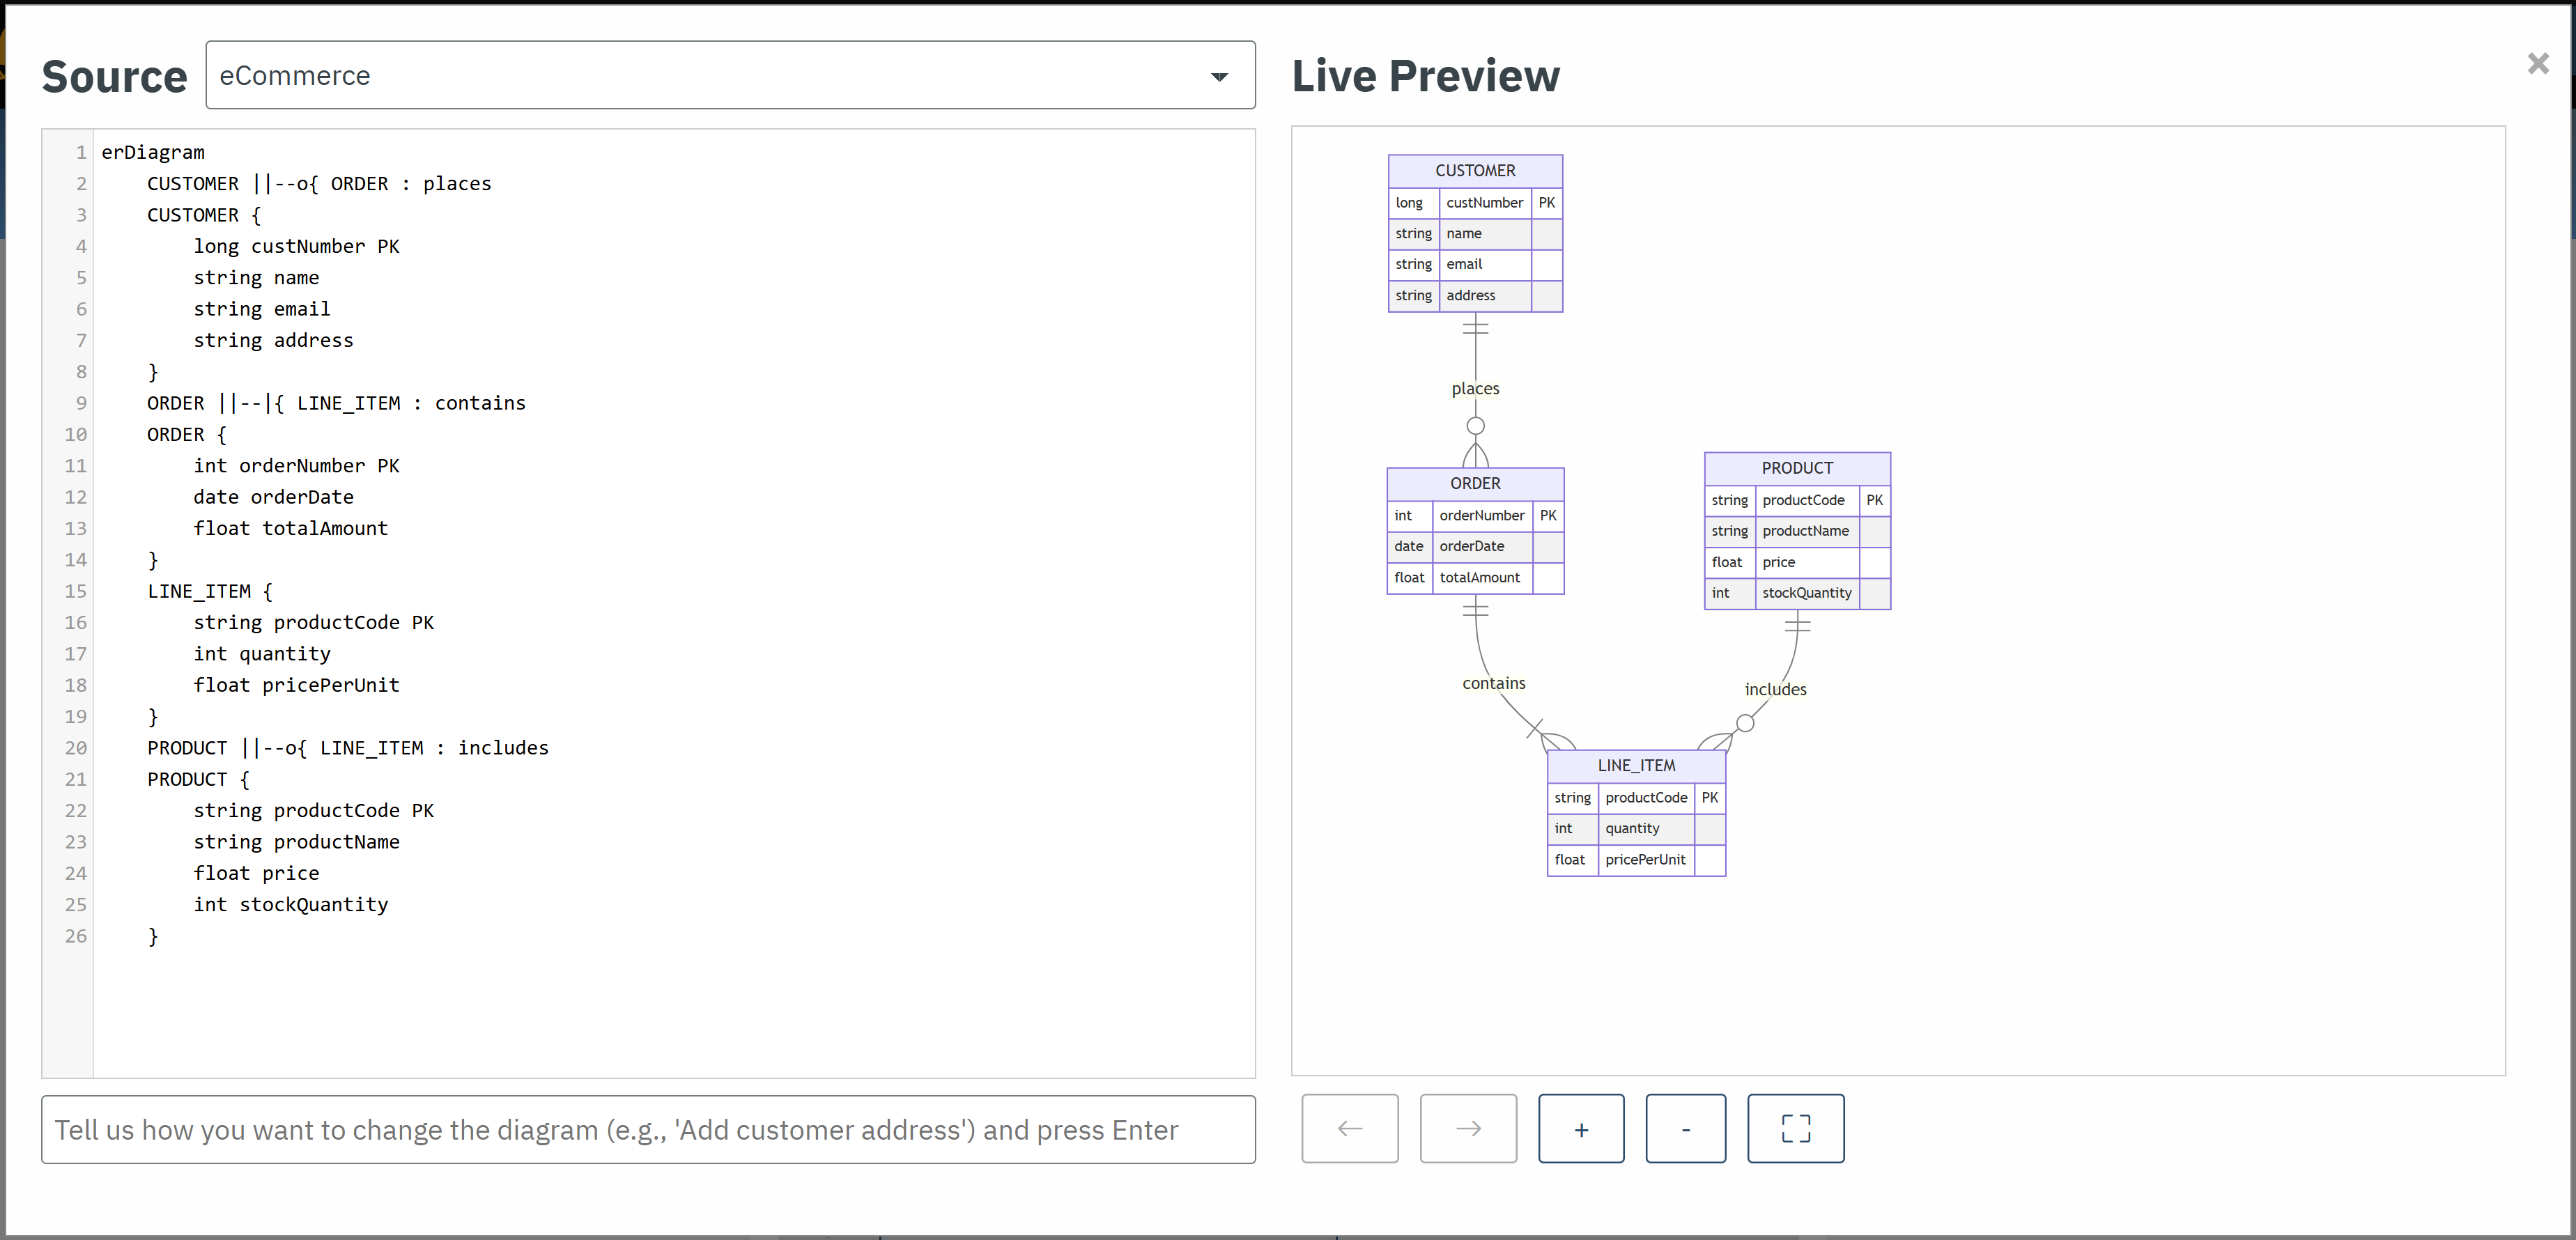
The Payara Starter interface includes a split panel where the Mermaid source code appears on the left, and a live visual representation of the ER diagram is shown on the right. Any changes made in the source or through Generative AI interactions update the visualization immediately.
Users can freely modify the ER diagram by editing the Mermaid source code directly in the left panel. These modifications are instantly reflected in the live preview, offering full control over the diagram’s structure and appearance.
Using the ER Diagram
Open the existing or Generate a new ER Diagram:
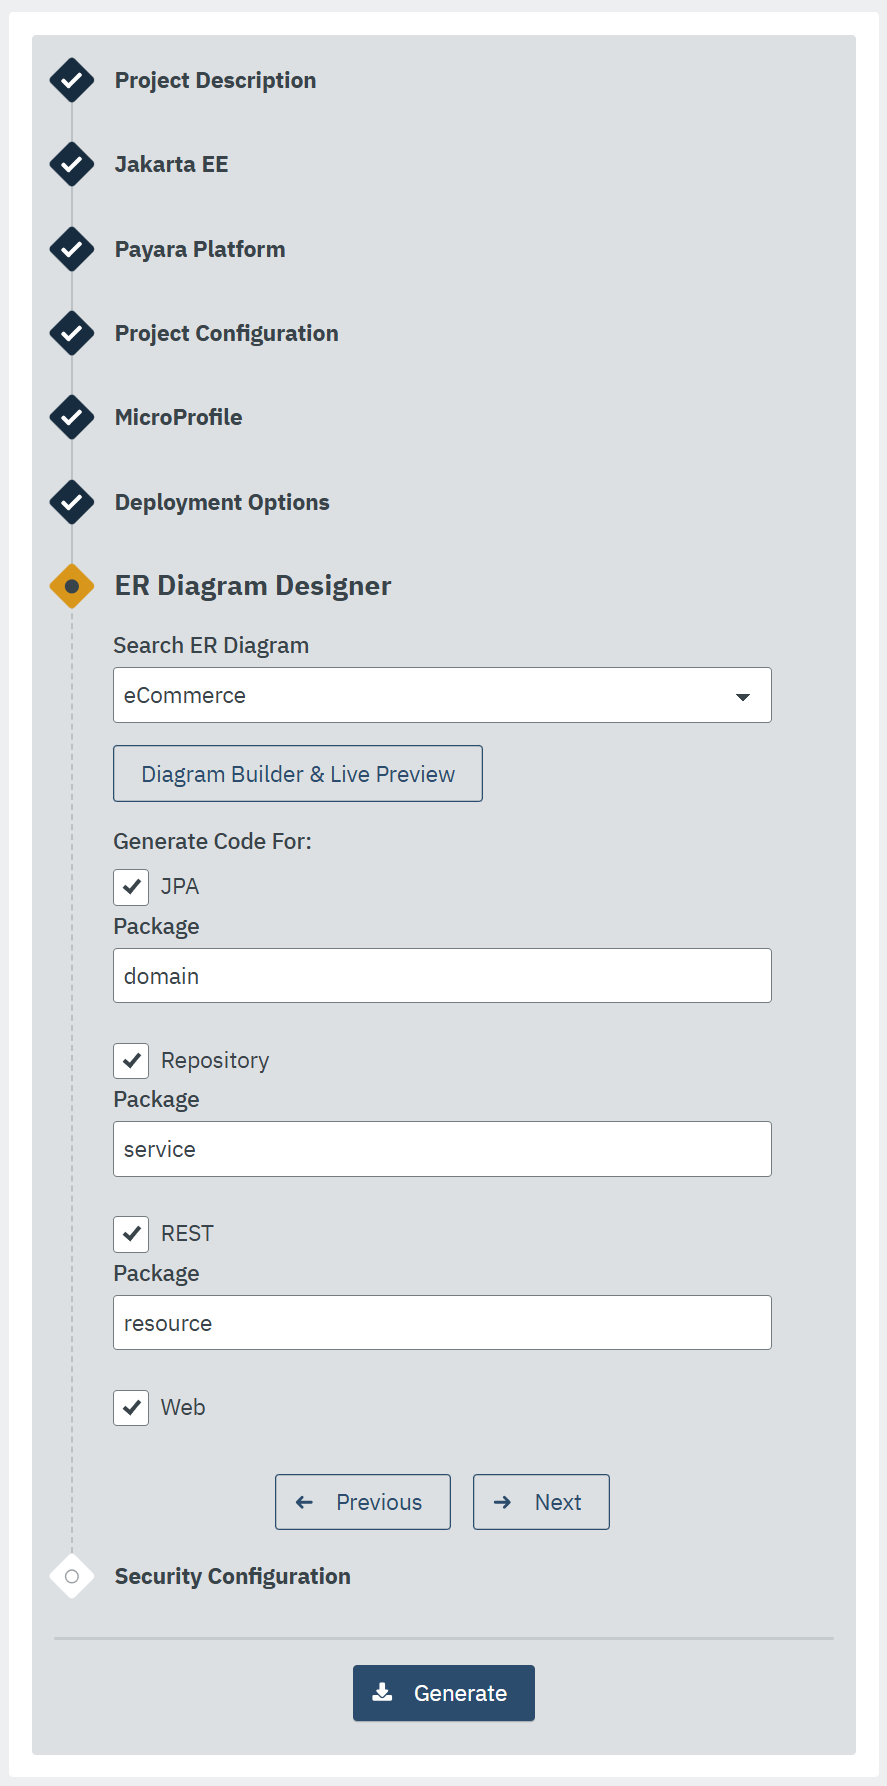
Open the ER Diagram panel within the Payara Starter application interface. Select from the default diagrams or start a new diagram by pressing the Diagram Builder & Live Preview button and entering a description.
Enhance the Diagrams
Use the Real-time Diagram Design via Free-text support to interact with OpenAI. Type specific requests or commands, such as "Add an Order entity" or "Make Customer and Order related" and receive real-time updates to your diagram.
In autopilot mode, use the (+/-) buttons to quickly enlarge or shrink the diagram.
Generate the Full-Stack Application
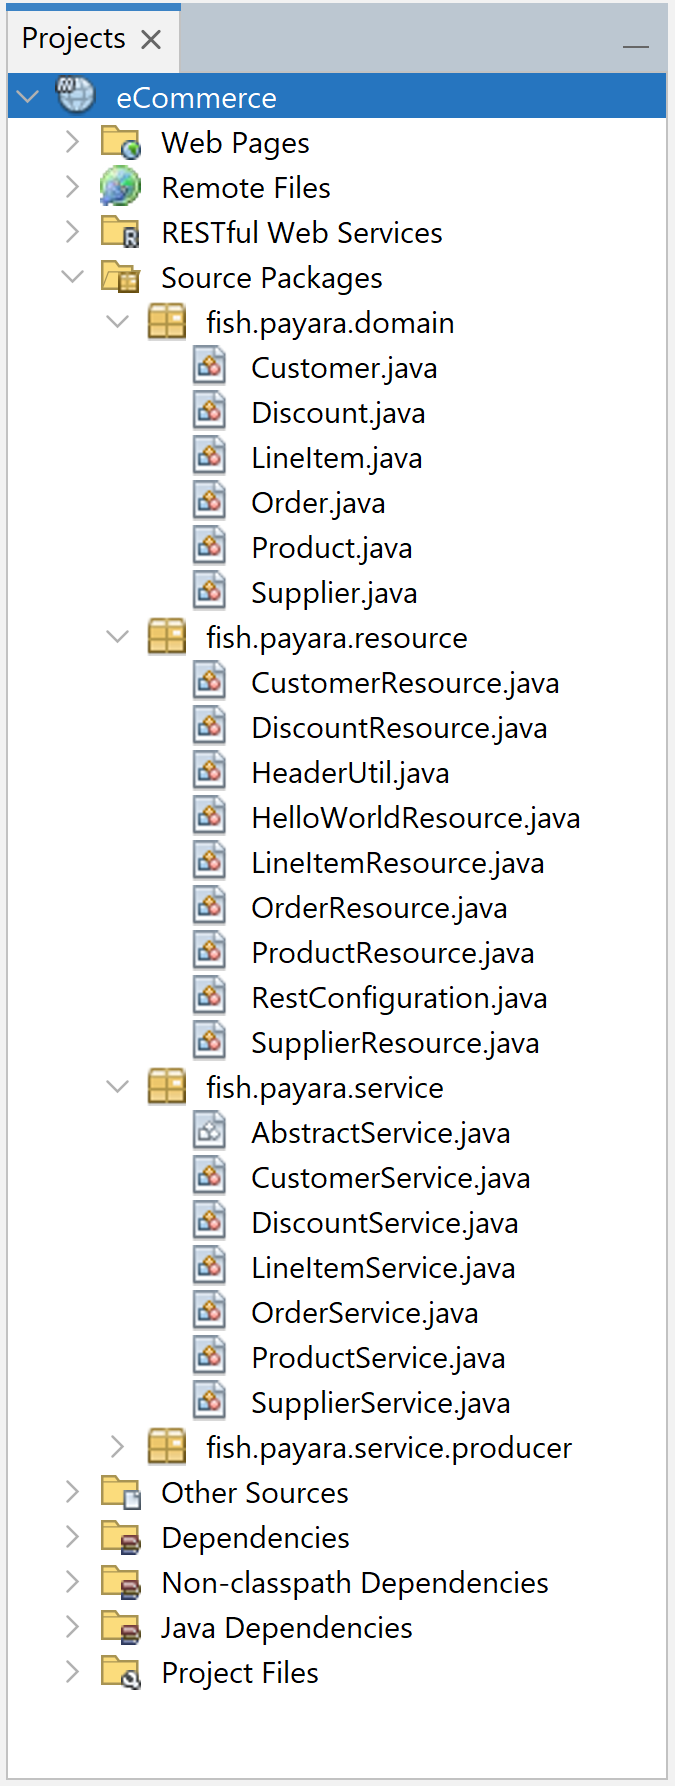
Once the ER diagram meets your requirements, you can initiate the full-stack application generation. Payara Starter uses the diagram structure to create JPA entities, repository services, REST endpoints, and optionally web pages.
Optional Features and Dependencies
During the generation process, you can customize the output to include or exclude specific components. Note the cascading dependencies between components:
- JPA Entities
-
If skipped, all other components (repository services, REST endpoints, and web pages) will also be skipped. Only the ER diagram will be saved to the root of the project.
- Repository Services
-
If skipped, the generation of REST endpoints and web pages will also be skipped.
- REST Endpoints
-
If skipped, web pages will also be skipped.
- Web Pages
-
Can only be generated if repository services and REST endpoints are included.
This flexibility allows developers to tailor the generated application to meet their specific project needs while ensuring structural coherence.
