How to Use Custom Domains
Payara Cloud customers with the Standard or Premium level subscriptions have the option of creating custom domains for end users to access their applications.
Payara Cloud defines a URL to applications when you upload them to your namespace. By default, the url is a combination of your namespace name and application name to ensure it is unique. It might look something like this: https://guide-docu-6696a94c.payara.app/demo
(not a real URL).
You probably don’t want to give a URL that looks like that to your end users to access your application. With Payara Cloud’s custom domain option, you can customize the url so it is something like https://your.brand.com/demo instead.
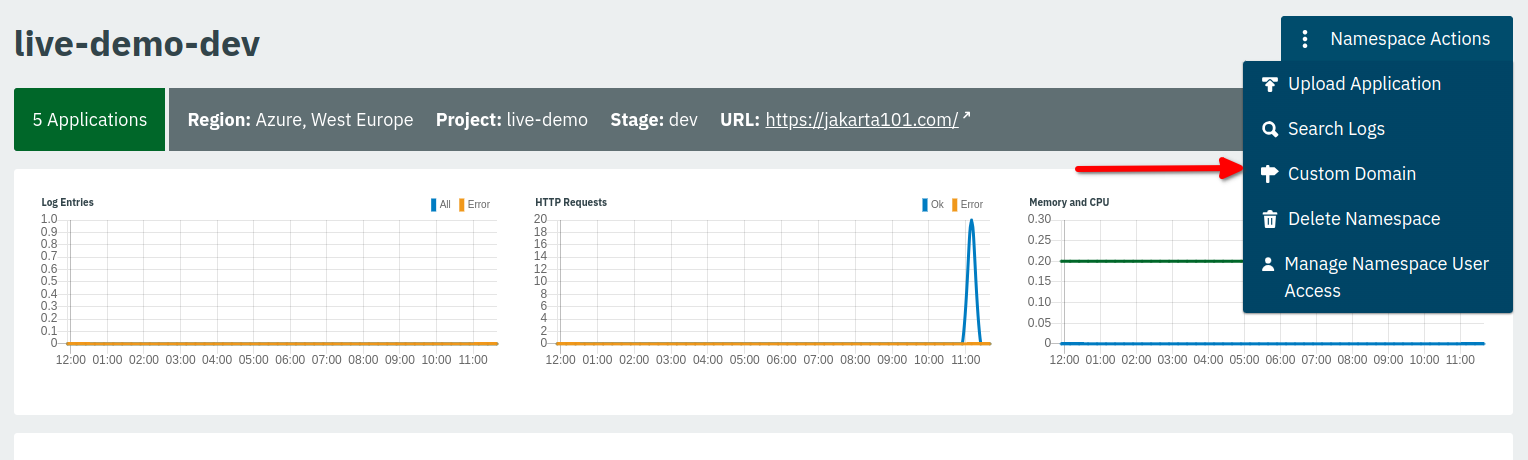
Click on the namespace containing your application from the Namespace Navigator. In the Namespace Actions drop down menu, click Custom Domain.
Click Add Custom Domain.
Type in the domain name you would like to use to access your application in the Custom Domain Name field.
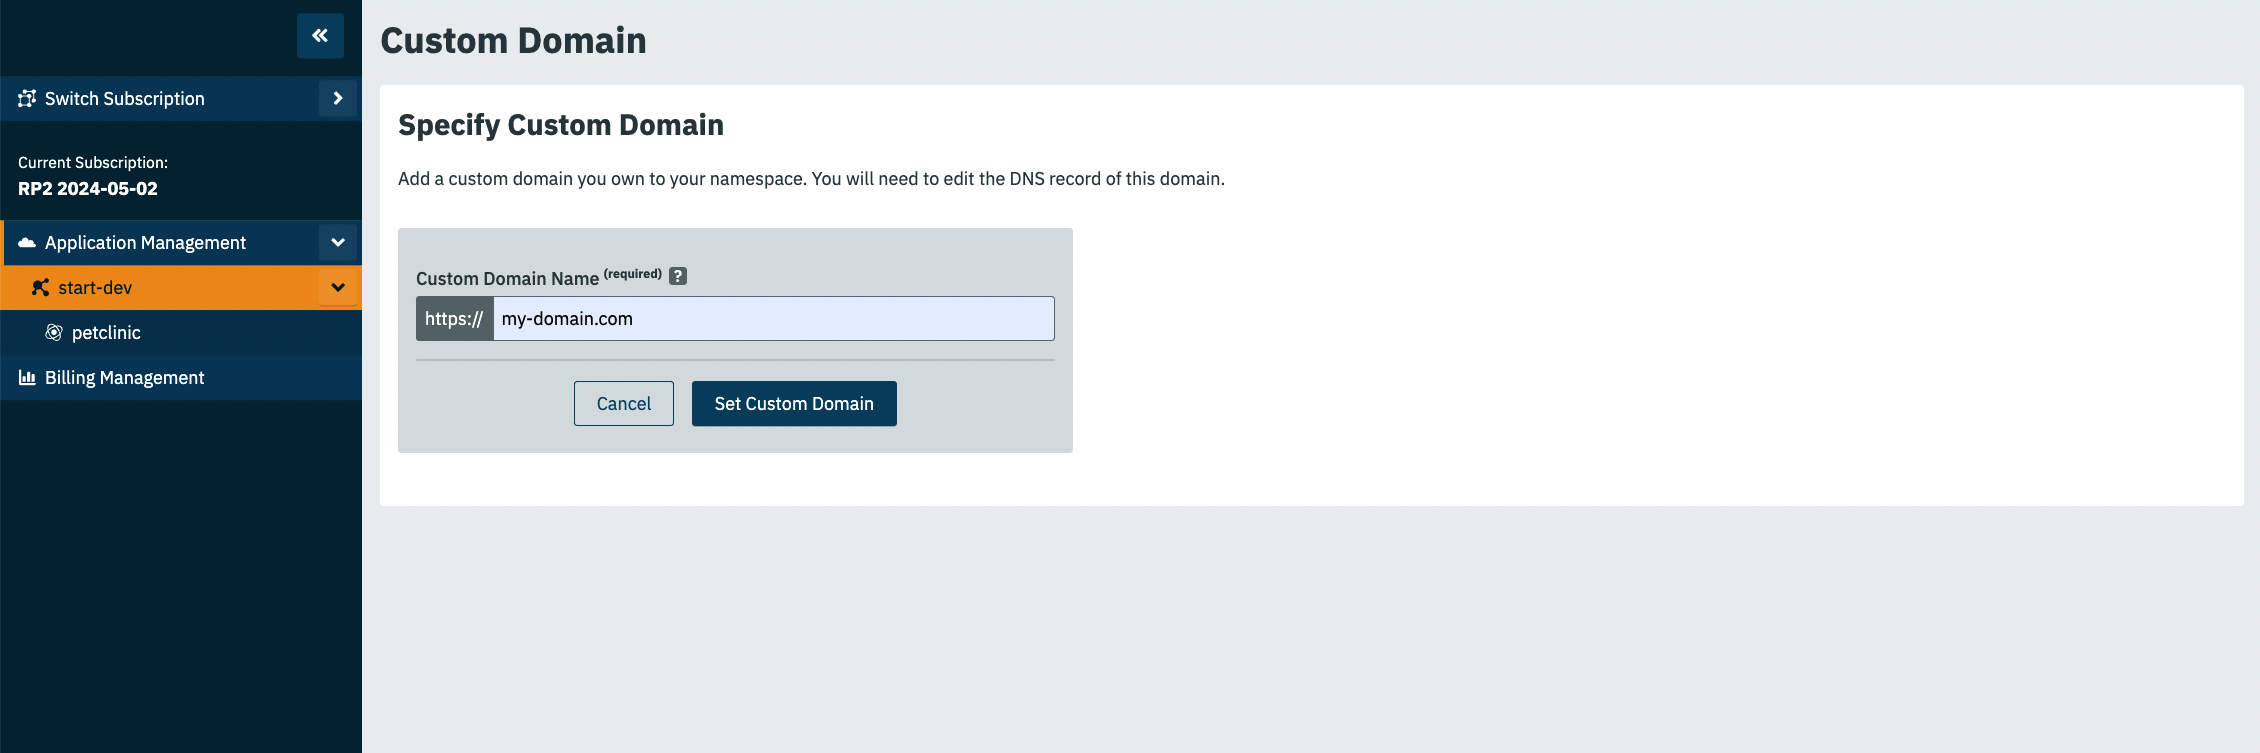
Click Set Custom Domain.
You are then presented with the Custom Domain screen and the information to set up the DNS record:
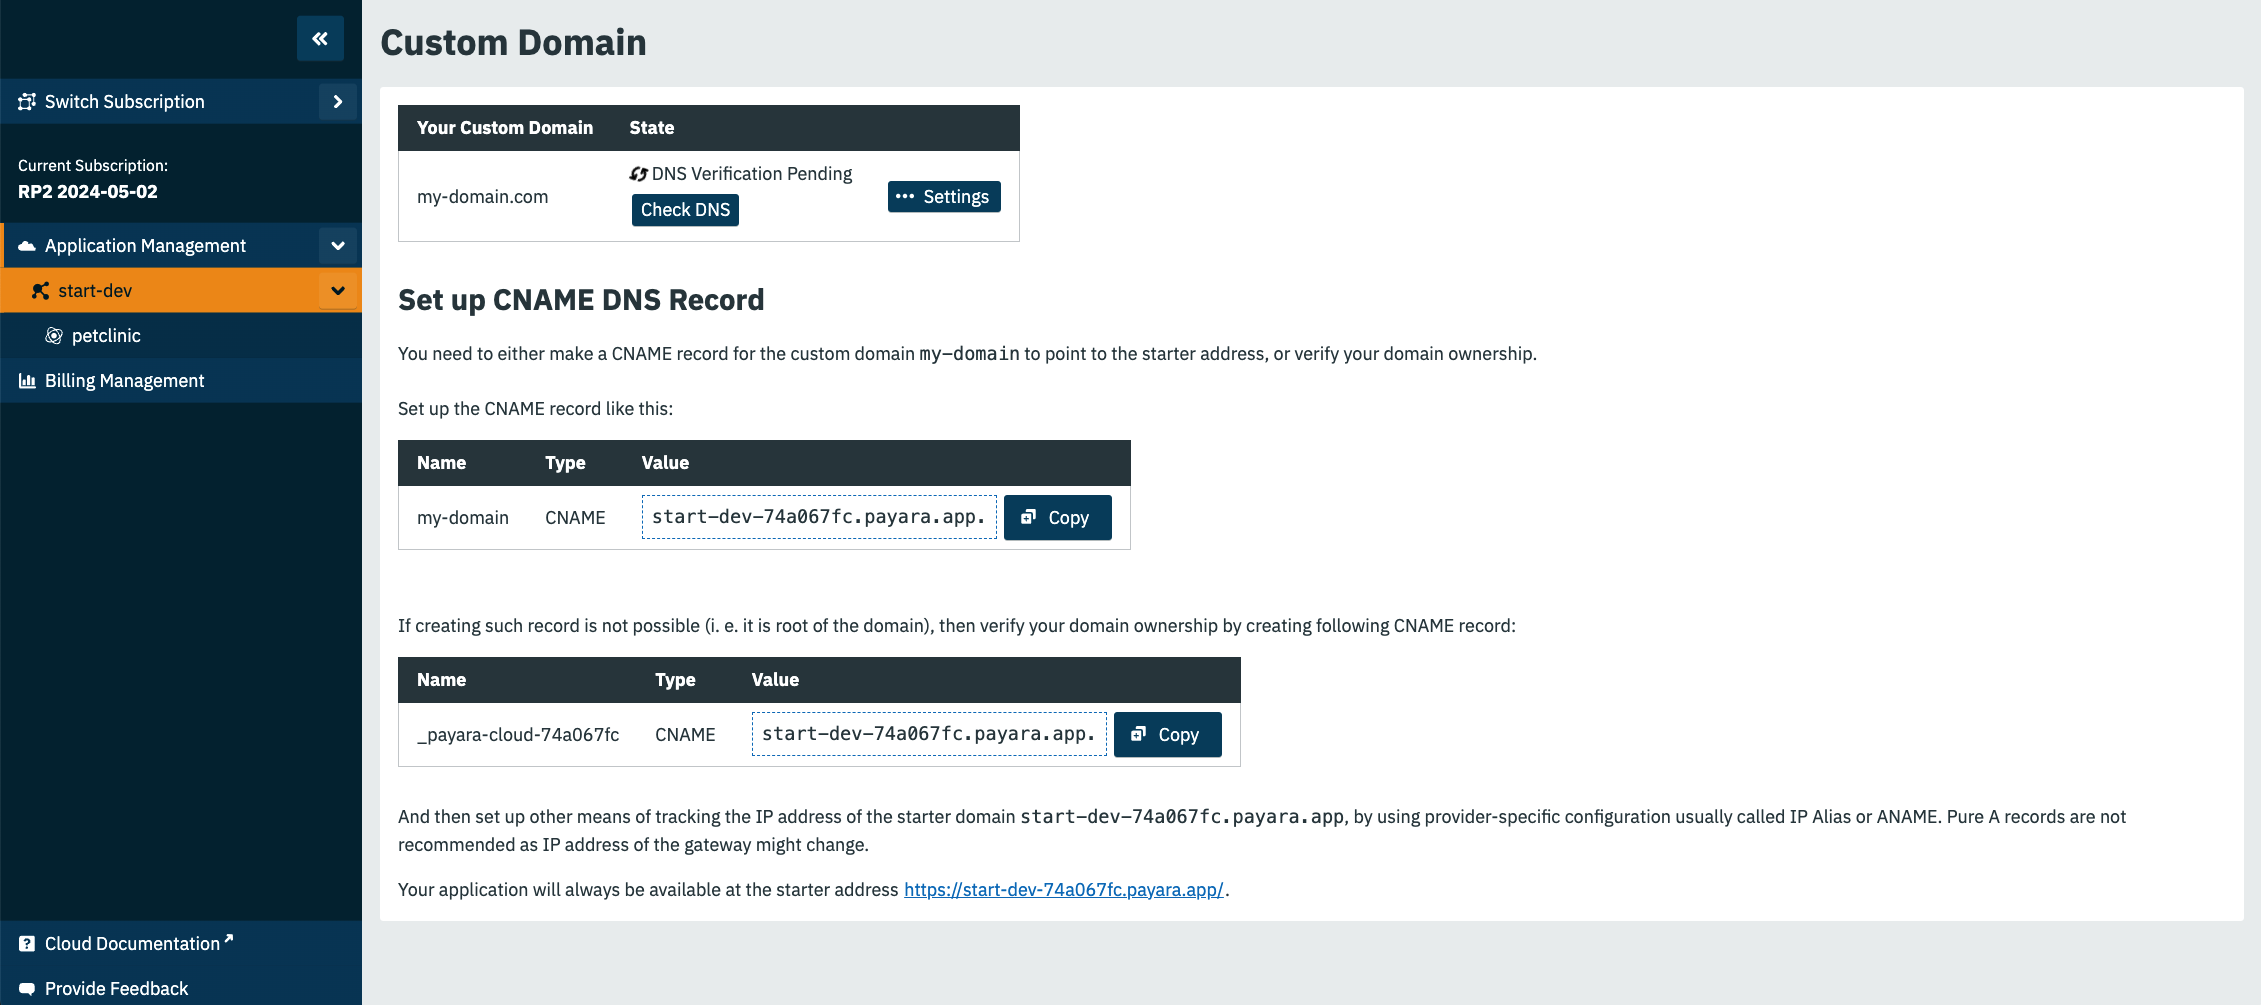
Copy the value in the Set up CNAME DNS Record value field and enter it into the CNAME of the DNS system you are using.
After setting up the CNAME value, click on the Check DNS button of this screen to ensure it was set up correctly. If the set up was successful, you can then use the custom domain you set up to access your application. Note that it can take some time for changes in the DNS system to propagate.